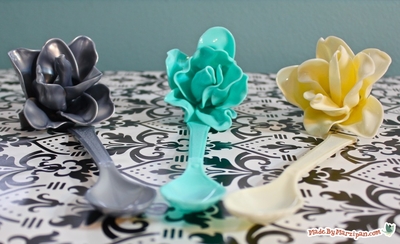
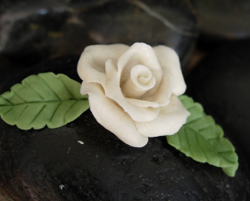
Bread Dough Rose
Whether it's bright and sunny or cold and snowy, this Bread Dough Rose from Heidi Borchers will always bloom. Flowers crafts look great all year. Best of all, once you make them, you don't have to worry about their upkeep. Materials for flower crafts aren't limited to fabric, paper, and clay. With a piece of white bread and a vintage technique, you can make your own dough for these cute roses. It's hard to believe that something made out of an old piece of bread can look so pretty, but it's true! These floral dough crafts look especially stunning on jewelry.
Materials:
- Aleene’s Original Tacky Glue in the Gold Bottle
- White bread (one slice)
- Plastic cup
- Craft stick
- Cold cream
- Measuring spoon – tablespoon
- Acrylic paint – white, green
- Zip top bag
- Flexible plastic (Heidi used shrink plastic) to create veins in leaf
- Toothpick (optional) for holding flower while drying (see video demo)
Instructions:
-
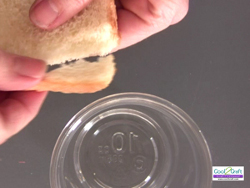
Remove crust from one slice of bread.
-
Shred bread into cup.
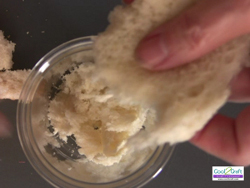
-
Add 1 tablespoon of Aleene’s Original Tacky glue. Add one dab of cold cream. Add 10 – 20 drops of white acrylic paint.
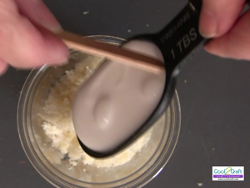
-
Mix until bread dough mixture starts to stick together. Use craft stick to remove mixture from cup and begin to knead with hands.

-
Continue to knead mixture for several minutes until a smooth ball of clay forms. (The glue and mixture should start to come off your hands as you knead the mixture. If not, add a small dab of cold cream to your hands as you continue to knead ball.) Once mixed, store bread dough in zip top bag. Bread dough should remain fresh in refrigerator for several weeks and can also be frozen. Just thaw to room temp before using.)
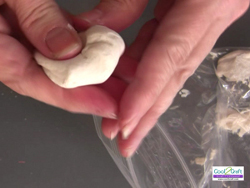
-
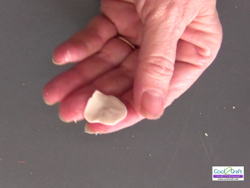
Remove a pea sized ball from bag. (Since this is air dry clay, you need to keep the remaining dough in the zip top bag.)
-
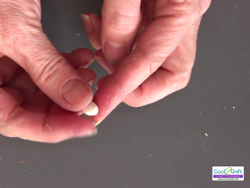
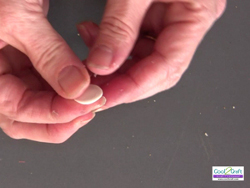
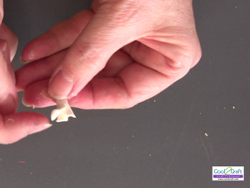
Press ball between finger and thumb to create a petal shape.
-
Continue to press until the petal is very thin.
-
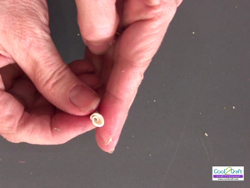
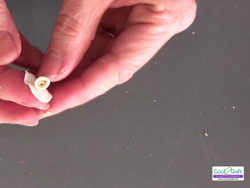
To create flower center, start to roll from one end.
-
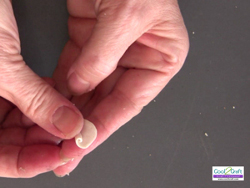
Use finger to gently pull back edge of petal to give dimension and shape.
-
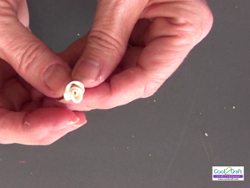
Remove another pea sized ball from bag and repeat process to create very thin petal. Guide petal around rose center and gently press in place.
-
Use finger to pull down edge of petal and give shape.
-
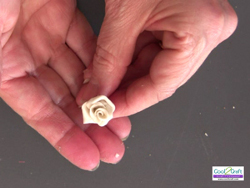
As you continue to add petals, be sure that each petal is flush with the center of rose. (If you do not watch this, the rose can quickly begin to look like a pine cone!)
-
Add as many petals as desired to create size and shape of rose. Set aside to dry overnight. Cut off back of rose with scissors to create flat back for gluing surface.
-
To create leaves, add green paint to small piece of dough. Mix thoroughly. Form pea sized shape into leaf. Add veins by gently pressing lines with plastic. Add shape to sides of leaves by pressing plastic along the edges where lines meet side. Gently press up sides of leaves to give shape. Set aside to dry.Glue leaves and flower onto desired surface. (On this example, I used a river rock to create a paperweight.)

For a comprehensive video tutorial of this project, check out How to Make a Bread Dough Rose.
Read NextNo Sew Fabric Flower Bouquet
Your Recently Viewed Projects

Thanks for your comment. Don't forget to share!
mulberrygalprinces s
May 26, 2018
This is a wonderful project. I have always wanted to try bread dough. I have used polymer clay and salt dough, but never this. I have never seen such a well written tutorial on it so I have decided this is the time to go ahead and try it. Thanks for sharing.
Marilyn B
Jun 02, 2017
This is a most excellent tutorial and the Rose is incredibly beautiful. In fact, it reminds me of those high end porcelain roses made in Italy! I have made similar creations from home made play-dough, but not with this bread formula, and it did not have the wonderful and moldable texture that this has. This rose could be made into so many things, many different jewelry pieces such as earrings, a brooch, etc. thank you for a fantastic formulation and tutorial!
len10pin
May 04, 2017
I learned how to make the dough (the recipe has changed just a little) back in the 80's when Aleene had a TV craft show with her daughters. I loved the dough. I made the little roses and made earrings. I also make different beads for bracelets and necklaces. Thank for bringing this back!
mulberrygalprinces s
Jul 09, 2016
I use to make salt dough ornaments. It was easy and fun. This looks even easier. You can make much more than flowers. You can make ornaments, santas, wreaths, anything holiday. Remember a garlic press makes great curls that you can use for hair or beards. Santas beard never looked better.
faylangshaw 612123 6
Mar 17, 2015
I have made these really easy and fun to do.If you havent try it you should.
mwicks2189 9889456
Jan 11, 2014
I would love to give this a try, but I dont keep any cold cream around, would a substitute like maybe lotion work about the same?
mwicks2189 9889456
Jan 11, 2014
I would love to give this a try, but I dont keep any cold cream around, would a substitute like maybe lotion work about the same?
dhopkins1960 31605 12
Nov 16, 2013
These look great, and I would like to try making them but have not heard of Aleene's Original Tacky Glue. I am from New Zealand, what would any Kiwis recommend using as a substitute? Thanks
darlenekrystal 072 6899
Aug 08, 2013
this is an awesome recipe.....I still have one of the roses that my daughter and I made and its......21 years old....the only thing that's happened to it is that one of the petals has a bit of a chip on it.....
angig1970 8740440
Jun 10, 2012
The last time I picked up cold cream was about two years ago and it was at a Dollar General store. Try looking at one of those. They might still carry it.
Pintinterest
Apr 06, 2012
My Mom and I used to make these and give them as little gifts when we didn't have enough money to buy gifts. Now I want to make the for fun!
larissa6177 512481 4
Feb 28, 2012
i too maded these roses 30+ years ago. i think we used french or italian bread at the time ... why? no idea. but, i had forgotten the rest of the mixture. hope someone gives us more info on cold cream....old term for todays lotions and posions. in the day i think pondes was advertised as a cold cream and my be noxema as well. WHAT A TRIP DOWN MEMORY LANE! sure clarifies the statement "whats old is new again".
cjroberts 3823706
Jan 29, 2012
My mom and I made these at least 30 years ago and all we used was white bread and white glue and it worked just fine.
Crafter 4873662
Jan 28, 2012
with all the additives in "cold cream" in this day and age is there any one of them that is recommended or not as the case may be. I seem to remember Aleene saying that some where better than others but of course why is long gone. Any info would be appreciated.
CricutLoverValerie
Jan 06, 2012
I have some of these that are over 20 years old that my grandmother made me. Think I'll try them myself.
coloradojoavs 2302 633
Nov 08, 2011
I have made these beautiful roses about 20 years ago. I have one left and still looks as good as it did the day I made them. They are so dainty and fragile looking. Yet easy to make even for those whom don't have much crafting techniques.
Report Inappropriate Comment
Are you sure you would like to report this comment? It will be flagged for our moderators to take action.
Thank you for taking the time to improve the content on our site.