Vintage Easter Cones
These vintage-themed Easter cones are made from brown paper bags, completely eco-friendly paints, ribbon and a vintage graphic from the Vintage Easter Digital Kit. They make a delightful alternative to commercial baskets. Learn about the eco-friendly paints and other products used in this project from Eco Green Crafts.
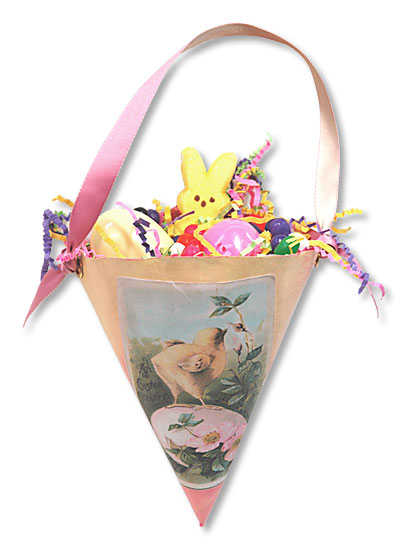
Chick with Violets Easter Cone

Materials:
- 14-16" paper bag
- Postcard from Eco Green Crafts Vintage Easter Digital Kit
- Eco Green Crafts Acrylic Paint / Lilac and Grape
- Ribbon
- 2 Grommets or hole re-enforcers
- Glue
- Clear Gloss Medium
Instructions:
- Cut a 14"-16" circle from a paper bag. Cut the circle in half. Fold the half circle in half and then into fourths. Cut one of the quarter sections off and discard. The large section will be the cone.
- Use the paints to paint each side of the paper.
- Lay the vintage graphic on the front and use a clear gloss medium to adhere in place and give the entire cone shine.
- Form the paper into a cone and use glue on the seam or use a strong red-line tape.
- Punch 2 holes near the rim and attach a grommet or a hole reinforcement to make it stronger.
- Attach a ribbon. All done! Fill with paper shred and Easter goodies.
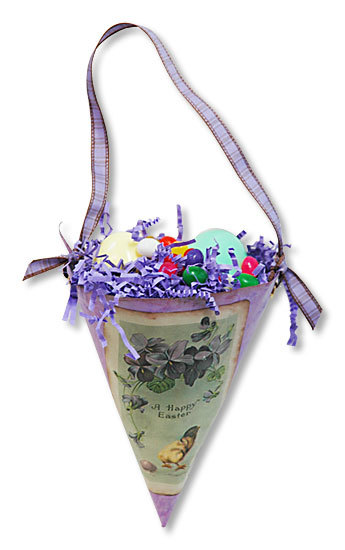
Egg and Chick Easter Cone
Materials:
- 14-16" paper bag
- Postcard from Eco Green Crafts Vintage Easter Digital Kit
- Eco Green Crafts Acrylic Paint / Rose, Butternut and Sunflower
- Ribbon
- 2 Grommets or hole re-enforcers
- Glue
- Clear Gloss Medium
Instructions:
- Cut a 14"-16" circle from a paper bag. Cut the circle in half. Fold the half circle in half and then into fourths. Cut one of the quarter sections off and discard. The large section will be the cone.
- Use the paints to paint each side of the paper.
- Lay the vintage graphic on the front and use a clear gloss medium to adhere in place and give the entire cone shine.
- Form the paper into a cone and use glue on the seam or use a strong red-line tape.
- Punch 2 holes near the rim and attach a grommet or a hole reinforcement to make it stronger.
- Attach a ribbon. All done! Fill with paper shred and Easter goodies.
Your Recently Viewed Projects
Thanks for your comment. Don't forget to share!
Morehouse17
Sep 30, 2017
These are really cute. They remind me of the Christmas tree decorations. I think they are very festive but I can see all the contents at our house all over the floor for a lack of opportunity to set these down.
Delphine Bryant
Mar 31, 2017
These vintage easter cones are too cute to give to the children as Easter baskets. None the less, the directions can be altered to be made into a project to complete with young children. I certainly love the idea of the cone and the use of a brown paper bag.
Crafty Suz
Mar 30, 2017
These are so very pretty. I think this would be a great project for a group of children to make for neighbors, shut-ins or elderly residents of senior housing or residential care. Anyone should be able to make these. A groups of elders could have a great time making them for a craft project that brings memories of their childhood days. It's a great pattern for a May basket too? If you don't have a printer there are certainly tons of beautiful scrapbook papers and decorative die-cuts and stickers on the market. How cute would one of these be with a tiny stuffed animal tucked inside with treats. What would you do?
Report Inappropriate Comment
Are you sure you would like to report this comment? It will be flagged for our moderators to take action.
Thank you for taking the time to improve the content on our site.