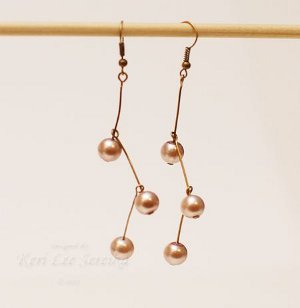
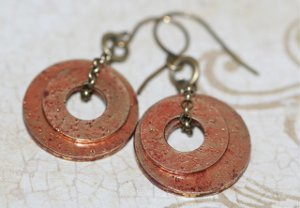
Faux Copper Enamel Earrings
You don't have to be a craft expert to learn jewelry making techniques. Let Tiffany Windsor be your guide as you learn how to create amazing earrings without a hefty price tag.
Materials:
- Matboard (or pre-cut grungeboard) (I pre-cut my matboard using my Sizzix Big Shot)
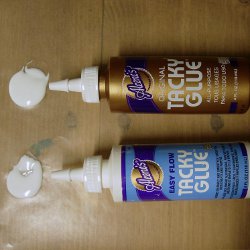
- Aleene’s Original Tacky Glue
- Aleene’s Easy Flow Tacky Glue
- White acrylic paint
- Black acrylic paint
- Waxed paper
- Wooden skewers (or large toothpicks)
- Hole punch (I use a Cropadile)
- Jewelry findings
- Jewelry pliers
- Glossy topcoat, optional
Instructions:
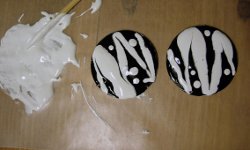
- Pour one quarter sized puddle of Aleene’s Original Tacky Glue and one quarter sized puddle of Aleene’s Easy Flow Tacky Glue onto waxed paper.
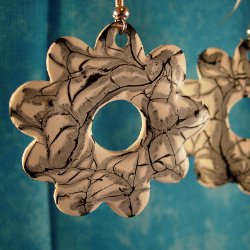
- For the featured earrings above, I used white for the background and black for the accent color. For this photo tutorial, I used the opposite (white accent on a black background). So, first decide which color you want as your base color and which you want as your accent color.
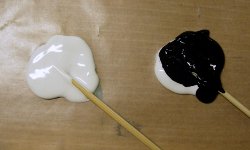
- For the base, mix equal parts acrylic paint with Original Tacky. This will create the thicker coating that you need for your base coat. Mix second color with the Easy Flow. This will create the thinner color for the accent. I use the tip of the wooden skewer to mix the colors. (In this example, the black is mixed with the Original and the White is mixed with the Easy Flow.)
- Next, pick up some of the black base color with the skewer and apply to matboard (or grungeboard) and coat entire surface. I apply with a slight rolling motion to transfer the paint to the board and pick up more color with my skewer and apply until entire surface is coated.
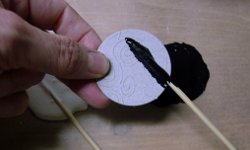
- Place on waxed paper. If you are creating earrings, repeat base color application on second piece of matboard.
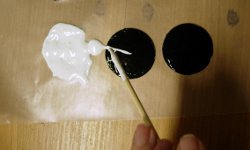
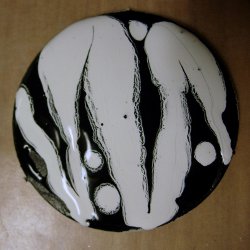
- While base glue/paint is still very wet, you will want to apply the accent color. Set the two pieces close to the white paint mixture. Dip end of wooden skewer into paint and drizzle over base color. Apply as much or as little paint as you desire to create an interesting design. On this tutorial example, I also added dots of paint. (On the feature project, I drizzled very thin lines of color which when dried took on the look of agate stone.)
- Set aside and let paint dry. You will notice that as the paint settles, interesting patterns start to develop along the edges of the paint.
- Let pieces dry completely overnight. Punch hole for jump ring or earring finding. Paint back of matboard (or grungeboard). Let dry.
- If desired, apply glossy top coat. Let dry. Use jewerly pliers to attach findings.
Notes:
- I like to apply a generous base coat so that the accent color oozes. You may find that the paint can ooze off the edge. If that happens, just carefully pick up, gently dab the edge to smooth and set your piece down in a clean area of the waxed paper.
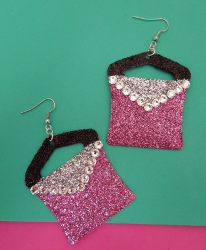
Read NextSparkly Barbie Boot Earrings
Your Recently Viewed Projects

Thanks for your comment. Don't forget to share!
dartistflame
Aug 04, 2012
This is supposed to be Faux Copper Enamel Earrings but the instructions are for black and white earrings. Would have liked to have seen the earrings in Copper Enamel Earrings being made.
tiffany 6960126
Jan 18, 2013
The ancient technique of copper enamel, which is applying a thin coat of powdered glass to a metal, then heating both to a high temperature so the glass melts and fuses to the metal can be made with any colors. Feel free to try any colors of acrylic paint for this faux copper enamel technique :)
Report Inappropriate Comment
Are you sure you would like to report this comment? It will be flagged for our moderators to take action.
Thank you for taking the time to improve the content on our site.