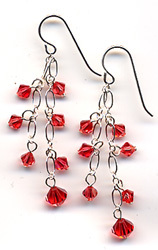
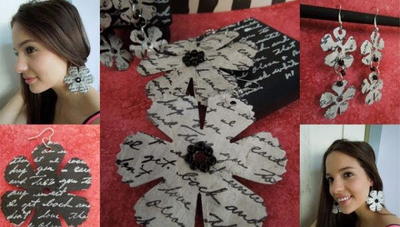
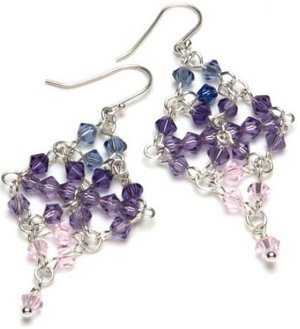
Chandelier Earrings Tutorial
Love jewelry making? Try this Chandelier Earring Tutorial from Liz Revit. It's fun, easy and informative.
Materials:
- 2 3-inch pieces of 20-gauge, dead soft, round, sterling silver wire
- 4 1 ¼-inch pieces of 22-gauge, dead soft, round, sterling silver wire
- 4 1 1/8-inch pieces of 22-gauge, dead soft, round, sterling silver wire
- 6 1 1/2-inch pieces of 22-gauge, dead soft, round, sterling silver wire
- 4 4mm Swarovski round beads in the following color: Vitail Medium
- 2 6mm Swarovski round beads in the following color: Vitrail Medium
- 2 sterling silver ear wires
- 4 8mm, 20-gauge sterling silver jump rings
- 6 1-inch, 24-gauge sterling silver head pins from
Instructions:
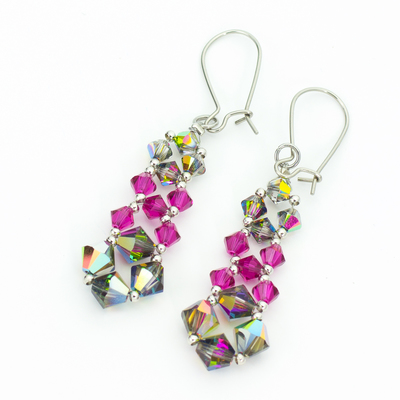
- To create a horseshoe-shaped dangle, use a two-inch piece of 20-gauge, dead soft, sterling silver wire. Center the wire at the widest part of your round-nose pliers, and bend the wire to form a horseshoe shape.
- Use the tips of your round-nose pliers to form a plain loop on each end of the horseshoe-shaped wire. Use your fingers to pinch in the top of the horseshoe-shaped wire so that the bottom of the shape is much rounder and wider.
- Create a total of six horseshoe-shaped dangles.
- Connect three of the horseshoe-shaped dangles together for one earring, and repeat this step for the other earring.
- Open two jump rings using your chain-nose pliers and flat-nose pliers. Place the jump rings through the plain loops on the top horseshoe-shaped dangle. Close the jump rings. Repeat this step for the other earring.
- Open the ear wire using your chain-nose pliers and flat-nose pliers. Place the jump rings through the loop on the ear wire. Close the ear wire. Repeat this step for the other earring.
- Place a 6mm round bead on a head pin. Make a plain loop, and attach the head pin to the bottom of the horseshoe-shaped dangle above it. Repeat this step for the other earring.
- To ensure the beaded head pin fits nicely into the horseshoe shaped dangle, you may want to lay the head pin on top of the dangle to judge how much wire, if any, you’ll want to trim before making the plain loop.
- Although centered, the 6mm round beads tend to lie on top of the horseshoe-shaped dangles; whereas, the 4mm round beads will fit more easily into the horseshoe-shaped dangles.
- Place a 4mm round bead on a head pin. Make a plain loop, and attach the head pin to the bottom of the horseshoe-shaped dangle above it. Repeat this step for the other earring.
- Place a 4mm round bead on a head pin. Make a plain loop, and attach the head pin to the jump rings above it. Repeat this step for the other earring.
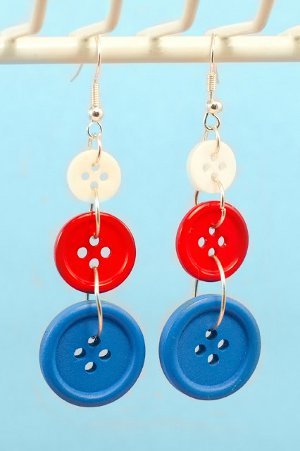
Read NextAmericana Button Earrings


Thanks for your comment. Don't forget to share!
Teariana Designs
Apr 19, 2012
The style is pretty. The materials and instructions do not match. The resulting earrings require 6 lengths of wire not 16. I am assuming the bottom tier uses the 20 gauge wire while the upper tiers use the 22, with the lengths getting smaller in the same direction. I hope this helps any who may be confused. So the material list was probably supposed to be like this: 2 2-inch pieces of 20-gauge, dead soft, round, sterling silver wire 2 1 -inch pieces of 22-gauge, dead soft, round, sterling silver wire 2 1 1/8-inch pieces of 22-gauge, dead soft, round, sterling silver wire 4 4 mm Swarovski round beads in the following color: Vitrail Medium 2 6 mm Swarovski round beads in the following color: Vitrail Medium 2 sterling silver ear wires 4 8 mm, 20-gauge sterling silver jump rings 6 1-inch, 24-gauge sterling silver head pins
Teariana Designs
Apr 19, 2012
Also it would be better to start with half-hard wire as manipulation is minimal and dead-soft would create an earring that wouldn't hold its shape very well.
Report Inappropriate Comment
Are you sure you would like to report this comment? It will be flagged for our moderators to take action.
Thank you for taking the time to improve the content on our site.