This project was submitted by one of our readers, just like you.
Key Holder Perler Bead Pattern
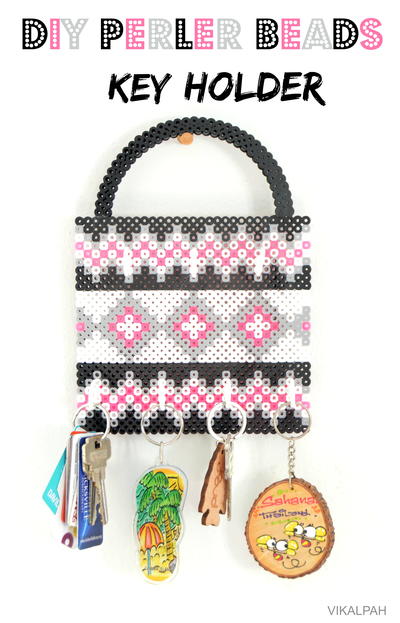
In the Designer's Words: "Such a fun project to make with perler beads. Never thought that screwing some cup hooks into these beads would add some utility value to the perler beads."
Estimated CostUnder $10
Time to CompleteIn an evening
Primary TechniqueDIY Craft

Project TypeMake a Project
Materials List
- Perler beads in your desired color choice
- Cup hooks
- Hot glue
- Parchment paper
- Iron
- Peg boards in square and circle
Instructions
-
Decide the length and width of the key holder. I thought one square board was small so I went with two square board side to side. I will show the steps to make the pattern shown above but feel free to try your own pattern and have fun with it. Bead a line of black beads and then form chevron pattern with grey beads.
-
Follow the grey beads pattern and bead three rows in white,neon pink and white. Then follow the same and bead a grey row in chevron pattern and complete it with a row of black beads. Fill the empty triangle space with black beads and repeat the same pattern on the other side.
-
Once the borders are done, now comes the center part. You can spell any words like "Keys" or "Hello" or fill it with a pattern . I went with the pattern and I have shown below on how to bead words just to give an idea.You can fill the remaining spots with a contrasting color beads. To make a pattern, use grey beads and make diamond pattern. Fill the another row with gray beads on the inside of the diamond pattern followed by neon pink and white. Fill the triangle spots with white beads. Now the whole tile is done.
-
To make a handle, use half of the circle peg board and bead two lines of black beads. This is done for two reasons, to make it look like a lock and also for hanging the whole key holder on to a nail.
-
Use parchment paper on the top of the beaded patterns and Iron until the beads melt and join together. Repeat the same on the other side.
-
Take the cup hooks and screw them wherever necessary according to the need. I went with three on the top and four on the bottom border. You don't need any glue , you just need to screw them and it stays securely. They are 7/8" wide cup hooks. They are kind of big for this so I used a perler bead on the back side to avoid poking of the hooks against the wall. But you can find smaller ones in home improvement stores.Make sure to take a bead or two with you to get the right size of cup hooks for this if you are getting new ones.
-
Attach the handle to the tile using hot glue and allow it dry. Your gorgeous perler beads key holder is now ready to hold the keys and keep them organized.

Read NextFruity DIY Wooden Trinket Boxes