Scrabble Inspired DIY Wall Art
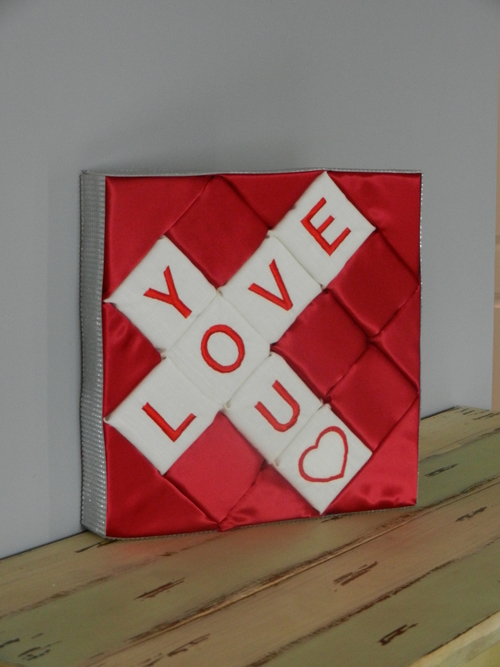
Decorate your walls with Scrabble Inspired DIY Wall Art and show off your creative spirit. Don't feel like you need to spend a ton of money on DIY home decorating ideas. Instead, create something completely unique. This project is extremely easy to make - all you need is craft foam and fabric to get started. Feel free to make your own message - it can correspond with a season or be fit for all occasions. No matter how you choose to personalize your projects, you'll surely receive tons of compliments. Make this easy DIY wall art today and transform the look of any space. The pop of color and sweet sentiment will truly stand out.
Time to CompleteWeekend project
Materials List
- Design Foam from Fairfield
- Fabric
- Embroidery machine (or could substitute stamps)
- Embellishments (optional)
Instructions
-
I decided to the the phrase LOVE YOU for this project. You could pick any words or even use the names of a couple (for a cute wedding gift) I used my Brother sewing and embroidery machine to embroider the letters LOVE YOU and a heart onto some left over off-white fabric I had. I ironed on some fabric stiffener to the back since I knew the letters would embroider to the fabric better that way.
-
If you don't have an embroidery machine, you could recreate this same look by using large letter stamps to spell out the words you would like.
-
After I had all of the letters embroidered I cut the squares down to size. The package of Design Foam had directions on the inside that tell you the size of fabric to cut depending on how big of an area of the foam you want to cover. They even figure out what you will need for wrapping the fabric around the edge and corner pieces.
-
Before I tucked each square into place on the grid I did use a little bit of Fabric Fusion to the back of each square, just over the area where the stitching for the letter was. This helped to hold the piece in place while I tucked, and made sure that nothing moved when I tucked in the next square on the grid.
-
You can tuck it in with your fingers, or grab a crafing tool to help push it in and make a smooth line. I really thought it was going to be hard to get nice smooth lines, but everything tucked in so easily!
-
I just kept adding letters one at a time, and then I added a heart.
-
This time after I sewed the heart once, I used the sizing option on my Brother machine and selected the decrease size option, and then I sized down twice. Since I kept the center of my image in the exact same spot, it embroidered a second line just inside the first one.
-
I decided to repeat this one more time, so in the end I had created 3 hearts, each one inside of the other. After I removed the fabric from the hoop and trimmed all of the strings, it heart ended up having a nice thick outline.
-
MUCH BETTER! And since each one of these were their own individual piece it was really easy to change that one square with the heart on it out. Can you imagine if this was a wall hanging quilt that was all one large piece? I would have had to start all over just to change that one square with the heart!
-
Now all that was left to do is wrap the remaining sections in some shiny red fabric I had in my stash.
-
I did each of the corners as their own section, and then the rest of the grid in separate square, just to keep that "tiled" feel for the project.
-
Here is a close up of the heart. I think that the technique of using the resize tool on the machine and sewing the heart inside of itself worked really well to make a thicker image.
-
Because I decided to use this as a table top decor piece I also covered the back of the Design Foam. This was so easy to do since the Design Foam has an adhesive back. And since the entire piece is 12" x 12" you can cover it with a standard piece of scrapbooking cardstock. And if I want to hang it up, I can easily add a hook to the back too, but I really like it for a table top piece. I think it goes perfectly on the table in our entry.
-
I also trimmed the back with the clear rhinestone sticker sheets from The Buckle Boutique, just to add some extra sparkle to the project. I love how you can just cut these rhinestone sheets with a pair of scissors to whatever size I need, peel off the backing to expose the adhesive and stick for instant sparkle.
Read NextSpring Fling Woven Wall Decor