Kid's Silhouette Tutorial
This silhouette tutorial comes to us from Catherine Peart of Gingham Cherry. Making silhouettes of the kid(s) is a great gift idea for Mother's Day or a fun way to decorate any room of the house. The look is easy to achieve but elegant.

Materials:
- Profile photo of your child
- Soft Pencil (4B is good)
- Tracing paper
- Fine scissors (embroidery, or even nail scissors, are good)
- Decorative backing paper
- Black or other coloured solid paper/card for silhouette
- Glue or double sided tape (or mounting tape if you have a shadow box frame
Steps:
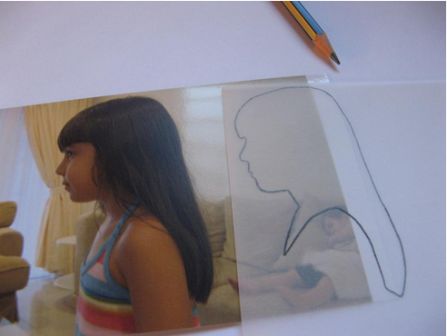
- Print out a suitable profile photo. Trace outline and finish off neck in traditional silhouette shape.
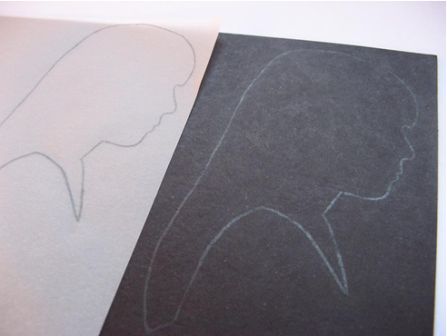
- Turn tracing paper over and draw, rub or shade over line to transfer pencil image to the solid card.
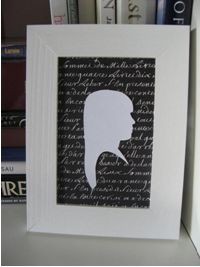
- Cut out carefully and use glue or double sided tape to adhere cutout to your decorative or plain background. If you have a shadowbox frame it is nice to use mounting tape as well.
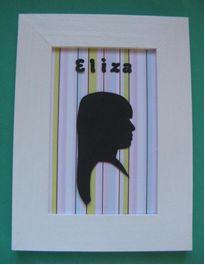
- I also used a decorative font to add my daughter’s name. As you can see, there are many different ways of displaying them.
Read NextHalloween Wreath DIY
Your Recently Viewed Projects
Thanks for your comment. Don't forget to share!
trueheartlk 390169 5
Jun 01, 2014
Where is the "save project" button located? I can't see it on any page and it's driving me crazy! Help!
Melissa Ryan
Jun 02, 2014
Hi trueheartlk--Thanks for the comment. The save project button is located on the top left side of the screen, right under the byline of the project. You'll see 4 buttons there, Notes, Print, Save Project, Comment. The Save Project button is second from the right. Hope that helps!--FaveCrafts Editor
DebbyJ
Jan 23, 2010
I've wondered how to do this as I've wanted to for a while. Thank you for the easy to understand instructions.
Report Inappropriate Comment
Are you sure you would like to report this comment? It will be flagged for our moderators to take action.
Thank you for taking the time to improve the content on our site.