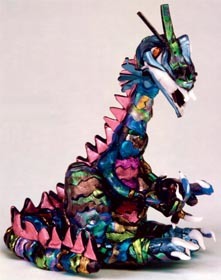
Fantasy Dragon
This colorful dragon from AMACO, made from pliable plastic, is perfect for an imaginative child's room.

Materials:
- 1½" x 7" Friendly Plastic® Metallic Sticks: 15 to 20 Shades of Blues and Greens
- 2 Solid White/White
- 1 Solid Red/Red
- 1 Solid Purple/Black
- 3 Solid Dark Pink Pearl/Pink
- Small Round Red Glass Faceted Bead
- Aluminum Foil
- Pinking Shears, Sharp Scissors
- Electric Skillet
- Water
- E-6000 Glue
- Spoon
- Cookie Sheet
- Oven
Steps:
- Body: Crumple up a 15" piece of foil to create tail, body and neck of dragon. Shape foil into a cylinder tapered at both ends and bent into “J” for the tail. Add extra foil to fatten the stomach.
- Scales: Using pinking shears, cut sticks of Blue and Green Friendly Plastic®. Cut 10 strips to ¼" or ½" x 1½" . Cut some longer 3¼" strips also. Soften Friendly Plastic® in 140°-150°F water for 5-10 seconds. Wrap one strip of softened Friendly Plastic® around tip of dragon’s tail. Starting at the bottom, wrap alternating Blue and Green strips around body, overlapping each strip. Continue until you get to the belly. For the belly, use similarly cut strips of a complimentary color such as Pinks or Yellows. When the belly and back are covered, outline the belly with one " wide strip of Pink. Finish layering strips of Greens and Blues up the back and around the length of the neck. Leave ¼" of foil showing at top of neck.
- Arms and Legs: Arms: Cut a 3" strip of Green Friendly Plastic® in half lengthwise. Soften in warm water then roll it up lengthwise and shape to create a long cylinder that will be the arm from shoulder to the tip of one finger. Shape to the desired pose. Attach three ½" cylinders to make fingers and thumb. While still soft, shape hand around bead that will become a “crystal ball”. Attach fingernails (White). Add extra " wide strips to arm by starting at palm and wrapping up length of arm in loose coil. This adds color, strength and size to biceps. Repeat for other arm. Legs: Shape legs from 6" foil, bend to form “L”. Starting at the top, layer strips of Greens and Blues to cover the leg. The end of the leg piece forms the center toe and two more toes are added on either side. Cut two 1" x 3/16" strips of Green Friendly Plastic®. Soften, fold in half lengthwise, and roll into ½" cylinder to form toes. Cut " x 2" strip of slightly different color with pinking shears and wrap around base of toes to form foot. Cut tiny triangles for toenails and attach to top of foot with glue. Repeat for other leg. To attach body and legs, soften the body slightly by pouring hot water from a spoon over area that leg or arm will be attached to. Dip the top end of the arm or leg into hot water for 20 seconds to properly soften. Push arm or leg and body gently together until they melt together. Hold for 30 seconds to allow parts to bond together.
- Jaws: Cut two 2" equilateral triangles out of Green Friendly Plastic®. Soften them on a cookie sheet in an oven set at 250°F for five minutes COLOR SIDE DOWN. While triangles are softening, cut small ¼" triangles for teeth out of White Friendly Plastic®. Remove cookie sheet and quickly place teeth around two sides of each triangle. Let cool. Dip one triangle into warm water to soften, fold slightly to form lower jaw, and wrap around neck. The second triangle will form top of head.
- Head and Eyes: Dip top of head in water to soften, then shape into inverted “U”. Top teeth should be spread slightly wider than lower jaw. Cut two ¼" x ¾" strips of White. Soften and roll into small balls for eyes. Wrap 1/16" strip of Purple around it, make vertical indent with fingernail. Cut two " wide strips of Turquoise 1½" long. Place eyes on top and use Turquoise strips across top of eye to hold in place and form eyelids.
- Nose: Cut nose piece from Green plastic. Soften and place at front of top jaw, attach it to front fourth of dragon’s head. Make loop in nose piece and lay the rest up bridge on nose. Very quickly, using butter knife, gently press onto middle of nose piece. The loop will fold into middle and become nostrils. Ends of nose piece can stick up or be twisted or cut as horns or ears.
- Attach top of head to body: Cut a 3" triangle of Blue plastic. Melt triangle and attach it point up to the top of the upper head behind horns. While still soft, wrap bottom of triangle around neck behind lower jaw. Cut six ¾" triangles with pinking shears and attach to side of neck as gills.
- Spikes: Cut strips of Pink plastic then cut triangles out of one side all the way down. Soften one “spike” right side down in oven. Remove from oven and put a second one side up on top of it Pink side up so there is color on both sides. Place back in oven to completely bond. Repeat for each “spike”. Remove from oven and allow to cool. Drip warm water down back of dragon, soften “spikes” in water and press onto dragon’s back until bonded.
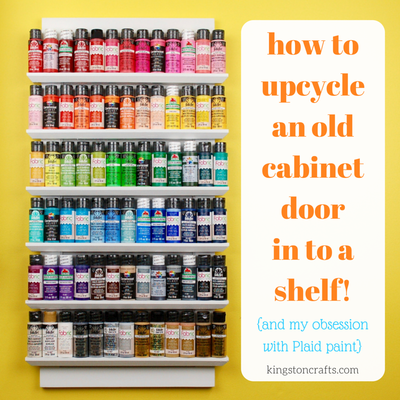
Read NextUpcycled Shelf From a Cabinet Door
Your Recently Viewed Projects


Thanks for your comment. Don't forget to share!
Member 14523
Jan 18, 2010
The Friendly Plastic sticks are available at my craft stores or online from Amaco, httpwww.amaco.comshopcategory-85-friendly-plastic-modeling-material.html
rooandken
Jan 17, 2010
I love this, is there anywhere I could purchase it already made? Thank you. My brother in law in a "special" person and he just loves and collects dragons. enjoy your day. Ronda Simon
Devibear
Jan 16, 2010
Where would I buy the Friendly Plastic Metallic Sticks to make this project with my kids?
Report Inappropriate Comment
Are you sure you would like to report this comment? It will be flagged for our moderators to take action.
Thank you for taking the time to improve the content on our site.