DIY Chandelier
Make your own chandelier or pendant lights with this DIY chandelier project! It's easy and thrifty to upcycle an old chandelier into a beautiful new light fixture.

Materials:
- Old chandelier
- Krylon Spray Paint
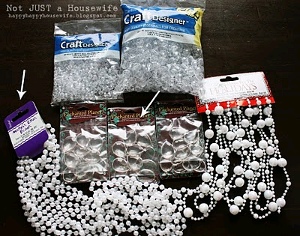
- Assorted beads, pearls, and crystals
- Wire
Instructions:
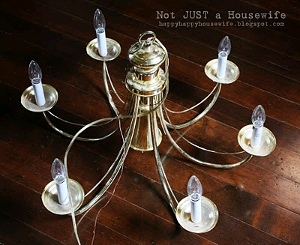
- In the classifieds online I found an old brass light fixture. I was not in love with the brass but the shape was perfect!
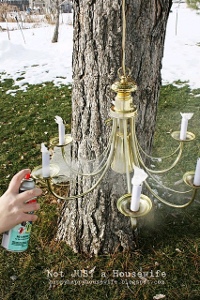
- I took it outside and hung it from a tree so I could paint it. I sprayed several thin coats. If you try to do thick coats of paint it will run and you will have drips everywhere.
- Since it was pretty cold I brought it in and hung it inside to dry. I then started on the beads/jewels. I bought a ton of options knowing I probably wouldn't use them all. But since I didn't have a certain design in mind I wanted to make sure I had plenty to choose from. I ended up only using the mardi gras necklaces and one pack of the tear drop shaped beads.
- Here is how I wired the beads that hang from the center of the chandelier.
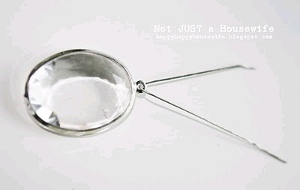
- I made a round part for the last pearl on the string to fit through. Then the twisted part got wrapped around the string just above the last pearl. I cut off any extra wire.


- Then I cut a wire that was long enough to go around the center of light. I attached these jewels to that wire and wrapped it around the center of the light.
- Some of the necklaces were cut into 6 equal strips. I used wire the attach the first pearl to the bottom of the "arm" and then I wired the last pearl to the top of the "arm".
- I wired 2 necklaces together so it would be long enough to drape . They got draped across the skinny part of the arms. Each time the arm and the necklace touched I used wire to hold it in place.
- Once everything was wired into place I took it outside again to spray paint. I wanted it to be all white. I forgot to take a picture of it before I painted the jewels. It looked alright except you could see the wire. Now it blends right in!
Read NextAltered Paper Tube Decor
Your Recently Viewed Projects

Thanks for your comment. Don't forget to share!
Marilyn B
Jan 12, 2017
With so many house demolitions and estate sales, I am sure you could find some wonderful chandeliers to try this and up cycle. I am wondering if a heavier weight clear fish line could be used to attach the crystals instead of wire. Jewelry wire might work as it is more decorative. . Looks like a great and practical project!
gant2 4981574
Jun 16, 2011
I love this idea! And I have an old chandelier hanging above my dining room table that would work perfect! I've been embarrassed by it for years, and now's my chance to actually be stylish! lol If I knew how to unhook the wiring, I'd do it right now! But I'll have to get my husband to do that this weekend. Thanks so much for the tutorial!
101975113070
Jun 16, 2011
I THINK THIS IDEA IS INSPIRED AND INSPIRING. I'M SO INTO ARTS AND CRAFTS, AND I AM INSPIRED TO DO THIS. THANKS!!!
Monica815
Jun 02, 2011
Thanks for this idea! I have a light socket in my kitchen, I could make a faux chandelier! :) I'll have to keep my eyes open for a scrap one, or 1 less then $5!
Report Inappropriate Comment
Are you sure you would like to report this comment? It will be flagged for our moderators to take action.
Thank you for taking the time to improve the content on our site.