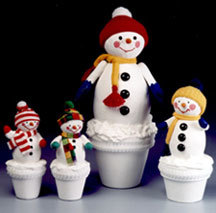
Cheery Snowman Topiaries
This collection of happy, waving snowmen will make you smile. Place the large snowman on your winter dinner table for a centerpiece. Make the small and medium snowmen as favors for each family member or guest and display at each person's place setting. To brighten your Christmas tree, thread nylon filament through the hats and hang these cheerful fellows on your tree. Or, display a group on your mantel, sideboard, coffee table or even on your windowsill.

Materials:
- STYROFOAM Brand Products:
- Sheet, 1/2" x 12" x 18"
- Small snowman: egg, 2-3/8" x 1-7/8"; ball, 1-1/2"
- Medium snowman: egg, 3-13/16" x 2-13/16"; ball, 2"
- Large snowman: egg, 5" x 3-3/4"; ball, 3"
- Terra cotta pots: 2-1/4" tall (small snowman); 2-1/2" tall (medium snowman); 4" tall (large snowman)
- Polymer clay, small package, orange
- Spackling compound
- Fine sandpaper
- Glitter, white or clear
- Acrylic craft paint: white, red, black, blue, pink, green
- Textured snow paint
- Fabric: brightly colored scraps of knit, jersey or socks (hats and scarfs)
- Yarn, small amount (scarf fringe)
- Black buttons, assorted sizes (eyes and buttons)
- Pompoms
- Braid, to fit around rim of pot
- Thread
- Needle
- Pencil
- Paintbrush, flat
- Scissors
- Palette knife
- Serrated knife
- Old candle
- Fine sandpaper
- Low temperature glue gun and glue sticks
For pattern, click here.
Steps:
- Paint pot white, inside and out. Cut a circle of foam from the 1/2" sheet that will fit in the pot, 1/2" from the top. For easier cutting, wax the serrated knife with an old candle. Glue foam circle in pot.
- Cut a small slice from narrow end of egg. Glue ball to cut end of egg.
- Cut arms from 1/2" foam sheet. Round the cut edges with fingers and sand any rough edges using a scrap of STYROFOAM brand foam.
- Spread a thin coat of spackling compound on snowman and arms; let dry. Sand.
- Glue arms to snowman. Position arms to wave, reach out or simply hang to the sides.
- Paint snowman white; let dry.
- Make carrot nose from polymer clay; follow baking instructions on package.
- Glue on carrot nose and eyes. Paint on mouth, cheeks and freckles (freckles are optional). Paint on mittens. Glue on buttons.
- To make hats, cut length of sock cuff or knit fabric:
• Small snowman: 2" x 5"
• Medium snowman: 3" x 7"
• Large snowman: 5" x 10"
- Sew a running stitch along one long edge of fabric strip. Pull threads to gather hat top; knot threads. Turn up open end, making cuff. Glue pompom on top and glue hat to head.
- To make scarf, cut strip of knit fabric, felt, fleece, or ribbon:
• Small & medium snowmen: 1" x 10"
• Large snowman: 1-1/2" x 15"
- Glue long edges together; tuck in and glue edges. Add yarn fringe to ends (optional). Tie scarf around snowman's neck.
- Glue snowman in pot. Glue braid around rim of pot. Fill in top of pot with textured snow; while wet, sprinkle with glitter. Let dry.
®™ Trademark of The Dow Chemical Company ("Dow") or an affiliated company of Dow. For more project ideas, please see styrofoamstyle.com.
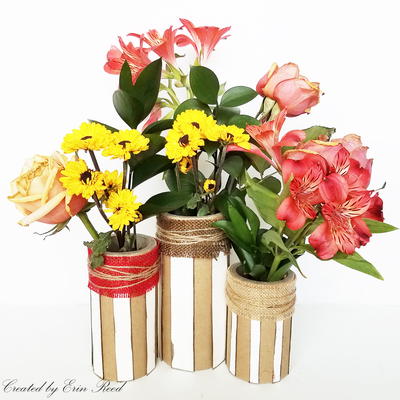
Read NextAltered Paper Tube Decor