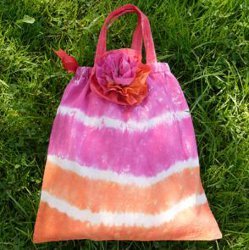
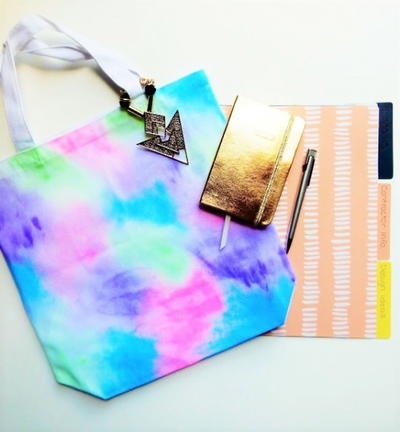
Summertime Bag
The Summertime Bag from I Love to Create is an easy project. You'll love the results because this colorful bag is great for the lazy days of summer. Turn to this free craft when you want to make a usable and stylish accessory.

Materials:
- Aleene's® Fabric Fusion® Permanent Dry Cleanable Fabric Adhesive
- Tulip® One-Step Fashion Dye™
- Fuchsia
- Orange
- Red
- Muslin – ¼ yard – natural color
- Tote bag
- Low-tack masking tape
- Sewing needle and pink thread
- Scissors
- Plastic tablecloth
- Safety pin
- Plastic wrap
- Steam iron
- Ribbon – 1 yard – ½? wide – red grosgrain
Instructions:
- Cover work surface with plastic tablecloth.
- Wet tote and fabric under running water then wring dry. Place on prepared surface. Fold fabric in half lengthwise. Smooth tote flat. Starting at one side of tote and about 3? up from bottom hem, start pinching fabric in a slight curve to other side. Tightly wrap with a rubber band around pinched section then add another rubber band right above. Pinch next section about 3? above first rubber-banded section and wrap with rubber bands. Repeat once more 3” above second section.
- Wearing gloves from dye box, fill all dye bottles with water to line indicated on bottle then tightly replace caps. Shake each until thoroughly mixed.
- Squeeze Orange on first section at bottom hem of tote, turning fabric and inserting tip into folds. Repeat with second section. Add Fuchsia dye to remaining sections then Red onto handles.
- Squeeze Red dye on one third of fabric piece then add other colors to remaining thirds.6. Cover dyed fabric with plastic wrap to keep damp. Let set 6 to 8 hours or longer for most intense colors. Fully rinse dyed fabric under warm running water until all extra dye is removed and water runs clear. Use scissors to carefully cut off rubber bands. Fill washer to large load setting with hottest water suitable for fabric and a small amount of laundry soap. Dry in dryer then use steam iron to smooth.
- To create casing for ribbon, fold top edge to inside of tote then iron along edge. Run a thin bead of Fabric Fusion along inside edge then press in place, holding with masking tape until dry if needed. Fold ends of handles to casing to secure. Let thoroughly dry.
- Use scissors to carefully snip casing at side seam, creating an opening. Attach safety pin to end of ribbon then insert into opening. Push pin and ribbon through casing around entire top of tote then pull pin out same hole and gather fabric along ribbon. Tie ribbon in a knot then a bow, trimming ends.
- Rosette: Tear a 3" wide and a 2" wide strip the length of dyed fabric. Fray edges by pulling a few threads from edges. Layer together, lining up one side. Use needle and thread to sew a gather stitch through both fabrics along edge. Gather fabric then add a few stitches to secure. Swirl to form rosette, adding stitches along gathered edge to secure. Pull apart fabric for a fuller rose. Use Fabric Fusion to glue in place. Let dry.