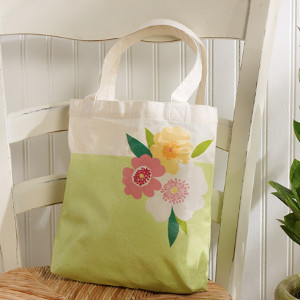
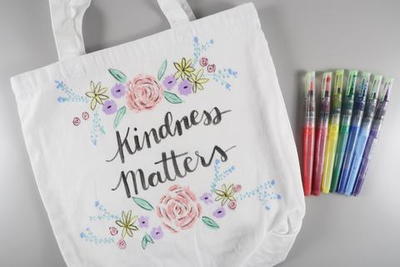
Beachy Floral Tote
Grab the flip flops and the paintbrushes because it's time for a summertime DIY painting idea. This Beachy Floral Tote may just be the thing you need for your next vacation. What a simple project that will surely put a smile on your face, even if you've never touched a paintbrush before. All this DIY tote bag needs is a few brushes, paints, stencils, and some summer spirit. Take your Beachy Floral Tote anywhere and you'll be bringing along cheer wherever you go.

Materials:
- Martha Stewart Crafts ® 2oz Multi-Surface Satin Acrylic Craft Paint - Granny Smith
- Martha Stewart Crafts ® Basic Brush Set - 5pc
- Martha Stewart Crafts ® Stencil Tape
- Martha Stewart Crafts ® Craft Squeegee
- Martha Stewart Crafts ® Decoupage Fabric-to-Fabric Durable Oil Cloth Finish, 16oz
- Martha Stewart Crafts ® Decoupage Fabric Cut-outs - Modern Floral
- Martha Stewart Crafts ® Decoupage Brush Set
- Canvas tote
Instructions:
- Using Martha Stewart Crafts Stenciling Tape, mask off your desired painted area.
- Using a stencil brush, pounce Martha Stewart Crafts Paint in Granny Smith Satin all over bottom of your tote bag. When dry, repeat on the reverse side until completely covered.
- After your basecoat of paint is completely dry, using a decoupage brush take your Oilcloth decoupage and apply a layer of decoupage directly to your tote bag in the desired area while simultaneously applying a layer of decoupage to your fabric die-cut pieces.
- Wait 1-2 minutes and take your fabric die-cut pieces and place them on the tote to adhere.
- Wait 1-2 hours before applying another 2-3 layers of Oilcloth Decoupage over your fabric pieces to secure, making sure to wait 1-2 hours in between coats. Be sure to leave a minimum ¼ “halo around the edges of your pieces for maximum adhesion.
- For an oilcloth finish, apply another 1-2 layers of Oilcloth Decoupage over your entire project, waiting 1-2 hours between each coat. Tip: use a Martha Stewart Crafts Squeegee to apply for an extra smooth finish.
- When completely dry, use your Crafts knife to score and release your tape