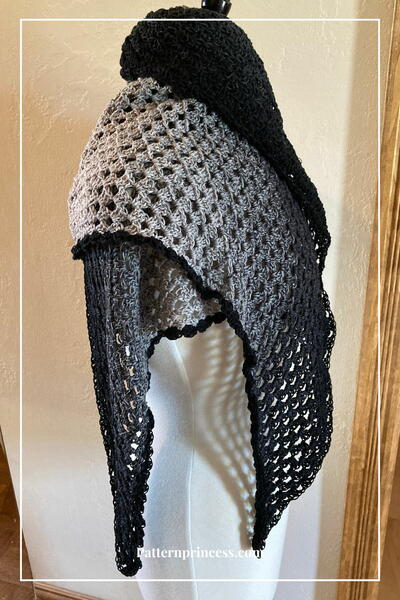
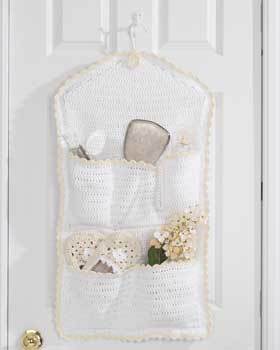
Pocket Hanging Storage
Crochet a pocket catch-all from Lily Sugar n' Cream to hang from a door or in the closet for extra storage. This is an attractive way to keep essentials easily at hand. For another hanging storage crochet pattern, see Baby Hanging Storage.

Materials:
- Yarn: Lily Sugar ’n Cream (70.9 g/2.5 oz)
Main color (MC) (White): 7 balls
Contrast A (Cream): 1 ball
- Crochet Hook: Size 4 mm (U.S. G or 6) crochet hook or size needed to obtain gauge
- Garment hanger
- Glue gun and glue stick to cover hanger hook with yarn if desired
Gauge: 14 sts and 10 rows = 4 ins [10 cm] in pat.
Instructions:
FRONT
**With MC, ch 57.
1st row: (WS). 1 sc in 2nd ch from hook. 1 sc in each ch to end of ch. Turn. 56 sc.
2nd row: Ch 3 (counts as dc). Miss first st. 1 dc in next st and each st to end of row. Turn.
3rd row: Ch 1. 1 sc in each st to end of row. Turn.
Last 2 rows form pat.**
Cont in pat until work from beg measures 24 ins [61 cm], ending with RS facing for next row:
***Next row: Ch 4 (counts as tr). (Yoh and draw up a loop in next st. Yoh and draw through 2 loops on hook) twice. Yoh and draw through all loops on hook – dc2tog made.
Dc2tog over next 2 sts. 1 dc in each dc to last 5 sts. (Dc2tog over next 2 sts) twice. 1 tr in last st. Turn.
Next row: Ch 1. 1 sc in first st. Draw
up a loop in each of next 2 sts. Yoh and
draw through all 3 loops on hook – sc2tog made. Sc2tog over next 2 sts. 1 sc in each st to last 5 sts. (Sc2tog over next 2 sts) twice. 1 sc in last st. Turn.
Rep last 2 rows 5 times more. 8 sts. Fasten off.**
Place markers at each end of last row.
BACK
Work from ** to ** as given for Front.
Cont in pat until work from beg measures 3 ins [7.5 cm] ending with RS facing for next row.
Work from *** to *** as given for Front.
Joining Back and Front: Place WS of Back and Front tog, matching shapes and pin them tog. With RS of work facing, join MC with sl st to left marked corner of Front.
Proceed as follows:
1st rnd: Working through both thicknesses: ch 1. 1 sc in same sp as last sl st. Work 22 sc evenly down left “shoulder” and 10 sc down left side.
Working in Front only: 72 sc down left side of Front. 3 sc in corner st. 1 sc in each of next 54 sc across bottom of Front. 3 sc in corner st. 72 sc up right side of Front. Working through both thicknesses: 10 sc up right side and 22 sc evenly up right “shoulder”. Working in Front only , 8 sc across top of Front. Join with sl st in first sc.
2nd rnd: Ch 1. 1 sc in each sc around, working 3 sc in corners. Join A with sl st to first sc.
3rd rnd: With A, ch 1. (1 sc. Ch 3. 2 dc) in same sp as last sl st. *Miss next 2 sc. (1 sc. Ch 3. 2 dc) in next sc. Rep from * around. Join with sl st to first sc. Fasten off.
POCKET (make 2)
With MC, ch 56.
1st row: (WS). 1 sc in 2nd ch from hook. 1 sc in each ch to end of ch. Turn. 55 sc.
2nd row: Ch 3 (counts as dc). Miss first st. 1 dc in next st and each st to end of row. Turn.
3rd row: Ch 1. 1 sc in each st to end of row. Turn.
Last 2 rows form pat.
Cont in pat until 18 rows in total have been worked.
Next row: (RS). With A, ch 1. (1 sc. Ch 3. 2 dc) in first st. *Miss next 2 sts. (1 sc. Ch 3. 2 dc) in next st. Rep from * to last 3 sts. Miss next 2 sts. 1 sc in last st. Fasten off.
FLOWER
With A, ch 4.
1st rnd: 1 dc in 4th ch from hook.
Ch 3. (Sl st. Ch 3. 1 dc. Ch 3) 4 times in same sp. Sl st in same sp. Fasten off.
Sew Pockets in position stitching top Pocket into 3 divisions and bottom Pocket into 2 divisions. Sew Flower in position, as shown in picture.
If desired, use hot glue to attach MC to hanger hook wrapping 2 strands tog at same time around hook.
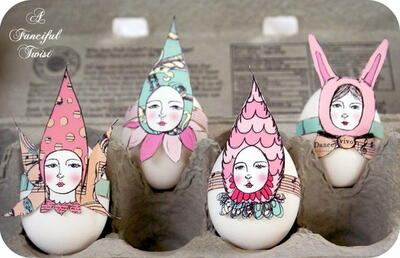
Read NextSummer Vacation Gnome
Your Recently Viewed Projects
Thanks for your comment. Don't forget to share!
Crafty Suz
Apr 10, 2017
This has a lacy and romantic appeal to it. I like that commenters have pointed out that there's a slight problem so I'll be aware of it when working on the project. This would be cute in a young girls' bedroom. I think it would be adorable for when my granddaughter is older. It would be nice in a variety of colors to match a favorite color or room dcor. Lace is cute or I could crochet thread edging to go with the yarn,
pjckmen
Apr 07, 2014
Very interesting post. really informative. of all the blogs I have read on the same topic, this one is actually enlightening.
anniebugs
Jun 23, 2010
Parts of this pattern are a little confusing. After starting the back, I noticed the 2nd instruction says to work from *** to *** as given for Front. There is a starting *** point but no ending *** point. Am I just confused or is there an omission in the pattern instruction? I would appreciate some help with this. Thanks!
JMitchell
Jul 25, 2012
anniebugs Yes I believe there IS an omission in the pattern but an insignificant one It's the same way on the Lily Sugar 'n Cream site and in their own PDF From the way I understand this pattern when it says to work from to as given for Front you would work from that symbol to the end of the directions for the front of the pattern This item would be so handy to have in my bathroom as I have a severe shortage of countertop space I intend to make a similar item but extended in length so that I can add a third pocket piece which I will divide into four smaller pockets which will hold some of my smaller items I will extend the length at the point where it says Cont in pat until work from beg measures ins cm - my length will be about ins…Read More or about cm
freakyjean
Jun 22, 2010
I thought the hanging baby pocket catch all was very cute and easy to make. Thank you very much. I'm always looking for neat and easy ways to make pocket curtains.
Member 15262
Jun 19, 2010
The shoes can be found at http://www.favecrafts.com/Crochet-Socks-and-Slippers/Flower-Slippers-Crochet-Pattern
bgoodbbyahoocom
Jun 12, 2010
Crafter 14370, I'm confused this is not a crochet pattern for shoes. I see the slippers in one of the pouches but no pattern here. Bb Bgood I look forward to doing this pattern. Great gift also.
Crafter 14370
Jun 11, 2010
I was recently going to look for this crochet pattern but only for adult shoes. I haven't tried as yet but when I do and I cannot find one, I'll just increase the size of this baby one......this should work.
Cybercat
Dec 28, 2009
I have always thought that a door makes a great area to use for storage. There are so many creative ways to hang bathroom and bedroom accessories and supplies from a home office. The door itself is a blank canvas on which you can add strips of wood for holding supplies, freeing up floor and drawer space.
Report Inappropriate Comment
Are you sure you would like to report this comment? It will be flagged for our moderators to take action.
Thank you for taking the time to improve the content on our site.