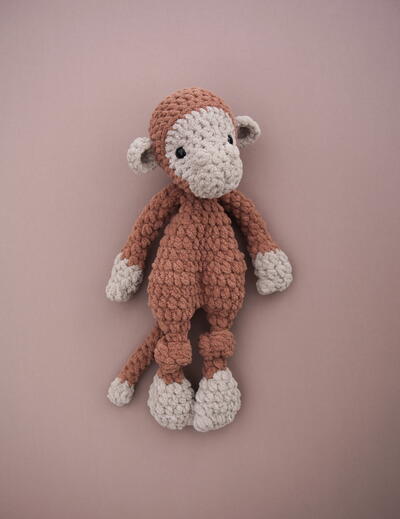
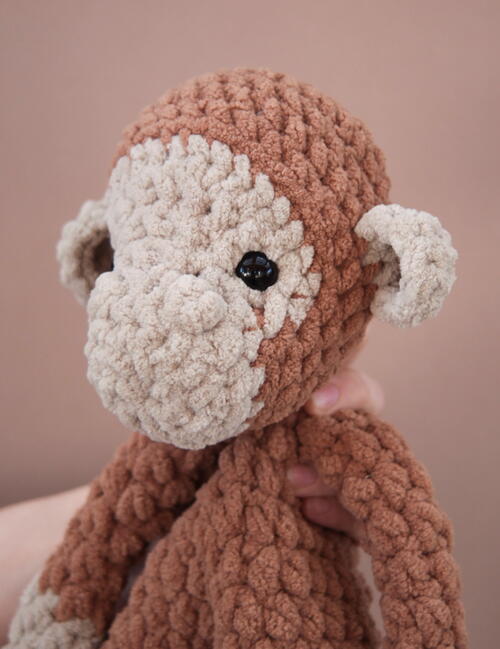
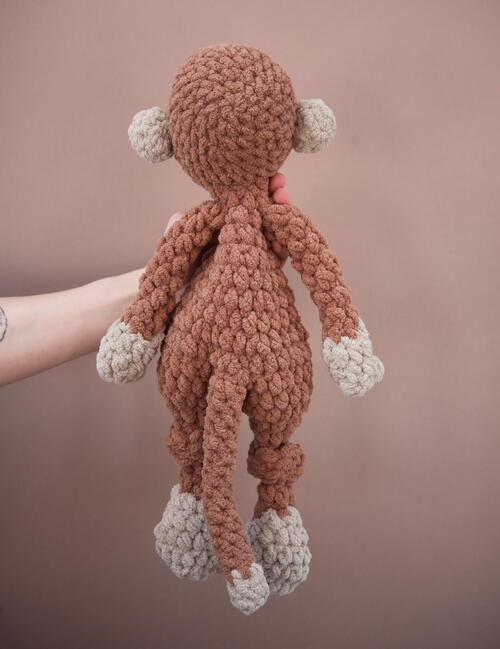
Max Monkey

Meet Max, the resident acrobat of the wild. This rowdy guy is always up for jumping on the bed! But give him a banana milkshake and he’ll be ready to settle down for some cuddles. Make Max in neutral tones, or let his fun side show in bright jungle-inspired colors.
FINISHED SIZE:
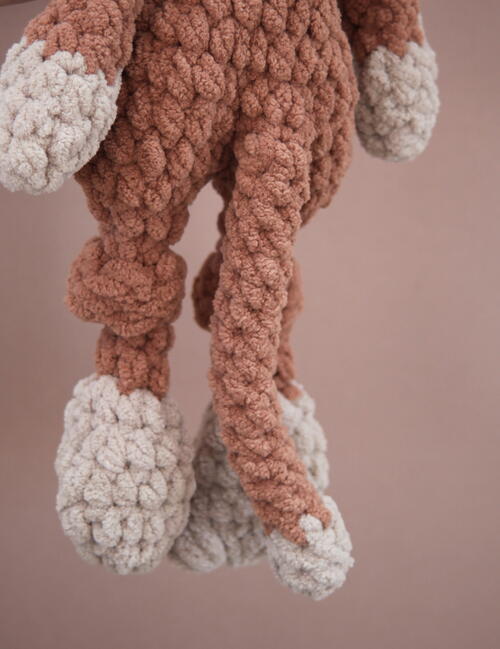
16 inches (40 cm) from top of head to tip of toe
Materials List
-
Yarn
- Super bulky weight/category 6
- Main color: Caramel
- Contrast color: Sand
-
Hooks
- US 7 mm — head
- US 8 mm/L — body, legs, arms, ears, tail
-
Notions
- 14 mm safety eyes or embroidered eyes
- Darning needle
- Fiber fill for head
- Scissors
- Stitch markers
Instructions:
ABBREVIATIONS:
BLO: back loop only
CC: contrast color(s)
hdc: half double crochet
hdc inc: 2 hdc in next stitch
hdc2tog: half double crochet 2 stitches together using invisible decrease
MC: main color
sc: single crochet
sc inc: 2 sc in next stitch
sc2tog: single crochet 2 stitches together using invisible decrease
sl st: slip stitch
st(s): stitch(es)
SPECIAL STITCHES
2x bobble
4x bobble
5x bobble
REQUIRED SEWING
Arms
Tail
EARS (MAKE 2)
Begin working in CC with 8 mm hook.
-
Round 1: sc 5 in a magic circle [5]
Round 2: sc 1, sc inc x 3, sc 1 [8]
Round 3: sc 3, sc inc x 2, sc 3 [10] -
Fasten off.
-
Place st markers in the 2nd st and last st of round 3. You will use the 3 sts from st marker to st marker when attaching each ear to the head.
HEAD
Begin working in MC with 7 mm hook. Round 1 is the back of the head.
-
Round 1: sc 6 in a magic circle [6]
Round 2: sc inc around [12]
Round 3: (sc 1, sc inc) x 6 [18]
Round 4: sc 1, sc inc, (sc 2, sc inc) x 5, sc 1 [24]
Round 5: (sc 3, sc inc) x 6 [30]
Round 6: 2, sc inc, (sc 4, sc inc) x 5, sc 2 [36]
Round 7: sc 2, sc2tog, (sc 4, sc2tog) x 5, sc 2 [30] -
The ears are crocheted in place in the next round. Position each ear against the head with the right side of the ear facing you and the wrong side of the ear touching the head.
-
Round 8: sc 5, sc ear in place using next 3 sts, sc 14, sc ear in place using next 3 sts, sc 5 [30]
Round 9: sc around [30]
Round 10: MC: sc 7, CC: BLO sc 17, MC: sc 6 [30]
Round 11: MC: sc 6, CC: sc 3, sc2tog x 3, sc 1, sc2tog x 3, sc 3, MC: sc 5 [24]
Round 12: MC: sc 6, CC: sc 2, sc2tog x 2, sc 1, sc2tog x 2, sc 2, MC: sc 5 [20]
Round 13: MC: sc 1, sc2tog, sc 3, CC: sc 2, sc2tog, sc 1, sc2tog, sc 3, BLO sc 2, BLO sc2tog [16]
Continue working in CC.
Round 14: BLO sc 4, sc inc x 3, 2x bobble, sc2tog, sc 1, 2x bobble, sc inc x 3, sc 1 [21] -
Stuff the head firmly, but do not overstuff.
-
Place safety eyes between rounds 11 and 12, approximately 7 sts apart.
-
Round 15: (sc2tog, sc 1) x 7 [14] Round 16: sc2tog around [7]
Fasten off, leaving a long tail for closing the head. Use a darning needle to thread the yarn end through the outside loops of the remaining 7 sts, then pull tight to close. Use the needle to pull the yarn end up into the head to finish off.
BODY
Begin holding the head upside down with the nose pointing away from you. Working in MC using 8 mm hook, work 9 sc sts into the head in a circle (use rounds 8 to 10 of the head as a guide for where to place sts). This will be the foundation for the body.
-
Round 1: hdc around [9]
Round 2: (hdc 2, hdc inc) x 3 [12]
Round 3: (hdc 2, hdc inc) x 4 [16]
Round 4: (hdc 3, hdc inc) x 4 [20]
Round 5: hdc around [20]
Round 6: (hdc 4, hdc inc) x 4 [24]
Round 7: hdc around [24]
Round 8: (hdc 3, hdc inc) x 6 [30]
Round 9: hdc 2, hdc inc, (hdc 4, hdc inc) x 5, hdc 2 [36]
Round 10: hdc 2, hdc2tog, (hdc 4, hdc2tog) x 5, hdc 2 [30]
Round 11: hdc around [30] -
Do not fasten off. Continue to leg instructions.
LEGS (MAKE 2)
Lay the body flat and find the middle of the last round. Reserve 2 sts at the center (1 at the front of the body and 1 at the back of the body) using a st marker to mark. The legs will be worked individually off each set of 14 sts.
-
Begin working off the 14 reserved sts on one side of the body.
Round 1: hdc around [14]
Round 2: hdc2tog around [7]
Round 3: (hdc 1, hdc2tog) x 2, hdc 1 [5]
Round 4 to 14: hdc around [5] 11 rounds -
Color Change to CC.
Round 15: hdc inc around [10]
Round 16: (hdc 4, hdc inc) x 2 [12]
Round 17: (hdc 5, hdc inc) x 2 [14]
Round 18: hdc 13, 5x bobble [14]
Round 19: hdc2tog around [7] -
Fasten off, leaving a long tail for closing the foot. Use a darning needle to thread the yarn end through the outside loops of the remaining 7 sts, then pull tight to close. Use the needle to pull the yarn end up into the leg to finish off.
-
Sl st new yarn to the center of the body for the second leg, leaving an 8-inch (20-cm) tail (this will be used to stitch the body closed at the end). Repeat the previous directions for the second leg.
-
Finishing the Body + Legs
To close the space between the legs, whip stitch through the outside loops of each open st using the long tail left at the beginning of the second leg. -
Gently knot each leg.
ARMS (MAKE 2)
Begin working in CC with 8 mm hook.
-
Round 1: sc 6 in magic circle [6]
Round 2: hdc 1, 4x bobble, hdc 4 [6]
Round 3: (hdc 1, hdc inc) x 3 [9]
Round 4: hdc around [9] -
Color Change to MC.
Round 5: work entire round in BLO, (hdc 2, hdc2tog) x 2, hdc 1 [7]
Round 6: hdc 1, hdc2tog, hdc 2, hdc2tog [5]
Round 7 to 13: hdc around [5] 7 rounds -
Fasten off, leaving a long tail.
-
Sew the arms in place between rounds 1 and 2 of the body, approximately 3 sts apart.
TAIL
Begin working in CC with 8 mm hook.
-
Round 1: sc 6 in magic circle [6]
Round 2: (sc 2, sc inc) x 2 [8]
Round 3: sc 2, sc2tog x 3 [5] -
Color Change to MC.
Round 4 to 20: sc around [5] 17 rounds -
Fasten off, leaving a long tail.
-
Sew the tail in place at the back center of the body using round 9 as a guide.
Read NextTulip Shopper Bag