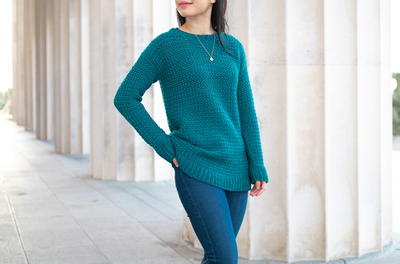
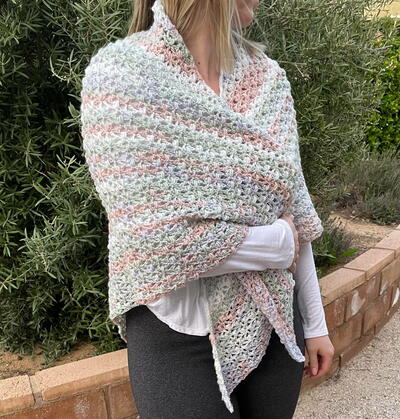
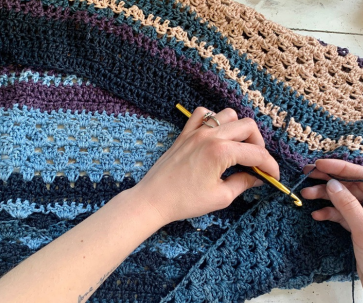
Ebb and Flow Crochet Shrug

Pair this lovely multicolored shrug with your favorite dress for those chilly spring evenings. Grab a couple DK Weight Herbal Dyed Recycled Silk Yarn Packs in your favorite colorways and follow along with the designer to crochet this beautiful shrug.
Follow along with Sammi stitch by stitch with our Crochet-A-Long! Check it out on our YouTube channel
Size:
Size A: XS-XL Size B: XXL-3XL
Dimensions:
Size A: 39” long (measured laying flat from sleeve edge to sleeve edge) x 23” high (measured laying flat from collar to bottom edge)
Size B: 46” long (measured laying flat from sleeve edge to sleeve edge) x 23” high (measured laying flat from collar to bottom edge)
Gauge: 2” square = 4 rows high of 8 double crochet stitches long
PLUS! Enter to win the Darn Good Yarn Herbal Dyed Silk Shrug Yarn Kit Giveaway as part of our 10 Days of Thanks Giveaway as well as our 10 Days Grand Prize!
Primary TechniqueCrochet

Materials List
- 2 DK Weight Herbal Dyed Recycled Silk Yarn Packs
- US I / 5.5 mm Crochet Hook
- Scissors
- Tapestry Needle
- Stitch Markers
Abbreviations:
CH: Chain
DC: Double crochet
SC: Single crochet
ST(S): Stitch(es)
SLST: Slip stitch
Pattern
-
Part 1:
Ch 127 (Size A: size XS-XL) in Yarn A - mark every 10 ch with stitch markers to keep count OR Ch 169 (Size B: XXL-3XL) in Yarn A - mark every 1 ch with stitch markers to keep count.
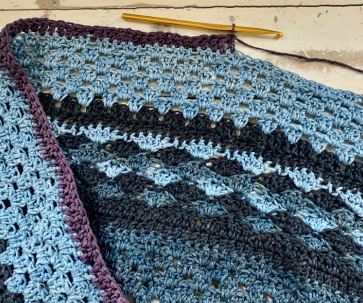
Row 1: 3 dc in 4th ch from hook, *skip 2 ch, 3 dc in next ch* repeat from * to * until 3 ch remain, skip 2 ch, and 3 dc in last ch.
Row 2: Ch 1, 3 dc in each space between clusters of 3 dc in previous row, until last cluster then 3 dc in space between cluster and turning ch.
Row 3-5: Repeat directions for Row 2.
Row 6: Switch to Yarn B by working into ch 1 turning chain, dc across entire row.
Row 7: Ch 1, dc across entire row (stitch count: 126 (or 168)). -
Part 2:
Row 8: Switch to Yarn A by working into ch 1 turning chain, *skip 2 sts, 5 dc in next st, skip 2sts, sc* repeat from * to * until 4 sts remain then skip 1 st, 3 dc in next st, skip 1 st, sc in last st.
Row 9: Switch to Yarn B by working into ch 1 turning ch, dc, sc, *skip 2 sts, 5 dc in next st, skip 2 sts, sc* repeat from * to * until last 2 sts, skip 1 st, 2 dc in last st . (stitch count: 123 (or 165)).
Row 10: Switch to Yarn C, repeat directions for row 8.
Row 11: Switch to Yarn A, repeat directions for row 9.
Row 12: Switch to Yarn B, repeat directions for row 8.
Row 13: Switch to Yarn C, repeat directions for row 9.
Row 14: Switch to Yarn B by working into ch 1 turning ch, dc entire row.
Row 15: Ch 1, dc entire row . (stitch count: 126 (or 168)). -
Part 3:
Row 16: Switch to Yarn C by working into ch 1 turning ch, 3 dc in space between third and fourth dc of previous row, *skip 2 dc of previous row, 3 dc in the space between third and fourth dc of previous row*, repeat from * to * for entire row.
Row 17: Ch 1, 3 dc in each space between clusters of 3 dc in previous row until last cluster, then 3 dc
in space between cluster and turning ch.
Row 18-20: Repeat directions for Row 17.
Row 21: Switch to Yarn D by working into ch 1 turning ch, dc entire row.
Row 22: Ch 1, dc entire row (stitch count: 126(or 168)). -
Part 4:
Row 23: Switch to Yarn C by working into ch 1 turning ch, dc, *skip 1 st, dc, working from behind dc just made dc in skipped st (creates a twist), dc in st after twist* repeat from * to * for entire row (last two sts make a twist stitch).
Row 24: Switch to Yarn D, repeat directions for Row 23.
Row 25: Switch to Yarn E, repeat directions for Row 23.
Row 26: Switch to Yarn C, repeat directions for Row 23.
Row 27: Switch to Yarn D, repeat directions for Row 23.
Row 28: Switch to Yarn E, repeat directions for Row 23.
Row 29: Switch to Yarn D by working into ch 1 turning ch, dc entire row.
Row 30: Ch 1, dc entire row . (stitch count: 126(or 168)). -
Part 5:
Row 31: Switch to Yarn E by working into ch 1 turning ch, 3 dc in space between third and fourth dc of previous row, *skip 2 dc of previous row, 3 dc in the space between third and fourth dc of previous row*, repeat from * to * for entire row.
Row 32: Ch 1, 3 dc in each space between clusters of 3 dc in previous row until last cluster, then 3 dc in space between cluster and turning ch.
Row 33-36: Repeat directions for Row 32.
Row 37: Switch to Yarn A by working into ch 1 turning ch, dc entire row.
Row 38: Ch 1, dc entire row.
Row 39: Switch to Yarn E by working into ch 1 turning ch, *3 dc, sk 1 st, 3 dc into next st, sk 1 st*, repeat from * to * for the rest of the row.
Row 40: Switch to Yarn A, repeat directions for row 39.
Row 41: Repeat directions for Row 39 except switch to Yarn D, at end of row, bind off with a sl st and leave a 24” long tail.
END OF RECTANGLE -
Part 6:
CREATE ARHMHOLES/SLEEVES
Step 1: Lay your finished rectangle (approximately 37” x 20” for Size A and 45” x 20” for Size B) lengthwise on a flat surface.
Step 2: Fold the top and bottom of the rectangle towards the center so that the top and bottom edges meet.
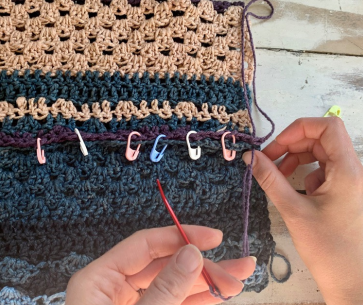
Step 3: Using stitch markers and a tape measure, clip the matched edges on both the left and right sides together for 7” (Size A) or 9” (Size B) to create two sleeves
Step 4: Test for fit and adjust if necessary (the sleeve seam can be lengthened or shortened based on fit preference).
Step 5: Using a yarn needle, stitch the sleeves together, removing stitch markers as you progress (the 24” long tail left from the last row of crochet will be used to stitch together one sleeve, the other side will need 24” of Yarn A joined to the end of the sleeve for stitching).
Step 6: After sleeves have been stitched, fasten off stitching yarn and weave in or trim ends/ tails as needed. -
CROCHET THE COLLAR BORDER
Step 1: Starting at the seam of one sleeve, join any choice of yarn using sl st (the video tutorial uses Yarn B).
Step 2: Working upwards towards the top of the left sleeve, dc around edge until seam of opposite sleeve is reached, then *ch 2, turn, and dc back towards first sleeve, stopping at seam of other sleeve, sl st to join dc row to sleeve for stability (see video for visuals)*, repeat from * to * for a total of 4 dc rows.
Step 3: After 4th dc row is completed, sl st and bind off, cut 1” tail, weave into stitches, then trim excess using scissors. -
Enjoy your finished Ebb & Flow Shrug!
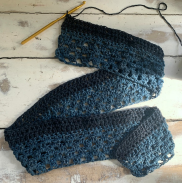
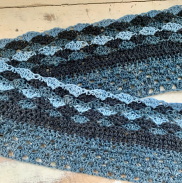
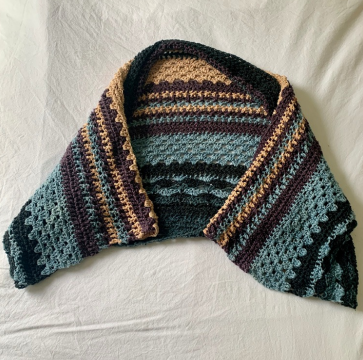
Notes• Size A (shown in photos) will have a more fitted look. If you prefer a looser fit, I recommend chaining the amount for Size B.
• This project is crocheted in a multiple of (6 + 1).
• When chaining my starting chain, I use a stitch marker on every 10 stitches to keep track of my count.
• When switching colors of yarn, I like to cut the end of old yarn once new yarn is worked in and leave a 1” tail, work the ends of yarn into stitches across the row.
• The turning chain between each row will be a chain 1
• Occasionally check your stitch count, and if you’re short on stitches, add missing stitches in.
Likewise, if you have too many stitches, use invisible decrease until the correct amount of stitches remain. The basic rectangle shape is very forgiving!
• Finished rectangle for Size A is approximately 37” long by 20” high, Size B will be approximately 45” long by 20” high.
• This project is reversible.
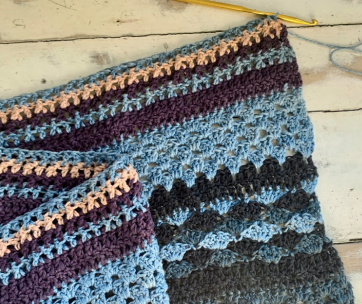
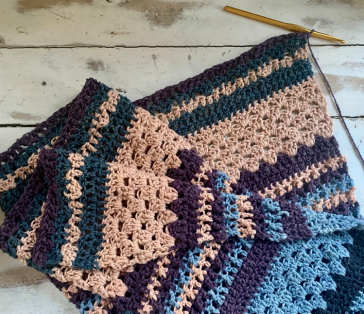
• The color designations I use in this project are: Yarn A (medium blue), Yarn B (darkest blue), Yarn C (lightest blue), Yarn D (purple), Yarn E (peach)
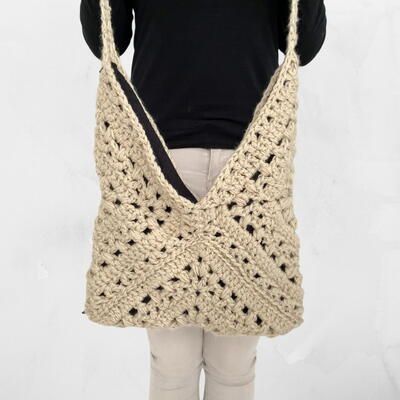
Read NextTulip Shopper Bag