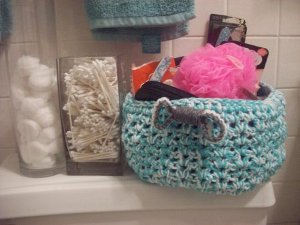
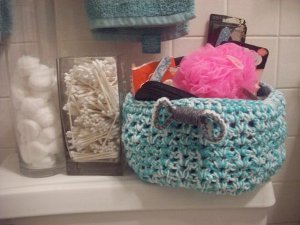
Crocheted Stash Buster Basket
Clean out your yarn stash and begin organizing your life with this Crocheted Stash Buster Basket. This easy beginner crochet pattern is made with 2 strands of yarn, so it works up quickly and is thick and sturdy for all your storage needs. Use the same colored yarn or mix and match colors to create a basket for any room in your home.
Materials:
- 2 balls Red Heart Super Saver yarn
- 6.5 mm [US K-10 ½] crochet hook
- Yarn Needle
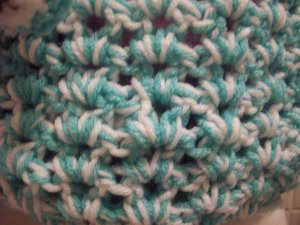
Special Abbreviations: V st: (dc, ch 1, dc) all in the same st. or ch. As you can see, you’ll be making little V’s all around the basket.
Instructions:
For a bigger basket, continue round 5, just increase an additional dc in each round (so the next round would be ch 2, 2 dc in first st, dc in next 4 sts). For a smaller one, omit round 5. You can also make the basket walls as high as you’d like by continuing or halting rounds when you get to round 7.
This pattern requires holding two strands of yarn. Ch 2 does NOT count as a st. Ch 4 does count as dc and ch 1.
-
With 2 strands of yarn held together, ch 4, sl st in first ch to create ring.
-
Round 1: Ch 2, 12 dc in ring, join with sl st to first dc. (12 dc)
-
Round 2: Ch 2, 3 dc in each st around, join with sl st to first dc. (24 dc)
-
Round 3: Ch 2, (2 dc in first st, dc in next st) 12 times, join with sl st to first dc. (36 dc)
-
Round 4: Ch 2, (2 dc in first st, dc in next 2 stitches) 12 times, join with sl st to first dc. (48 dc)
-
Round 5: Ch 2, (2 dc in first st, dc in next 3 sts) 12 times, join with sl st to first dc. (60 dc)
-
Round 6: Chain 4, dc in first st, sk 1 st, (V-st, sk 1 st) 29 times, join in 3rd ch of ch-4. (30 V-st)
-
Rounds 7-15: Sl st into first ch 1, ch 4, dc in same ch 1, (V-st in next ch 1) 29 times, join in 3rd ch of ch 4. (30 V-st) if you want your basket to be higher, you can continue this for five more rounds, for a total of 20. I thought 15 was plenty for me.
-
Round 16: Ch 3 dc in each dc from previous round, join in top of ch 3.
- Weave in ends.
Read NextCrochet Gnome Bottle Topper
Your Recently Viewed Projects
Thanks for your comment. Don't forget to share!
johnpamrobison 387 8890
Apr 14, 2018
pattern for fun flapper doesn't seem to match pink headband on photo. I cannot see any crochet 7dc tog. They all look like regular 7 dc.'s. Love the headband
Editor Dana
Apr 16, 2018
Hi there! I made some edits to the flapper headband crochet pattern on our site, but you can view the original here if you'd like: http://www.hopefulhoney.com/2014/11/1920s-lace-headband-crochet-pattern.html Good luck!
Crafty Suz
Apr 08, 2018
What a great way to use up yarn remnants. I think I'd even use multiple colors as long as it is the same type of yarn, would you? These storage baskets could be used in any room. This would certainly cut down on the use of boxes and bags. The pattern is so nice and easy that it would be well worth it to get new skeins of yarn to math the dcor of a room.
msdeb21
May 07, 2017
This is so cute! I don't know how to crochet, but I do know how to loom knit a hat. I'm hoping I can create a basket like this in a beautiful blue color for my summer beach theme. I love soft blue yarns even in the summer.
lpalmer59 7490208
Jun 23, 2016
What an adorable little basket you can do up for either your personal bathroom or for a guest bathroom. There is no better way to make your guests feel welcome than to show them you care by adding little touches like a handmade basket to their bathroom filled with items just for them to use. You can fill this basket with personal items you know are your guests favorite, to help them feel comfortable and welcome. I love this idea, thank you.
Heidi Lorene
Apr 08, 2016
I have been trying to find a nice free basket pattern and this is perfect for what I need it for. I can't wait to make and use this basket. I love how 2 different colored yarns held together looks also it really makes this basket pop. Now to get the hook out. Then to make sure I starch it well so it holds its shape.
bobbylonardo 50143 99
Jul 16, 2014
This is basically an upside down hat. You could likely make it using any hat directions as long as you use 2 strands of yarn. Just keep in mind that once you wash it (and you probably will at some point), It may not be as sturdy since the yarn "softens" up in the wash.
Melissa Ryan
Jul 17, 2014
Hi bobbylonardo--Thanks for your comment. Actually this ends up being much larger than a hat...and in order to make a basket, the base has to be flat and round, while a hat is more pointed at the end...but technically if you're really crafty, you could adapt a hat into a basket by extending the base. And you can easily stiffen the basket if you'd like by using starch.
gneal76 5039234
Apr 19, 2013
Oh, forgot to say that I started the basket with the magic ring instead of the ch 4. I liked the way it looks more than the open hole.
gneal76 5039234
Apr 19, 2013
This was fun. Thank you for the pattern. After round 16 I added a row of reverse single crochet to give a little more firmness to the top edge.
NanHick
Mar 25, 2013
Pattern looks good and I will try it but I think there is a typo. I think Round 2 should be 2 dc in each st around not 3. 3 dc around would make it 36 dc in round and I don't think it would lay flat. The idea is great though.
Report Inappropriate Comment
Are you sure you would like to report this comment? It will be flagged for our moderators to take action.
Thank you for taking the time to improve the content on our site.