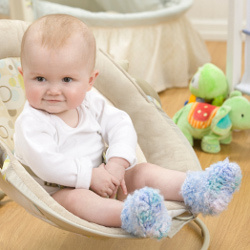
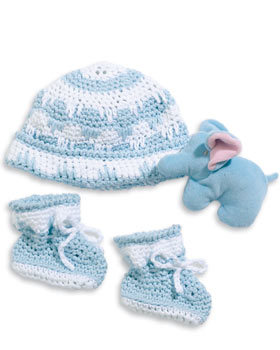
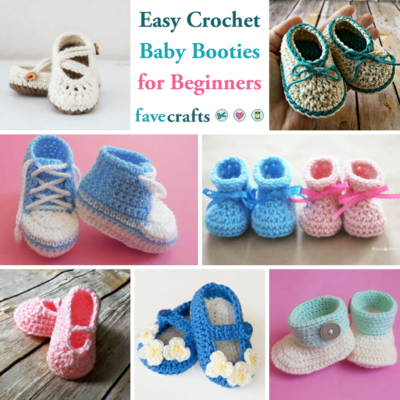
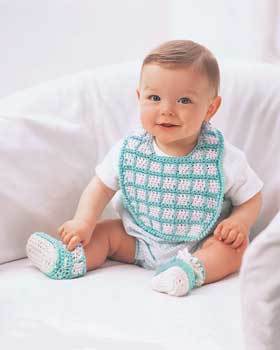
Baby Booties and Bib
Crochet a matching set of booties and bib for baby in soft aqua and cream yarn. This baby crochet pattern from Lily Sugar n' Cream helps create a great shower gift.

Materials:
- Yarn: Lily® Sugar’n Cream (Solids: 70.9 g/ 2.5 oz/109 m/120 yds)
Main Color (MC) (cream) 2 balls
Contrast A (aqua) 2 balls - Crochet hook: Size 4 mm (U.S. G or 6) crochet hook or size needed to obtain gauge
- Button
Gauge: 14 hdc and 10 rows = 4 ins [10 cm
Instructions:
BIB
With MC, ch 21.
1st row: (RS). 1 hdc in 3rd ch from hook. 1 hdc in each of next 2 ch. *Ch 1. Miss next ch. 1 hdc in each of next 3 ch. Rep from * to end of ch. Turn. 19 sts.
2nd row: Ch 2. 2 hdc in first st. 1 hdc in each st or ch 1 sp to last st. 2 hdc in last st. Join A. Turn.
3rd row: Ch 1. 1 sc in each of first 4 sts. *(Yoh) twice and draw up a loop in missed ch of foundation ch 2 rows below in front of work. (Yoh and draw through 2 loops on hook) 3 times – long tr made. Miss next st (behind long tr). 1 sc in each of next 3 sts. Rep from * to last st. 1 sc in last st. Turn.
4th row: Ch 1. 2 sc in first st. 1 sc in each st to last st. 2 sc in last st. Join MC. Turn.
5th row: Ch 2. 1 hdc in first st. *Ch 1. Miss next st. 1 hdc in each of next 3 sts. Rep from * to last 2 sts. Ch 1. Miss next st. 1 hdc in last st. Ch 2. Turn.
6th row: 2 hdc in first st. 1 hdc in each st or ch sp to last st. 2 hdc in last st. Join A. Turn.
7th row: Ch 1. 1 sc in each of first 2 sts. *Long tr in next missed st 2 rows below. Miss next st (behind long tr). 1 sc in each of next 3 sts. Rep from * to last 3 sts. Long tr in next missed st 2 rows below. Miss next st (behind long tr). 1 sc in each of next 2 sts. Turn.
8th row: Ch 1. 2 sc in first st. 1 sc in each st to last st. 2 sc in last st. Join MC. Turn. 27 sts.
Cont even in pat as placed in last 8 rows for 12 more rows.
Shape neck: 1st row: (RS). With MC, ch 2. Pat across 6 sts. Yoh and draw up a loop in next st. Draw up a loop in next st. Yoh and draw through all loops on hook – hdc2tog made. Turn. Leave rem sts unworked.
2nd row: Ch 2. Hdc2tog over first 2 sts. Pat to end of row. Join A. Ch 1. Turn.
3rd row: Ch 2. Pat to last 2 sts. Draw up a loop in each of next 2 sts. Yoh and draw through 3 loops on hook – sc2tog made. Turn. 5 sts.
Work 6 rows even in pat.
Next row: (WS). Ch 2. 2 hdc in first st. Pat to last 2 sts. Hdc2tog. Join A. Turn.
Next row: Ch 1. Sc2tog. Pat to last st. 2 sc in last st. Turn.
Next row: Ch 1. 2 sc in first st. Pat to last 2 sts. Sc2tog. Join MC. Turn.
Next row: Ch 2. Hdc2tog. Pat to last st. 2 hdc in last st. Turn.
Next row: Ch 2. 2 hdc in first st. Pat to last 2 sts. Hdc2tog. Fasten off.
With RS of work facing, miss next 11 sts. Join MC with sl st to next st. Ch 2. Hdc2tog over this st and next st. Pat to end of row. Turn.
Work to correspond to first side, reversing all shapings.
Edging: Join A with sl st to top left corner of neck edge. Ch 1. 1 sc in same sp as last sl st.
Work 1 row sc evenly around all edges. Join with sl st to first sc.
Next rnd: Working around outer edge only, ch 1. Working from left to right, instead of from right to left as usual, work 1 reverse sc in each sc to opposite side. Fasten off. With A, make button loop at center back on left side. Sew button in position.
BOOTIES
With A, ch 28.
1st row: (RS). 1 sc in 2nd ch from hook. 1 sc in each ch to end of ch. 27 sts. Turn.
2nd row: Ch 1. 1 sc in each sc to end of row. Join MC. Turn.
3rd row: With MC, ch 2. 1 hdc in first st. *Ch 1. Miss next st. 1 hdc in each of next 3 sts. Rep from * to last 2 sts. Ch 1. Miss next st. 1 hdc in next st. Turn.
4th row: Ch 2. 1 hdc in first st. 1 hdc in each st or ch 1 sp to end of row. Join A. Turn.
5th row: With A, ch 1. 1 sc in first st. *Long tr in next missed ch 2 rows below. Miss next st (behind long tr). 1 sc in each of next 3 sts. Rep from * to last 2 sts. Long tr in next missed ch 2 rows below. Miss next st (behind long tr). 1 sc in last st. Turn.
6th row: Ch 1. 1 sc in each of first 4 sts. *Sc2tog. 1 sc in each of next 4 sts. Rep from * to last 3 sts. 1 sc in each of last 3 sts. Turn. 23 sts.
7th row: (Eyelet row). Ch 1. 1 sc in each of first 2 sts. *Ch 1. Miss next st. 1 sc in each of next 2 sts. Rep from * to last 2 sts. 1 sc in each of last 2 sts. Turn.
8th row: Ch 1. 1 sc in each st or ch 1 sp to end of row. Fasten off.
Instep: 1st row: With RS of work facing, miss first 7 sts. Join A with sl st to next st. Ch 1. 1 sc in same sp. 1 sc in each of next 8 sts. Turn. 9 sts.
2nd row: Ch 2. 1 hdc in each st to end of row. Turn.
3rd row: Ch 1. 1 sc in each st to end of row. Turn.
4th row: As 2nd row.
5th row: Ch 1. Sc2tog. 1 sc in each st to last 2 sts. Sc2tog. Fasten off.
Sew center back seam. With RS of work facing, join A with sl st at center back seam. Ch 1. 1 sc in each of next 7 sts. Work 5 sc down side of instep. 3 sc in corner sc. 5 sc across end of instep. 3 sc in corner sc. Work 5 sc along other side of instep. 1 sc in each of next 7 sts. Join with sl st to first st. 35 sts.
Next rnd: Ch 1. 1 sc in each st around. Join MC with sl st to first st.
Next rnd: With MC, ch 1. Working in back loops only work 1 sc in each st around. Join with sl st to first st.
Next rnd: Ch 1. Sc2tog. 1 sc in each of next 13 sts. Sc2tog. 1 sc in next st. Sc2tog. 1 sc in each of next 13 sts. Sc2tog. Join with sl st to first st.
Next rnd: Ch 1. Sc2tog. 1 sc in each of next 11 sts. Sc2tog. 1 sc in next st. Sc2tog. 1 sc in each of next 11 sts. Sc2tog. Join with sl st to first st.
Next rnd: Ch 1. Sc2tog. 1 sc in each of next 9 sts. Sc2tog. 1 sc in next st. Sc2tog. 1 sc in each of next 9 sts. Sc2tog. Join with sl st to first st. Fasten off. Join center foot seam.
Drawstring
: With MC, chain a length to measure 16 ins [40.5 cm]. Fasten off. Weave drawstring through eyelet row. Knot ends of drawstring.
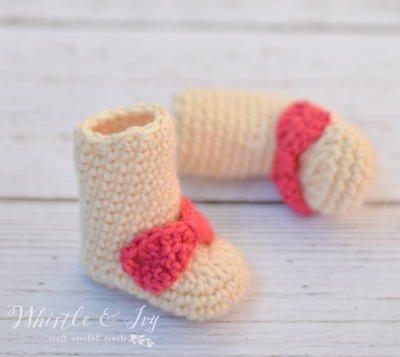
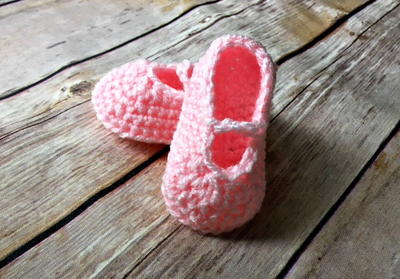
Read NextBaby Ballet Slippers Crochet Pattern
Your Recently Viewed Projects
Thanks for your comment. Don't forget to share!
elocin1104 2800379
Jun 10, 2018
This bib and booties combination looks super cute. My sister just found out she is having a boy in October, and the colors in this pattern would be perfect for him! I am so excited to start making a bunch of clothing and other items for him. There are so many great ones out there.
eascott53 5376216
May 03, 2014
Explaintion on bib at the end of row 8 was confusing was unable to complete
patricia9135 62499 23
Apr 07, 2011
I am really enjoying your sites. The patterns are wonderful. I have a question on this pattern. What does it mean when it says on shaping the neck to "PAT ACROSS 6 STS. Patricia t
beechiegirl1953
Aug 24, 2010
The finished pieces look really cute, but this pattern is apparently for a very experienced crocheter. I would love to see more similar patterns designed for the intermediate or 'not quite so intermediate' crocheter. It appears that 'didough' did a good job of trying to explain the instructions, but without an experienced crocheter right there beside me, I'd never be able to do this pattern, even though I usually don't have any problems with thread nor yarn crochet patterns marked intermediate.
didough
Mar 03, 2010
kmarie - I haven't tried this pattern yet, but read your query. I think that after working the 5 rows (9 sts) under Instep instructions, it will look like you have made a rectangle and where it says work 5sc down side of instep, these will be worked into the row ends of the 5 rows - down the right or left hand side of the piece (depending on which way you are looking at it) - then across the bottom of the piece (increasing on both corners) and back up the other side of the row ends. Hope that is clearer than mud ... Di
kmarie
Jan 27, 2010
this is so cute i am trying to make for baby shower. on the booties i am on the 5th row of the instep don't kmow what it means when it tells you to work 5 sc down side of instep please help time is running out for me. love this site use or look at it every day thanks
Report Inappropriate Comment
Are you sure you would like to report this comment? It will be flagged for our moderators to take action.
Thank you for taking the time to improve the content on our site.