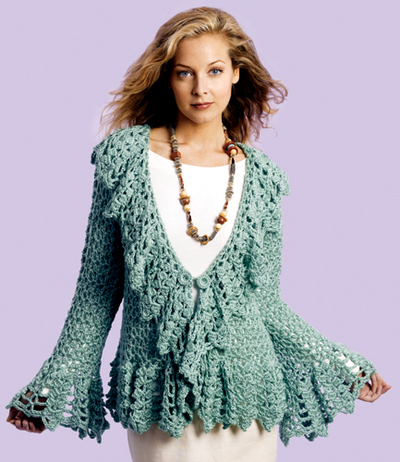
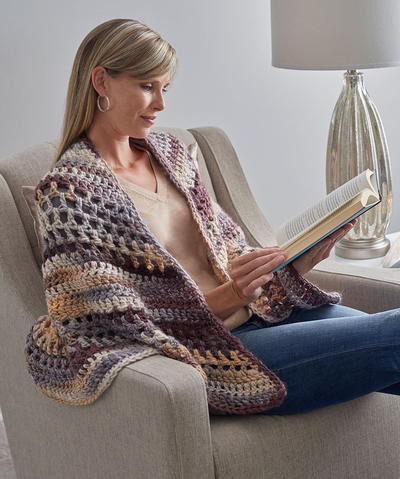
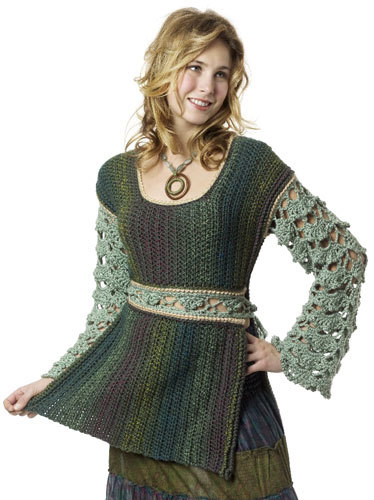
Autumn Crochet Tunic

When the weather turns crisp and cool, you'll love cuddling up in this warm Autumn Crochet Tunic from Caron Yarns. Great for walks outside or curling up by the fire, this easy crochet sweater pattern is great for women of all ages.
NotesMeasurements:
Bust 41 (43 1/2, 47, 51, 53 1/2)/104 (110.5, 119.5, 129.5, 136) cm
Length 30 (30, 31, 32, 32)"/76 (76, 78.5, 81.5, 81.5) cm
Crochet HookI/9 or 5.5 mm hook, J/10 or 6 mm hook
Yarn Weight(4) Medium Weight/Worsted Weight and Aran (16-20 stitches to 4 inches)
Crochet GaugeIn Jacket pattern, using smaller hook, 5 pattern repeats and 10 rows = 4"/10cm.
Finished SizeS (M, L, 1X, 2X)
Materials List
- US I-9 (5.5 mm) crochet hook, or size to obtain gauge
- US J-10 (6 mm) crochet hook (for borders only)
- 18 (24, 24, 30, 30) oz Caron International's Simply Soft yarn in color of your choice (100% acrylic; 6 oz/170 g, 315 yds/288 m) (A)
- 9 (9, 12, 12, 12) oz Caron International's Simply Soft Shadows yarn (100% acrylic; 3 oz/85g, approx 150 yds/137m ball) (B)
- One button, 1–1 1/2"/25–38mm diameter
- Yarn needle
- Pattern
Instructions:
Border Pattern
(multiple of 2 sts + 1)
-
Row 1 (RS): Sc in 2nd ch from hook and in each remaining ch across, turn.
-
Row 2: Ch 1, sc in first sc, *Lsc in next sc, sc in next sc; repeat from * across, turn.
-
Row 3: Ch 1, Lsc in first sc, *sc in next sc, Lsc in next sc; repeat from * across.
-
Repeat last 2 rows for Border pattern.
Jacket Pattern
(multiple of 3 sts + 1)
-
Row 1: Ch 3, (dc, ch 2, dc) in first st, *sk next 2 sts, (2 dc, ch 2, sc) in next st; repeat from * across, turn.
-
Row 2: Ch 3, (dc, ch 2, sc) in first ch-2 sp, (2 dc, ch 2, sc) in each ch-2 sp across, turn.
-
Repeat last row for Jacket pattern.
Back
Border
-
With larger hook and B, ch 74 (80, 86, 92, 98).
-
Row 1: Work Row 1 of Border pattern—73 (79, 85, 91, 97) sc.
-
Rows 2–15: Repeat Rows 2 and 3 of Border pattern 7 times.
-
Row 16: Work Row 2 of Border pattern. Change to A.
Body
-
Change to smaller hook.
-
Row 1: Work Row 1 of Jacket pattern—25 (27, 29, 31, 33) pattern repeats.
-
Continue in Jacket pattern until piece measures 30 (30, 31, 32, 32)"/76 (76, 78.5, 81.5, 81.5) cm from beginning. Fasten off.
Front (Make 2)
Border
-
With larger hook and B, ch 38 (40, 44, 46, 50).
-
Row 1: Work Row 1 of Border pattern—37 (39, 43, 45, 49) sc.
-
Rows 2–15: Repeat Rows 2 and 3 of Border pattern 7 times.
-
Row 16: Ch 1, work 1 (2, 1, 2, 1) sc in first sc, *Lsc in next sc, sc in next sc; repeat from * across, turn—37 (40, 43, 46, 49) sts. Change to A.
Body
-
Change to smaller hook.
-
Row 1: Work Row 1 of Jacket pattern—13 (14, 15, 16, 17) pattern repeats.
-
Continue in Jacket pattern until piece measures 27 (27, 27, 28, 28)"/68.5 (68.5, 68.5, 71, 71) cm from beginning. Do not fasten off.
Shape Neck
-
Row 1: Ch 3, sk first ch-2 sp, sc in next ch-2 sp, ch 3, (dc, ch 2, sc) in next ch-2 sp, *(2 dc, ch 2, sc) in next ch-2 sp; repeat from * across, turn—11 (12, 13, 14, 15) pattern repeats.
-
Row 2: Work Row 2 of Jacket pattern across.
-
Rows 3–6: Repeat last 2 rows 2 more times—7 (8, 9, 10, 11) pattern repeats.
-
Repeat Row 2 until piece measures same as back.
-
Fasten off.
Sleeve (Make 2)
Border
-
With larger hook and B, ch 68 (74, 74, 80, 80).
-
Row 1: Work Row 1 of Border pattern—67 (73, 73, 79, 79) sc.
-
Rows 2–15: Repeat Rows 2 and 3 of Border pattern 7 times.
-
Row 16: Work Row 2 of Border pattern. Change to A.
Body
-
Change to smaller hook.
-
Row 1: Work Row 1 of Jacket pattern—23 (25, 25, 27, 27) pattern repeats.
-
Continue in Jacket pattern until piece measures 12 1/2 (12 1/2, 13, 13, 13)"/32 (32, 33, 33, 33) cm from beginning. Fasten off.
Finishing
-
With A, sew shoulder seams. Sew top of sleeves to body, centering top edge of sleeve at shoulder seam. Sew side and sleeve seams.
Right Front Edging
-
Row 1: With RS facing, join B in lower front corner, work sc evenly up front edge to neck shaping, changing to A at beginning of body, ensure that you have an odd number of sts, turn.
-
Row 2: Ch 1, sc in first 2 sc, ch 4, sk next 4 sc (buttonhole made), ch 1, sc in next sc, *Lsc in next sc, sc in next sc; repeat from * across, changing to B at beginning of border, turn.
-
Row 3: Work Row 2 of Border pattern to the ch-4 buttonhole, 4 sc in ch-4 sp, sc in last 2 sc. Fasten off.
Left Front Edging
-
Row 1: With RS facing, join A in beginning of neck shaping, work sc evenly down front edge to lower corner, changing to B at beginning of border, ensure that you have an odd number of sts, turn.
-
Rows 2 and 3: Work Row 2 of Border pattern.
-
Fasten off.
Collar
-
Row 1: With WS facing and smaller hook, join B in beginning of neck shaping, work sc evenly around neck edge to beginning of opposite neck shaping, ensure that you have an odd number of sts, turn.
-
Row 2: Ch 1, working in front loops only, sc in each sc across, turn.
-
Change to larger hook, repeat Row 2 of Border pattern until collar measures 3"/7.5 cm from beginning.
-
Fasten off.
-
Using yarn needle, weave in all ends. Sew button to left front, opposite buttonhole.
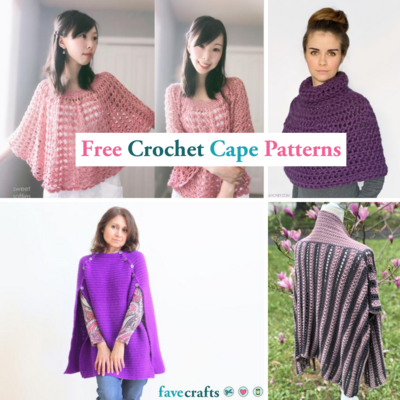
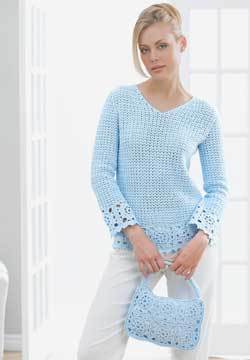
More Free Crochet Tunic Patterns
If you like this pattern, you'll love these other free crochet tunic patterns that are fun and easy to make:


Abbreviations
- Lsc: Long single crochet
- Insert hook in indicated st 2 rows below, yarn over and draw up a loop to height of current row, yarn over and draw through both loops on hook. Skip the corresponding st in the current row.
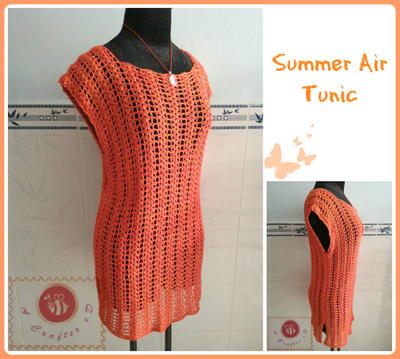
Read NextSummer Air Crochet Tunic
Your Recently Viewed Projects
Thanks for your comment. Don't forget to share!
princess6860504
Sep 10, 2018
When I wear this with the sleeves extended to full length, they kind of look like they lack proper shaping at the cuff. So I usually wear it rolled up like it shows in the picture. The color is awesome for fall. I am enjoying wearing it.
Tricia108
Aug 31, 2017
This looks like a fairly easy jacket to make. I am always looking or extra layers in the winter. It can be done in one color or multiple colors. I like the fact it has the different stitch patterns to add some texture. It keeps it from being ordinary. Thank you.
princess6860504
Jun 28, 2017
This looks like such a cozy long cardi for the fall and winter, especially pleasing to the eye in the deep wine or garnet color. I agree that gray would be a great second choice. In reading the directions, I realize that the "long single crochet" is also known as the spike stitch. Pretty sure about that, but correct me if I'm wrong. I wonder what the sleeves look like unrolled, though.
Cheryl Y
Aug 15, 2016
Love this Autumn Crochet Tunic pattern! I like the step by step directions and the color is so spot on for Autumn. I do like the way the pattern is written out so you know just what step to do. I want to make one or two and have saved this pattern for my must make list. I do have one question, why only 1 button? I'm thinking of adding more to close it up for the cooler nights. Thank you so much for this free crochet pattern.
oneilljackie 20
Oct 31, 2013
love this pattern i have three colors i want to use, grey for the border and i have green and beige/brown but don't know what way to use the green and beige/ brown colors any ideas in what order to use them?
pinkcaddy7
Aug 15, 2013
WOW, lots of directions for something called "EASY"! LOL... I like the sweater, so I'll give it a try. Thanks.
Melissa Ryan
Dec 21, 2012
For those who were wondering about sizes/measurements, we have included them above. We also updated the format to make it a little easier to read. Hope this helps everyone! And, as always, let us know if there's anything else we can help with! Thanks again!
louazumwgmailcom
Oct 21, 2024
That is helpful but do I sew them together or make each separately and them sew them together at the end? I guess this is a little above my ability.
louazumwgmailcom
Oct 21, 2024
That is helpful but do I sew them together or make each separately and them sew them together at the end? I guess this is a little above my ability.
louazumwgmailcom
Oct 21, 2024
That is helpful, but should I sew them together or make each separately and then sew them together at the end? I guess this is a little above my ability.
louazumwgmailcom
Oct 21, 2024
That is helpful, but should I sew them together or make each separately and then sew them together at the end? I guess this is a little above my ability.
spshovestadt 47164 23
Nov 09, 2012
It's simple. Really. 1. This is not a one size fits all pattern. Under "Materials" the first and second lines are to be understood as a Quantity of One Crochet Hook in the sizes noted. 2. To get your size: Sizes are listed as S, (M, L, 1X, 2X.) Let's say you want a size L. Under "Finished Measurements", your bust size would be 47 (41=S (43 1/2=M, 47=L, etc), and your length would be 31 (30=S (30=M, 31=L, etc). In the body of the pattern, for instance, go to the section for "Back" and "Border". The instructions read: "With larger hook and B, Ch 74 (80, 86, 92, 98). You would chain 86 for size L. For row 1, you would work 85 sc. On the Body: Row 1 would have 29 pattern repeats for size L. And then you would work until the piece measures 31" /78.5 cm.
crochetgal
Nov 07, 2012
The layout of the pattern is VERY confusing. The layout does shorten the writing of the pattern but makes it difficult to follow. I need a 1x but how am I going to know which size pattern to follow?
CSum
Dec 04, 2010
Under "Instructions:" SIZES S (M, L, 1X, 2X) FINISHED MEASUREMENTS: Bust ... (gives measurements) Length ... (gives measurements)
coffeegirl33
Aug 01, 2010
The First line of the material list says ONE SIZE,I hook or size to obtain gauge , then the next line says ONE SIZE J hook for borders That sounds like it is a One size fits all pattern . I suppose if you're on the petite size, you would use a smaller hook, or if you are big busted or otherwise, you'd use a larger hook to adjust the gauge(s). That is my guess
NEEDLER
Jul 12, 2010
Hi Everybody, No sizes are listed, but are available at caron.con . And they are S ( M, L, 1X, 2X). Hope this helps all.
Crafty Granny
Jul 12, 2010
Exactly what I have been looking for. I can picture it in several yummy colors.
Report Inappropriate Comment
Are you sure you would like to report this comment? It will be flagged for our moderators to take action.
Thank you for taking the time to improve the content on our site.