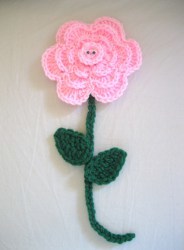
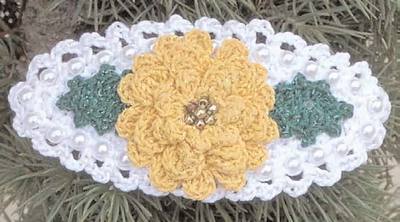
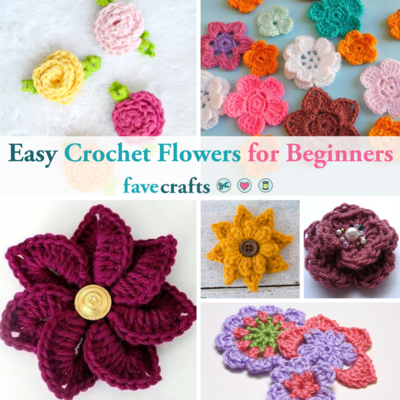
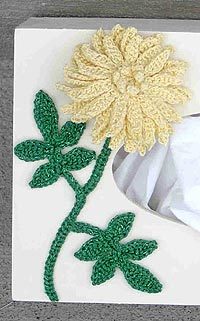
Crochet Chrysanthemum
This chrysanthemum crochet flower pattern creates a pretty, layered embellishment for clothing, accessories and home accents. This projects shows how to use the flower for decorating a tissue box.

Materials:
- Crochet cotton size 10: Small amounts each yellow (A) and dark green (B)
- Kreinik Blending filament (50 m per spool): 1 spool each #091 yellow (BFA) and 008 green (BFB)
- Size 7 steel crochet hook or size needed to obtain gauge
- Small amount polyester fiberfill or cotton ball
- Starch, Wooden Tissue Box and craft glue (if desired to finish as a tissue box as we have done)
Gauge: 9 sc = 1 inch
Pattern Note: Join rnds with a sl st unless otherwise stated.
Instructions:
FLOWER Base
Rnd 1 (RS): With one strand A and one strand BFA held tog, ch 2, 7 sc in second ch from hook, join in back lp only of first sc . (7 sc)
Rnd 2: Ch 1; working in back lps only, 2 sc in same st as joining, 2 sc in each rem sc around, join in first sc. (14 sc)
Rnd 3: Ch 1; working in back lps only, sc in same st as joining, 2 sc in next sc, [sc in next sc, 2 sc in next sc] rep around, join in first sc. (21 sc)
Rnds 4 & 5: Ch 1; working in back lps only, sc in same st as joining, sc in each rem sc around, join in first sc. (21 sc)
Rnd 6: Ch 1, sc in same st as joining, sc dec, [sc in next sc, sc dec] rep around, join in first sc. Fasten off, leaving length for finishing. (14 sts)
FLOWER Petals
Rnd 1: Join one strand A and one strand BFA held tog with a sl st in any rem lp of rnd 1 on Base, *ch 4, sc in second ch from hook, sc in each of next 2 chs**, sl st in next rem lp, rep from * around, ending last rep at **, join in st at base of first ch-4. (7 petals)
Rnd 2: Sl st in rem lp of rnd 2 of Base directly behind joining st, *ch 7, sc in second ch from hook, hdc in next ch, dc in each of next 3 chs, sc in next ch**, sl st in next rem lp of rnd 2 on Base, rep from * around, ending last rep at **, join in st at base of first ch-7. (14 petals)
Rnd 3: Sl st in rem lp of rnd 3 of Base directly behind joining st, *ch 8, sc in second ch from hook, hdc in next ch, dc in each of next 4 chs, sc in next ch**, sl st in next rem lp of rnd 3 on Base, rep from * around, ending last rep at **, join in st at base of first ch-8. (21 petals)
Rnd 4: Sl st in rem lp of rnd 4 of Base directly behind joining st, *ch 9, sc in second ch from hook, hdc in next ch, dc in each of next 5 chs, sc in next ch**, sl st in next rem lp of rnd 4 on Base, rep from * around, ending last rep at **, join in st at base of first ch-9. (21 petals) Fasten off.
Pin out Flower, straightening each petal. Apply starch with paper towel or small sponge. Let dry thoroughly. With tapestry needle, weave length left for finishing through tops of sts of last rnd of Base. Stuff Base with small amount of polyester fiberfill or cotton from cotton ball. Pull length left for finishing tightly to close opening. Fasten off.
FLOWER Calyx
Rnd 1 (RS): With one strand B and one strand BFB held tog, ch 2, 7 sc in second ch from hook, join with sl st in first sc. (7 sc)
Rnd 2: Ch 1, 2 sc in same st s joining, 2 sc in each rem sc around, join with sl st in first sc. (14 sc)
Rnd 3: Ch 1, sc in same st as joining, 2 sc in next sc, [sc in next sc, 2 sc in next sc] rep around, join with sl st in first sc. (21 sc)
Rnds 4-6: Ch 1, sc in same st as joining, sc in each rem sc around, join with sl st in first sc. At end of rnd 6, fasten off, leaving 18-inch length for finishing. (21 sc)
FLOWER Stem
Join one strand B and one strand BFB held tog with a sl st at bottom of Calyx, ch 41, sc in second ch from hook, sc in each rem ch across, sl st at bottom center of Calyx. Fasten off.
Stuff Calyx with polyester fiberfill or small amount of cotton. With length left for finishing, sew tops of sts of last rnd of Calyx to bottom of Flower Base.
FLOWER Leaf (make 2)
Rnd 1 (RS): With one strand B and one strand BFB held tog, *ch 7, sc in second ch from hook, dc in next ch, tr in each of next 2 chs, dc in next ch, sc in next ch*, ch 10, sc in second ch from hook, dc in next ch, tr in each of next 2 chs, dc in next ch, sc in each of next 2 chs, ch 11, sc in second ch from hook, dc in each of next 2 chs, tr in each of next 2 chs, dc in each of next 2 chs, sc in each of next 3 chs, sc in rem lp at base of next ch-10, ch 8, sc in each of next 2 chs on ch-10, sc in rem lp at base of first ch-7, rep from * to *, sl st in base of Leaf, ch 8 for Leaf Stem, sl st in second ch from hook and in each of next 6 chs, sl st at base of Leaf.
Rnd 2: Working in rem lps at base of first ch-7 of last rnd, sl st in each of next 6 sts, sl st over end of next st, ch 1, sl st in each of next 6 sts, sl st in rem lp of each of next 2 chs; working in rem lps at base of next ch-10, (sl st, ch 1) over end st, sl st in each of next 7 sts; working in rem lps of ch-11, sl st in each of next 10 sts, (sl st, ch 1) over end st, sl st in each of next 11 sts; working in rem lps at base of next ch-8, sl st in each of next 7 sts, (sl st, ch 1) over end st, sl st in each of next 9 sts; working in rem lps at base of next ch-7, sl st in each of next 6 sts, (sl st, ch 1) over end st, sl st in each of next 6 sts, sl st at base of leaf, sl st in each st across Leaf Stem to bottom of Leaf Stem. Fasten off, leaving short length for finishing.
Finishing as an embellishment on a tissue box cover.
Apply starch to Stem and Leaf. Pin out to dry, curving Flower Stem slightly. Let dry thoroughly.
With tapestry needle and length left for finishing, tack end of Leaf Stem on either Leaf to left edge of Flower Stem, approximately 2-1/4 inches from bottom of Flower Stem. Tack rem Leaf to right edge of Flower Stem approximately 1-1/2 inches from bottom.
With Craft glue, using photo as a guide, glue Flower, Stem and Leaves to left side of tissue box.
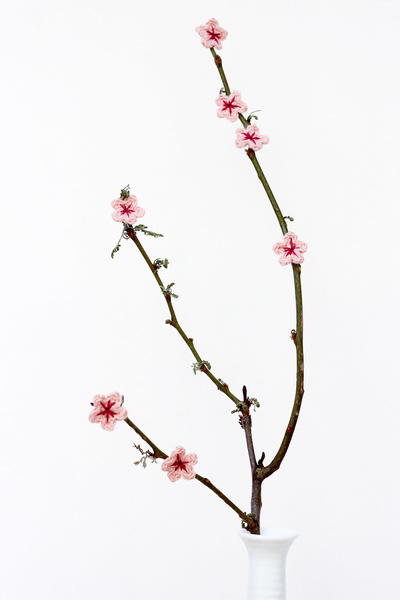
Read NextSpring Cherry Blossom Pattern
Your Recently Viewed Projects
Thanks for your comment. Don't forget to share!
dementeddragonfly7 3 0005558
May 02, 2019
I would have loved to try this, but I don't know what "RS" or "BFA" or "BB mean. Very disappointing
jsherris
May 08, 2019
If you have a look at the Materials list, BFA is the Blending Filament A - BFB is Blending Filament B. RS means 'Right Side' and WS means 'Wrong Side'. Before you try this pattern, have a look online for a few beginners patterns so that you can see how to gather the information needed to start your projects.
Hippie Chick
Apr 28, 2017
This makes a very cute applique that can be added to almost anything. A plain sweater could be jazzed up a little with a few of these sewn on to it. To be such a small flower, that is a lot of instructions. It is very detailed. It takes very little yarn to make one of these and is a good project to use up leftovers.
Sherry Buenrostro
Nov 26, 2009
Here I am spending all Thanksgiving alone. I decided to check my email and here are beautiful flowers to crochet. You made my Thanksgiving more meaningful. Thank you. I am busy printing your flower patterns.
Report Inappropriate Comment
Are you sure you would like to report this comment? It will be flagged for our moderators to take action.
Thank you for taking the time to improve the content on our site.