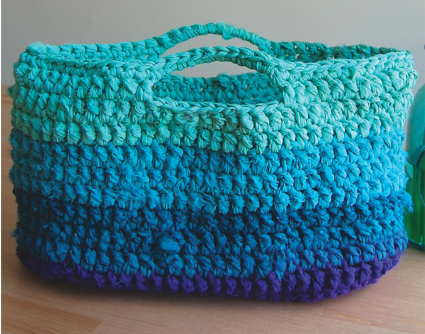
Quirky Crochet Handbag
 Visit Jaime at Crochet Dynamite.
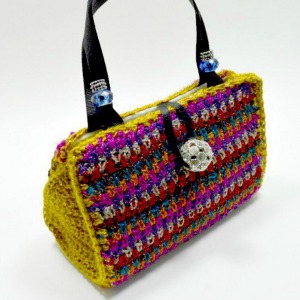
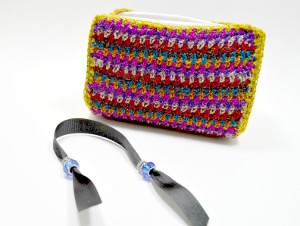
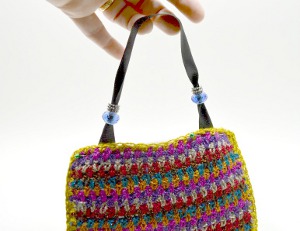
This Quirky Crochet Handbag is an explosion of color that you can carry with you. This tutorial on how to make a crochet purse involves alternating seven colors of yarn. Instead of looking chaotic, the effect is a cute striped pattern that allows the colors of yarn to blend slightly. This DIY handbag tutorial also includes techniques for keeping the shape of the bag intact and for preventing the handles from stretching out. The rhinestone accents on this bag allow you to dress it up or dress it down, so it looks great with any outfit.
You can find this project, as well as many other fabulous blogger projects, in our new eBook, The Best Blogger Craft Ideas 2014: Decoupage, Sewing, Jewelry Making, and More free eBook. Download your own free copy today!
Materials:
- Size F crochet hook
- Lion Brand bonbons
- 1/4 yard of bleached muslin
- 1/4 yard of Peltex 71 fusable interfacing
- Coats & Clark white sewing thread
- Coats & Clark invisible sewing thread
- Fiskars scissors
- Iron
- Darice Mix and Mingle beads
- 5/8" black grosgrain ribbon
- 1/4" black grosgrain ribbon
- Pen
- Yarn needle
- Sewing needle
- Straight pins
- Sewing machine - Optional: All of the sewing in this project can be hand sewn, but it is easier and faster to use a machine
Instructions:
Note: This project uses 8 bonbon colors to create the body of the handbag. Changed color every row, rotating through all 7 colors: pink, pumpkin, teal, brown, red, silver, and purple. Gold yarn will be used for the edging.
Outer Shell
Pink bon bon, ch 35
Row 1: hdc in 2nd ch from hook, (ch 1, skip 1 ch, hdc in next ch) 16 times , hdc in last ch (34 st)
Rows 2-64: change color, ch 1, hdc in first st, (ch 1, hdc in next ch space) 16 times, hdc in last st (34 st) Fasten off.
Attach gold yarn in the top corner of the crochet outer shell.
Ch 1, sc in each ch space across the top of the piece, 3 sc in the corner st, 42 sc evenly along the side, 3 sc in the corner st, sc in each ch space across the bottom, 3 sc in the corner st, 42 sc evenly along the side, 3 sc in the corner st, sl st to first sc to finish row. Fasten off.
Weave in remaining end.
Side Piece (2)
Gold bonbon, ch 16
Row 1: sc in 2nd ch from hook, sc in each ch across (15 st)
Rows 2-5: ch 1, sc in each st across (15 st)
Row 6: ch 1, sc 2 st tog, 11 sc, sc 2 st tog (13 st)
Rows 7-10: ch 1, sc in each st across (13 st)
Row 11: ch 1, sc 2 st tog, 9 sc, sc 2 st tog (11 st)
Rows 12-15: ch 1, sc in each st across (11 st)
Row 16: ch 1, sc 2 st tog, 7 sc, sc 2 st tog (9 st)
Rows 17-18: ch 1, sc in each st across (9 st)
Row 19: ch 1, sc 2 st tog, 5 sc, sc 2 st tog (7 st)
Rows 20-21: ch 1, sc in each st across (7 st)
Row 22: ch 1, 7 sc, ch 1, 15 sc evenly along side, ch 1, 15 sc across bottom of piece, ch 1, 15 st evenly along side, ch 1, sl st to first st to finish row. Fasten off. Weave in ends.
Lining
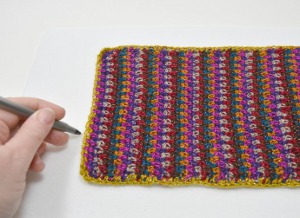
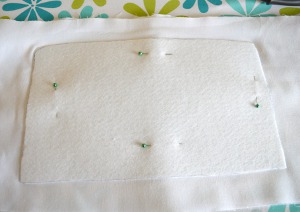
Trace crochet outer shell piece onto the interfacing. Cut along line with scissors to remove interfacing.
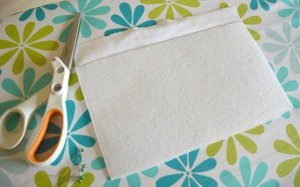
Iron the 1/4 yard strip of muslin to remove any wrinkles. Following manufacturer's instructions, fuse the interfacing to one end of the muslin strip.
Fold muslin in half behind interfacing. Pin in place. Using the edge of the interfacing as a guide and a 1/4" seam, use a sewing machine to sew along 3 sides of interfacing (short side, long side, short side).
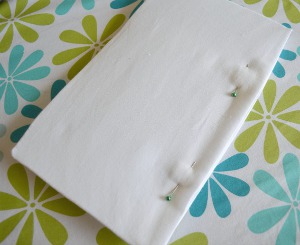
Leave 1/2" of fabric along unsewn side of the lining. On the 3 sewn sides, trim the muslin/interfacing to 1/8" from seam, making sure not to snip into the seam. Clip corners if necessary. Turn the lining right side out.
The interfacing is very stiff, and it will cause the whole piece to bow a little. Finger press the seams down to help fold them into place. Tuck the raw edges of the open side of the lining to the inside. Pin the edges closed.
Iron the lining to smooth any wrinkles and press all of the edges, paying careful attention to press the fabric along the open edge. Sew the open side closed using a 1/8" seam.
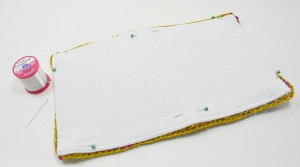
Pin the lining to the crochet outer shell. Using the invisible thread hand sew the lining to the crochet piece along both of the long sides only. Leave top part of the stitches in the crochet edging free. Make sure to sew into the center of the body of the stitch of the edging row of the crochet outer shell.
Adding Side Pieces
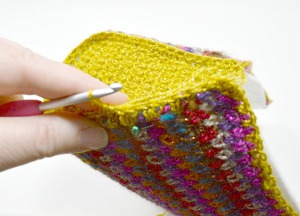
Pin the side pieces onto the lined crochet shell.
Using gold yarn, and matching stitches, single crochet the sides to the bag (42 st).
Handles
Cut two 12" lengths from the 5/8" ribbon.
Thread a silver and blue bead onto each end of one of the ribbons to create front handle. Slide end of ribbon between crochet shell and lining of the bag. Pin in place.
Make sure that the handle is centered and at desired length (Recommended length: 5" drop)
Repeat on other side of purse using the plain ribbon. Make sure that back handle drop is the same length as front handle drop, and that handles match up in the same place along the top edges of front and back of purse.
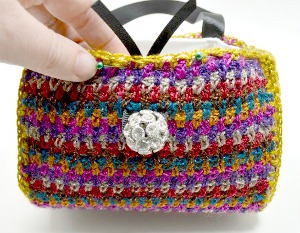
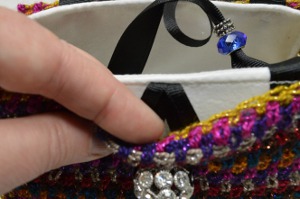
Closure
Cut two 6" lengths from the 1/4" ribbon.
Fold one of the pieces in half lengthwise at one end. Run a sewing needle through it to hold it in place.
Thread needle/ribbon through the large crystal center bead. Center bead on ribbon and remove needle.
Thread the ends of the ribbon through the crochet outer shell, 5 rows down from the top edge and centered. Push the ends of ribbon up to top edge of purse and pin in place.
Make a loop with the other 6" piece of ribbon. Adjust it so that it slips over the large center bead. Center it along the top edge of the back of purse, sliding ends of the ribbon between crochet shell and lining. Pin in place. Make sure that it is lined up with the center bead, and that the loop will close the purse to your satisfaction.
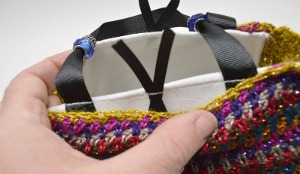
Using the sewing machine, sew the front side ribbons to the lining only, 1/8" from the top edge. This will keep the handles from pulling on and stretching out the bag.
Repeat on back side.
Tuck center ribbons down between crochet shell and lining. Pin crochet shell to the top of the lining. Using the invisible thread, hand sew the top edge of crochet to lining. Repeat on the back side.
Bottom of Bag
Find the crocheted row on the front of the bag that lines up with the bottom front corners of the purse. Use your fingers to crease along the row to make the bottom edge of the purse straight.
Repeat on the back side, making sure that the front of the purse and the back of the purse are the same length. Your purse will now sit flat and hold its shape.
Read NextHobo Bag
Your Recently Viewed Projects

Thanks for your comment. Don't forget to share!
princess6860504
Jan 25, 2017
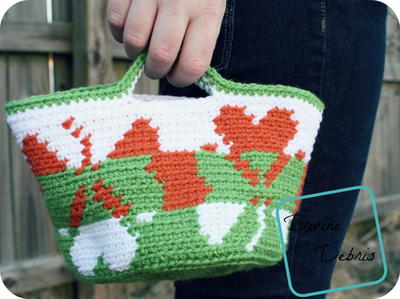
I love the Lion Brand Bon Bons yarns! I have used them for flower garland projects. An entire pack (which is what was used on this project) costs just 7.99 at Michaels. There is a jewel toned color pack which is stunning! I looked at one of the pictures toward the bottom of the page and she is holding the bag. It is very tiny!
terrilh2k2
Aug 02, 2016
This would be adorable as a full size handbag. I'd love to see the stitch count for that. Also, what is the finished size? It looks very small.
Report Inappropriate Comment
Are you sure you would like to report this comment? It will be flagged for our moderators to take action.
Thank you for taking the time to improve the content on our site.
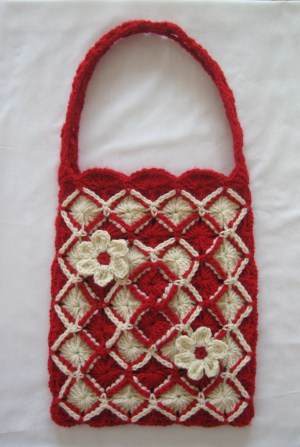
![Battenberg Crochet Granny Square Bag Pattern [Free]](http://irepo.primecp.com/2022/08/532101/Battenberg-Bag-02_Category-CategoryPageDefault_ID-4857588.png?v=4857588)