How to Make Cute Toilet Paper Storage
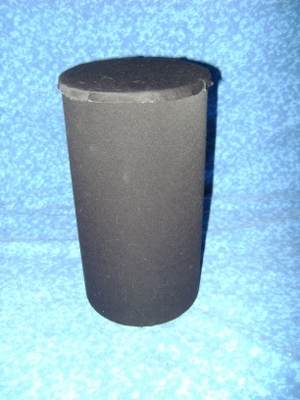
Looking for DIY storage solutions? Repurpose an oatmeal container to use as cute toilet paper storage that will blend in nicely with your bathroom decor. This video from Patty Biehler walks you through it!

Materials:
- Scissors
- Glue gun or adhesive
- Fabric of your choice
- Chalk pencil (for making marks where to cut fabric)
- Extra glue sticks if using glue gun
- Oat Meal container (must be the same size of the toilet paper roll you use)
Video:
Instructions:
- Place the container on its side and measure out the amount of the fabric you will need for the size you chose. Do the same for the lid and bottom of the container. The reason for measuring the bottom is to cover the container's bottom and excess fabric left behind that might be messy.
- Place a strip of the glue onto the side from top to bottom. Then press fabric onto of the glue. Press the fabric down until it feels set. Then place another strip of glue onto of the edge of the fabric you just glued down. Pull the fabric end over to the glue and press it down onto the glue making sure to get the glue into the fabric. Then make another strip of glue again next to that last area. Press the fabric down again and make sure it is firm on holding.
- Turn the container over to the bottom. Make small darts in the fabric (this makes it easier for the fabric to lay down and not bubble up or make creases.) Put glue in small amounts as you go so the glue doesn't dry as you are working. Once you have done that all the way around then you can place your extra fabric over that. Hide any uneven areas that might look unpleaseing to the eyes.
- Now turn the container to the top. Place glue in small amounts again as you go. Place the glue around the inside top edge of the container. Then press the fabric onto the glue and make sure it is set into the fabric. This is done all the way around until you meet up where you started.
- Your body of the container is done. Now it's time to start on the lid. Pleace the lid onto the fabric. Make sure the fabric isn't showing the side you want, the wrong way. Place small amounts of the glue on the lid's outer corners. Then press the fabric onto the glue. Press firmly. This is because it is on plastic now and we have to rely on the farbic to hold onto the lid. Once you have finished with your lid then you can place your item or items in the container and you're done.
Read NextQuick and Easy Crochet Butterfly
Your Recently Viewed Projects
Thanks for your comment. Don't forget to share!
faystevenson 01456 69
Sep 02, 2013
Really needs some decoration
wildtexspirit 0105 834
Feb 09, 2018
I left it that way for those that make it to do it however they choose. . This is just a simple tutorial for those that want to know how to make it.
Editor Dana
Feb 12, 2018
Hi there! By the way, I just fixed the video so it appears on the page now. Have a great day!
ewisch 1453078
Jun 18, 2012
I would have added some design on the container, such as lace, a picture or someting that matches your bathroom.
wildtexspirit 0105 834
Feb 09, 2018
Yes it is all up to you on what to put on it. I only made the tutorial for those that wanted to know how to make one. The canvas is open to decoration of the one to make it.
Report Inappropriate Comment
Are you sure you would like to report this comment? It will be flagged for our moderators to take action.
Thank you for taking the time to improve the content on our site.