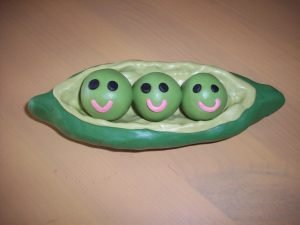
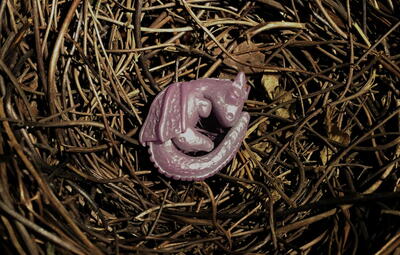
Peas in a Pod Figurine
This adorable Peas in a Pod Figurine is fun and easy to make. Follow this polymer clay tutorial and you'll see just how quickly you can put together this darling home decoration. This tutorial also includes several tips on what crafting supplies and technique to use so that this simple project is even easier to make. Made with polymer clay and simple tools, this cute craft is great for little girls and boys alike. It's also a heartfelt and meaningful gift for parents-to-be.

You can find this project, as well as many other Polymer clay tutorials, in our free eBook, 24 Polymer Clay Tutorials: Polymer Clay Jewelry, Decor and More!

Materials:
- 1 package STUDIO by SCULPEY “Clover”
- 1 package STUDIO by SCULPEY “Avocado”
- 1 package STUDIO by SCULPEY “Peapod”
- 1 package STUDIO by SCULPEY “After Midnight”
- 1 package STUDIO by SCULPEY “Blush”
- 1 package STUDIO STYLE and DETAILS TOOLS by SCULPEY (three dual purpose tools each with 1 ball end, stylus, and 1 flexible tip shaper)
- 1 package CLAY TOOL VARIETY SET by SCULPEY (three double-ended tools to shape, texture and detail)
- 1 STUDIO by SCULPEY ACRILIC CLAY ROLLER
Instructions:
-
Break apart “Clover” into the little squares and start working the clay in your hand. Start with two or three pieces and keep adding squares until the entire block is workable in your hand. Shape it into a peapod shape by rolling it on a flat surface and flattening the two edges of the roll. Once the pod is shaped to your liking, place it on a hard surface and press the middle down softly to create a flat surface on the bottom of the pod.
-
Using your knife from your variety set, cut your peapod down the middle, but be careful not to cut it in half…a ½ inch slit will do you just fine. Carefully pry the pod open with your fingers and reshape to your liking. Set aside.
-
Break off half of your “Avocado” log and do the same as you did with the “Clover” clay. For best results, wash your hands between clay mixing to prevent colors from spreading. Once your Avocado clay has warmed up, use the rolling pin and roll it until it’s about ½ inch thick and long enough to comfortably cover your pod. Place the Avocado sheet over the opening on your pod and press it into the hole you’ve created in the pod. Using your knife, remove the excess Avocado clay and use your fingers or the large ball roller to tuck the edge of the Avocado sheet into the peapod edge.
-
With the excess Avocado clay, roll a log about ¼ inch thin and long enough to go around the edge of the Avocado sheet. Wind the clay snake around the edge and gently push it down with the large ball roller or your finger.
-
Place the peapod in the palm of your hand and use the large ball roller to rub the fingerprints out of the clay. You can also give the pod as much texture as you’d like with this tool. Once the fingerprints have been removed and the pod is to your liking, set it aside.
-
Break off six squares of “Peapod” and separate them. Work each square individually to create three peas (two squares will give you one pea). Roll peas in the palm of your hand and place inside the peapod when you’re done. Don’t press them into the pod, they will stick to the pod and to each other while baking.
-
Once your peas are cozy in the pod, use the pointed needle tool to mark where you’d like the eyes of the peas to be by literally poking eye holes in each pea. Break off one square of “After Midnight” and create eyes by ripping off small pieces at a time and rolling them between your fingers to make small circles. Wash your hands after this step.
-
Finally, break off a square of “Blush” and roll it into a thin log. Cut the log into three ½ inch strips and, using a small ball roller, softly press the strips onto the peas to create a mouth.
- Bake your peas according to the package directions and be careful not to go over 30 minutes or else your clay will burn.
Tips:
- Instead of using the ball rollers, use the back of a spoon to smooth surfaces of your clay. You can also use a clean pencil eraser to achieve the same effect.
- Instead of a knife, use your fingers, a butter knife, scissors, or a kabob stick to slice the clay. If you use utensils for clay projects, PLEASE, PLEASE, PLEASE, make sure you take extra care to wash them well after use.
- Instead of the acrylic roller, place your clay between two sheets of wax paper and use your kitchen roller or refrigerated biscuits to roll out your clay. Covering your clay with wax paper will help prevent clay from sneaking into your wooden roller.
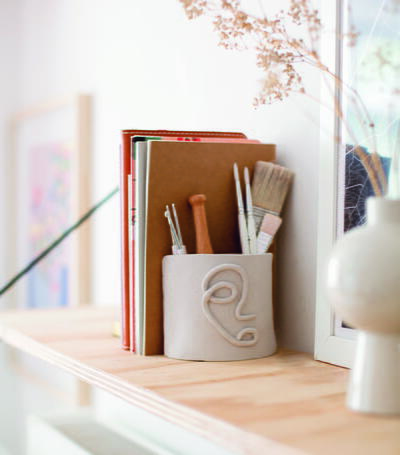
Read NextFresh Faced Bookend