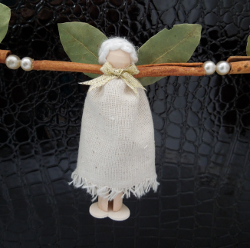
Cinnamon Angel Garland
You only have to open your pantry to make a sweet and simple Cinnamon Angel Garland from Heidi Borchers. Use cinnamon sticks and bay leaves to construct this adorable mantel decor. Christmas garland ideas have never looked (or smelled) so good!

Materials:
- Aleene’s Original Tacky Glue
- Fabric scraps (for dresses)
- Wooden doll clothespin (for body) – painted fleshtone
- Drill and extra small drill bit
- Needle and thread (to match fabric color)
- Small wood heart (for feet) – painted ivory
- Embroidery floss – ivory
- Cinnamon sticks
- Bay leaves
- Pearl beads
- Wooden bead (for head)
- Yarn
- Raffia
- Wedding novelty ring (for halo)
- Narrow gold ribbon (for bow)
Instructions:
-
For each angel, cut fabric 3″x5″.
-
If desired, to create fringe along fabric edge, apply line of glue approximately 3/8″ from edge of fabric. Let dry then remove threads to create fringe.
-
Add line of glue to one 3″ edge and fold over other 3″ edge to create tube. Let glue dry.
-
Drill small hole through neckline of clothespin.
-
With needle and thread, stitch running stitch along top edge of fabric. Add line of glue around neckline of clothespin. Slip fabric over clothespin, align stitching at neckline (over glue) and pull thread to gather fabric around neckline. Press fabric into glue. Tie off thread to hold gathers in place.
-
Align cut in clothespin so that it faces forward. This will help to assure that you are applying glue correctly for hair. Apply glue to top and back of clothespin head for hair. Cut length of yarn and starting with one end, press into glue and loop around and around to create hair.
-
Glue heart to end of legs with point of heart facing to back. Let all glue dry completely.
-
Cut embroidery floss to desired length of garland (add extra for ends). Run embroidery floss through neck of angel. Add one cinnamon stick to each side and one pearl to each side (for hands).
-
Determine where you want angel on the garland and tie a double (or triple knot) next to pearl. This will help to keep the angel from moving or shifting on the embroidery floss. Repeat to add more angels to garland. Tie off embroidery floss at end.
-
For wings, glue two bay leaves to back of angel.
-
For halo, glue ring in place on head.
-
Tie ribbon into bow and glue at neckline. Let dry completely.
- Tie raffia to ends of embroidery floss.
For a comprehensive video tutorial of this project, check out Aleene's Charming Cinnamon Angel Garland.
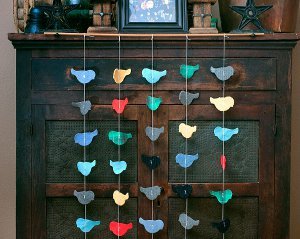
Read NextBold Bird Garland
Your Recently Viewed Projects
Thanks for your comment. Don't forget to share!
lcarr
Oct 23, 2018
When I first looked at these I wasnt very interested in them. They didnt catch my eye. But the more I thought about them, the more I realized they would make a great decoration. Not only are they festive, but they are also traditional looking. The cinnamon and Bay leaves will make the room smell wonderful. I do have a concern though. Bay leaves tend to crumble. What should be done to prevent that from happening?
Report Inappropriate Comment
Are you sure you would like to report this comment? It will be flagged for our moderators to take action.
Thank you for taking the time to improve the content on our site.