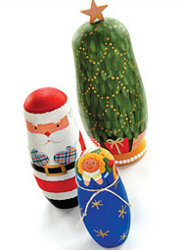
Christmas Nested Egg Dolls
Looking for a unique Christmas craft to make this holiday season? Try creating the Christmas Nested Egg Dolls. You can make them as personalized as you want and they make a great holiday gift or home decor.

Materials:
Plaid Supplies-
- 2151 - FolkArt ® Gems™ - Diamonds, 2 oz.
- 2715 - FolkArt ® Shiny™ Acrylic Paint - Licorice, 2 oz.
- 401 - FolkArt ® Acrylic Colors - True Blue, 2 oz.
- 402 - FolkArt ® Acrylic Colors - Light Blue, 2 oz.
- 437 - FolkArt ® Acrylic Colors - Lipstick Red, 2 oz.
- 449 - FolkArt ® Acrylic Colors - Olive Green, 2 oz.
- 478 - FolkArt ® Acrylic Colors - Lime Yellow, 2 oz.
- 660 - FolkArt ® Metallics - Pure Gold, 2 oz.
- 901 - FolkArt ® Acrylic Colors - Wicker White, 2 oz.
- 917 - FolkArt ® Artists Pigments™ - Yellow Ochre, 2 oz.
- 923 - FolkArt ® Acrylic Colors - Clover, 2 oz.
- 949 - FolkArt ® Acrylic Colors - Skintone, 2 oz.
Other Supplies-
- #5 & #12 round brush
- #1 Liner brush
- ½” flat brush
- 1” flat wooden star
- 10” – DMC Precious Metal Effects cording
- Unfinished nested egg dolls
- Transfer paper
- Glue
- Pencil
- Craft knife and blades
Instructions:
Tree-
- Transfer gift designs to base of largest doll. Basecoat doll with Olive Green, painting around packages. Paint base of doll Yellow Ochre. Referring to photo for color placement, paint gifts accordingly. (Do not paint ribbons and bows)
- Starting at bottom of tree and painting upwards, apply branches using #12 round brush and Clover. Start stroke from bottom and draw up with less pressure. Overlap each layer of branches slightly and finish at top.
- When dry, paint a highlight on each branch as shown using a mix of equal parts Clover and Lime Yellow. Wipe excess paint off so brush is slightly dry.
- Using opposite end of small brush, apply Pure Gold dots to create garland. Paint bottom row first which will then give you placement for next row on up.
- Paint bows and ribbons on gifts and apply white dots to edge of tree “skirt” using opposite end of largest paintbrush.
- Cut tips off of bottom of star using craft knife. Paint star Yellow Ochre. Apply glitter paint and glue to top of tree when dry.
Santa-
- Transfer pattern to middle egg doll. Referring to photo, paint accordingly.
- Shadow lines are made by mixing equal parts Wicker White and Licorice, Lipstick Red and Licorice, Peach Perfection and Lipstick Red.
- Apply glitter to hat band, cuffs, edge of coat and bottom of pants.
- Eyes are made using opposite end of smallest brush with Licorice.
Toy Sack-
- Transfer pattern to smallest egg doll. Refer to photo for color and placement.
- Paint stars Pure Gold.
- Fold lines on sack are made with equal parts True Blue and Licorice.
- Tie silver cording around neck of sack.
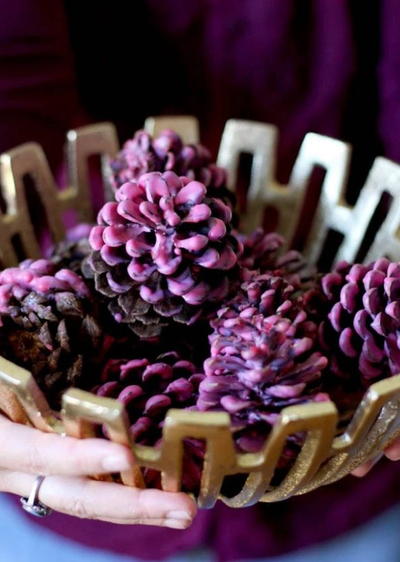
Read NextCheery Pinecone DIY Firestarters
Your Recently Viewed Projects
Thanks for your comment. Don't forget to share!
sketor98 5879463
Dec 17, 2011
I, too, would like to know where the patterns are that we are told to transfer to our dolls. I probably can fake it, but would feel more confident if I could see patterns.
Report Inappropriate Comment
Are you sure you would like to report this comment? It will be flagged for our moderators to take action.
Thank you for taking the time to improve the content on our site.