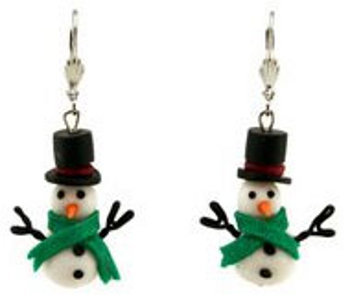
Snowman Bead Earrings
These cute, homemade Snowman Bead Earrings bring a little fun to the coldest time of year. Wear these during the cold months of winter and show off your spirit. Beaded jewelry patterns like this one make the holidays so special. Bead jewelry patterns don't have to be complicated - follow this patterns and find out how easy it is to create your own pieces. Soon you'll want to make your own earrings for every holiday and special occasion.

Materials:
- FIMO® Soft polymer clay: Metallic White, Metallic Red, Metallic Green, Black, a pinch of Mandarin Orange
- Liquid FIMO® Decorating Gel
- AMACO® Fun Wire - 24 gauge black
- Two silver tone 2" eye pins
- Two silver tone lever back earring hooks
- AMACO® polymer clay and craft oven
- AMACO® pasta machine
- AMACO® PolyBlade
- AMACO® PolyRoller
- AMACO® Bead Baking Rack with bead piercing pins
- AMACO® Tube Bead Roller - Set 1
- AMACO® Tube Bead Roller - Set 2
- AMACO® Professional Bead Roller - Set 2
- AMACO® Professional Bead Roller - Set 8
- Work Surface (granite, marble or glazed ceramic tile recommended)
- Round nose pliers
- Needle nose pliers
- Wire clippers
Instructions:
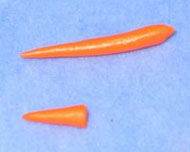
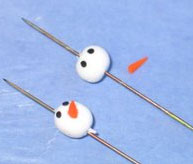
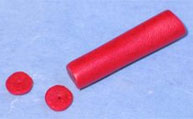
- Noses: Condition a small amount of Mandarin clay. Roll it into a 1/8" thick snake. Taper one end of the snake into a point. Cut off a 1/4" piece from the pointed end, this forms the carrot nose. Repeat this step to make a second tiny carrot (see photo #1). Place the noses on a tray and bake for 30 minutes at 230-265 F.
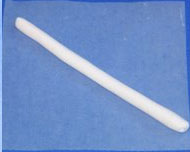
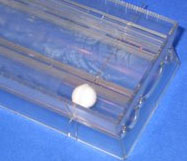
- Snowman body: Condition the metallic white clay. Roll it into a 1/2" thick snake (see photo #2). Cut off a 2" section and press it into the groove on the set #2 bead roller to make a 12 mm round bead. Trim off excess clay off the top, and remove the trimmed clay from the groove. Cut off two 3/4" sections of clay, and form into two balls. Place one ball back into the bead roller groove, place the other half of the bead roller on top, and roll your 12 mm bead. Align the bead with the bead piercing marks and insert bead-piercing pin (see photo #3). Repeat this step with the second ball of clay to form a second 12 mm pierced bead.
- Snowman head: Repeat step 1 to form the 2 snowman heads, this time using the small round bead roller set. Follow the package directions to make two pierced 8 mm beads out of the metallic white clay.
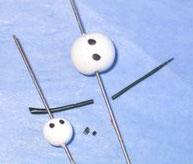
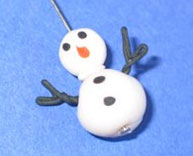
- Eyes and buttons: Condition the Black clay. Roll a small amount into a 1/16" thick snake. Cut of eight very thin slices. Place two slices on each snowman body for buttons. Place two slices on each snowman head for eyes (see photo #4).
- Add noses: Dab a bit of the Liquid FIMO® decorating gel on the snowman heads just below the eyes. Press the carrot nose in place, sinking at least 1/3 of the flat end of the cone into the bead (see photo #5).
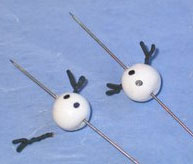
- Arms: Cut off four 2" pieces of Black Fun Wire™. Form a very small wishbone shaped fork in the wire with your pliers, and then twist the cut ends together. Trim the twisted ends down to 3/8". Make three more pieces like the first. Dip the trimmed end of one wire fork in liquid FIMO® and insert into one side of one of the snowman bodies, sinking it in at least 1/8". Dip the trimmed end of a second wire fork in liquid clay, and insert in the opposite side of the snowman body. Repeat this step for the second snowman (see photo #6). Place body and head beads on the bead baking rack. Bake for 30 minutes at 230-265 F and then allow to cool.
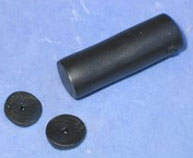
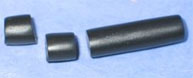
- Form the hat parts: Roll a small ball of Black clay. Roll a 9 mm tube bead with Black clay using set #1 tube bead roller. Place the tube of clay on your work surface. Trim off one of the uneven ends. Cut two 1/16" slices (or slightly thinner) Pierce each disk in the center with a bead piercing pin (see photo #7). TIP: to prevent distorting the tube, roll the tube toward you on your work surface and keep your clay blade perfectly perpendicular to the clay tube as you cut. Use set #2 tube bead roller to roll a 6 mm tube of black clay. Cut two 3/16" slices using the same method as just described (see photo #8). Also roll a second 6 mm tube out of conditioned metallic red clay. Cut two very thin slices from this tube (less that 1/16" thick) (see photo #9). Pierce the red and black beads with bead piercing pins. Place all of these pieces on the bead baking rack.
- Assemble Snowmen: Slide one snowman body onto a 2" headpin. Dab a little Liquid FIMO® onto the top of this bead. Roll a 1/8" ball of unbaked Metallic White clay, and slide it onto the headpin. Dab some more liquid clay on top of this ball. Slide one snowman head in place, flattening the ball in between. Repeat for the second snowman (see photo #10).
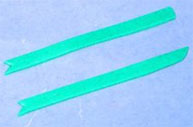
- Add scarf: Condition Metallic Green clay. Roll it into a sheet on the fourth thickest setting on the pasta machine. Cut two strips that are 2" long and 1/8" wide. Cut a small "V" at each end of each strip (see photo #11). Take one strip and wrap it around the neck of the first snowman, overlapping the ends. Repeat for the second snowman, overlapping the ends in the opposite direction (see photo #12). Place the snowmen on the bead baking rack and bake the snowmen plus the hat parts for 30 minutes at 230-265 F.
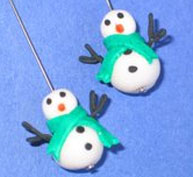
- Assemble hats: Once all the parts are cooled, place the thin 9 mm black disk slices on the heads, then the red band slice, and then the 6 mm black tube slice for the top of the hat (see photo #13). Form a 1/8" loop at the top of each snowman and trim off the excess wire. Hook each loop onto a lever back, and close the loops. Your snowmen are complete!
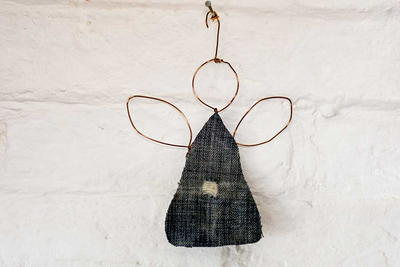
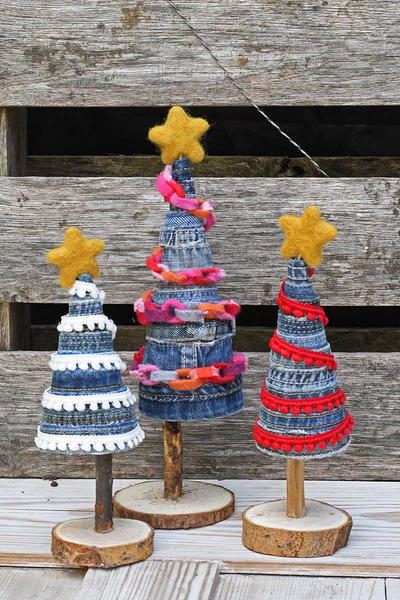
Read NextUpcycled Denim Christmas Trees
Your Recently Viewed Projects
Thanks for your comment. Don't forget to share!
mulberrygalprinces s
Jun 17, 2018
I love to work with clay. Some one gave me their supply of clay and tools when they moved. I ended up with every color Premo makes. Talk about a gift! So I started playing with it and have made all kinds of things. Remember, unlike air dry clay, polymer can sit for awhile f you need a break.
mrb 3583276
Feb 20, 2013
My daughter and I made very cute snowmen like this when she was in Middle school in the '90's. We had polymer clay, a kitchen table with waxed paper on it and a few inexpensive jewellry findings...oh, yes, and we had the kitchen oven which, used carefully with designated pans and the fan on is fine.
charlene4899
Dec 04, 2009
An easier way to make these cute earrings is to buy cute buttons from Micheals or Fabric stores, cut off the shank from the back, glue on or screw in an eye screw, add your shepherds hooks and voila! Your earrings are done. Usually a package of buttons have 10 buttons for $2! You do the math!
Report Inappropriate Comment
Are you sure you would like to report this comment? It will be flagged for our moderators to take action.
Thank you for taking the time to improve the content on our site.