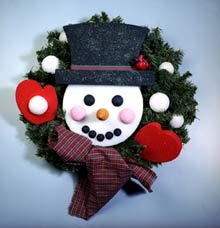
Decorative Snowman Wreath
Acrylic paints and Styrofoam balls come together to create this adorable snowman wreath. This Christmas season, be sure you have this little guy on your door welcoming all your friends to your home. This is a cute wreath to have on display both indoors and out, and it's super easy to make and assemble. You can even have this wreath out on display all winter long, from December through February!

Materials:
- (3) 2 1/2" STYROFOAM™ Brand Foam balls
- (4) 2" STYROFOAM™ Brand Foam balls
- (1) 1/2" STYROFOAM™ Brand Foam ball
- (3) 1" STYROFOAM™ Brand Foam balls
- Artificial feathered cardinal, 3-1/2"
- Plaid cotton fabric, 45" wide, 1/4 yd.
- Red/green striped grosgrain ribbon, 5/8" x 1/3 yd.
- Acrylic paints: red; orange; black; pink
- Artificial pine wreath, 24"
- Green chenille stems, two
- Cloth-covered floral wire, 28-gauge, 1 yd.
- Multi-colored glitter
- Serrated knife
- Candle stub or paraffin
- Fine-line black permanent marker
- Pencil
- Disposable palette
- Small disposable bowl
- Ruler
- Wooden toothpicks
- Stencil brush, 3/8"
- Water basin
- Paper towels
- Scissors
- Low-temp glue gun and glue sticks
- Thick, white craft glue
- Pattern
Instructions:
-
Wax serrated knife with candle stub or paraffin and cut foam balls in half as follows: one each 1-1/2" (eyes), 2" (cheeks) and 2-1/2" (mitten snowball); three 1" (mouth). Set aside one 1" half-ball and one 2-1/2" half-ball for future projects.
-
Cut 1-3/4" x 12" rectangle from foam sheet for hat brim. Cut one hat pattern from foam sheet, cutting along outline. Carefully cut mitten pattern from center of hat pattern; cut two mittens from foam sheet.
-
To create nose, use fingers to shape tip of foam cone to a point. Use knife to shave foam, and fingers to smooth foam, into carrot shape; base diameter should measure about 1-1/4".
-
Refer to diagram to position hat over foam disc (face). Cut and discard portion of disc directly under hat crown.
-
Using stencil brush to "scrub" paint into foam surface, paint pieces as follows: hat, hat brim, eyes, and five 1" half-balls (mouth) black; cheeks pink; nose orange; mittens red. While paint is still wet, sprinkle with glitter. Let dry.
-
Insert toothpicks into half-ball snowball cut in Step 1, as well as remaining foam balls. Mix equal parts white glue and water in small bowl. Holding each ball by toothpick and using stencil brush, apply glue/water mixture to foam surface and sprinkle with glitter. Stand toothpick in scrap foam until glue sets. Apply glue/water mixture and glitter to face in same way; let dry.
-
Apply glue to ends of three more toothpicks and insert halfway into flat edge of head. Apply glue to pick ends and head edge; press hat onto toothpicks. Glue brim to hat, covering seam where it meets head. Glue ribbon across hat, just above hat band. Glue bird to brim.
-
Apply glue to end of toothpick and insert halfway into flat base of nose. Cut three toothpicks in half; glue pieces into flat sides of cheeks, eyes and mitten snowball. Apply glue to pick ends and foam edges; press pieces into face and mitten. Glue mouth half-balls to face.
-
Fold one chenille stem in half and twist ends together around top center back of wreath for hanger. With hanger at 12 o' clock, arrange face, mittens and snowballs on wreath.
-
Tear 6"-wide scarf from plaid fabric, tearing from selvage to selvage (finished edges). Fold scarf so one end is about 8" longer than the other. Place scarf on wreath as shown, with longer end on bottom.
-
Cut wire in half; fold each piece in half. Use folded wires to secure scarf to wreath at fold and opposite side. Fold longer scarf end forward over second wire.
- Bend remaining chenille stem into 3"-wide "U" shape. Glue stem to back of hat 1" below top edge. Glue all foam pieces to wreath. Using chenille stem, wire top of hat to wreath.
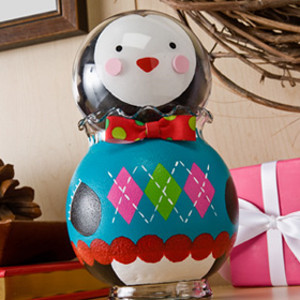
Read NextPenguin Goodies Bowl