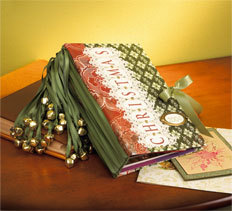
Decorative Christmas Card Album
In eight steps you can have your own handmade decorative Christmas card album to store all your memories and precious moments. Cardstock, ribbon and jingle bells just says Christmas.

Materials:
- 12" x 12" mat board, book board, or heavy chipboard "
- 20 yds. of 1/4" sage green ribbon*
- Printed cardstock*: 2 sheets each green print and red print
- Cream cardstock*
- Voila die-cut cardstock ribbon*
- Large oval punch*
- 12" of 5/8" sage green ribbon*
- Large gold eyelets
- Gold leafing pen*
- Number stamps
- Oval book plate*
- Moss green dye ink*
- Eyelet setter*
- Small jingle bells
- Small gold brads
- Dimensional glue dots*
- Multi-purpose glue*
- Bone folder
- Computer & printer
- Craft knife & mat
- Ruler
- Scissors
Tip:
- Folding cardstock is easier if you score along the edges with a bone folder, using the book board as a guide.
- To make a smooth cover surface, use bone folder to disperse glue evenly.
Steps:
- Make covers. Cut mat board into two 6" x 9" pieces and one 2" x 9" piece. Cut a 7" x 10" piece of green printed cardstock. Cover both pieces of mat board, leaving a 1/2" border on all sides. Trim corners to 45 degree angle and fold to back. Cut a 5 3/4" x 8 3/4" piece of red printed cardstock. Adhere to inside of mat board.
- Make spine. Cut a 5" x 10" piece from red printed cardstock. Attach to spine mat board, centering left to right and top to bottom. Cut a to 3" x 9" piece of green print paper, Adhere to reverse side of spine, leaving 1/2" on each side. Gently score all sides of the printed paper along the mat board edges.
- Assemble cover. Place spine with red side down on flat surface. Apply adhesive to one side of the excess paper, leaving a 1/8" space. Attach book cover, inside up. Repeat with second cover. Be sure green spine lining is under book covers.
- Make letters. Use the computer to print the word CHRISTMAS in red ink to match paper. Print on cream cardstock with space between the letters. Punch each letter out using a large oval punch.
- Apply die-cut strip. Trim die-cut strip so there are nine openings. Carefully remove adhesive paper cover along one side 1/2" from of edge. Apply to cover, being sure to overlap edge where red and green print cardstock meet. Slide punched letters under each opening and adhere with a drop of adhesive. Remove remaining paper cover and adhere rest of die cut to book front. Trim shanks from small brads and adhere brad tops between each letter with adhesive.
- Embellish. Apply leafing pen to bookplate and small brads. Stamp date with Moss ink on cream cardstock. Adhere behind bookplate. Place brads in holes of book plate and adhere all to cover using dimensional glue dots.
- Make closure. Use eyelet setter to place eyelets on front and back covers, centering on edge opposite spine. Thread 5/8" ribbon through and tie a knot in each end to secure. Add a drop of adhesive to secure ends of ribbon.
- Finish. Cut 20 lengths of ribbon one yard long. Tie around spine, knotting at top of spine and allowing ends to hang. Tie bells to each ribbon end, securing with a drop of adhesive. Arrange cards in ascending size and slip into ribbons on inside.

For more craft ideas, tips & projects from the Creative Home Arts Club, be sure to visit http://creativehomeartsclub.com
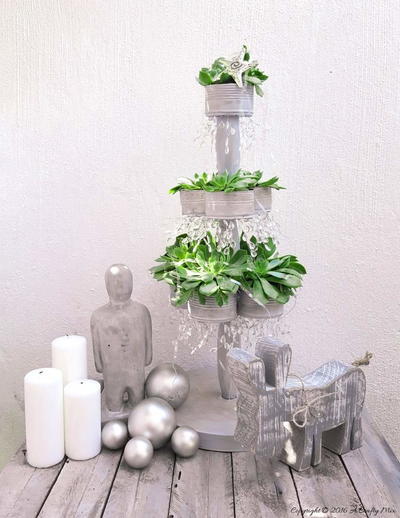
Read NextTin Can Succulent Christmas Tree
Your Recently Viewed Projects
Thanks for your comment. Don't forget to share!
Weberme
Dec 01, 2016
What a great idea for those who love to keep their Christmas cards for those special memories. Wondering what to get you grandmother or great grandmothers for Christmas. This is a good one especially if you find cards all over the house (like me). A Christmas card album just like the photo albums but to put cards in. What a great concept. A great home made gift made with love by your hands. This will be so special and a keepsake for many years and if you let those grands or great grands help it will even be more special.
Report Inappropriate Comment
Are you sure you would like to report this comment? It will be flagged for our moderators to take action.
Thank you for taking the time to improve the content on our site.