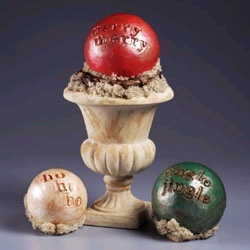
Christmas Sentiment Spheres
With a coat of metallic bronze paint, simple foam balls become fun and fancy Christmas spheres. Spell out "Merry Merry," "Ho Ho Ho," or whatever you like for the holidays.

Materials:
- STYROFOAM Brand Foam:
- Balls: 5", two; 4", one
- Vase Insert
- Metallic bronze acrylic paint
- Silver leafing glaze
- Brown antiquing gel
- Air-dry clay, one pkg.: red; green; natural (designer used Makin's Clay® by ProvoCraft)
- Ivory urn, 9"
- Twig wreath, 4"
- Plastic "stone" letter stamps, lowercase
- Natural reindeer moss, one bag
- Serrated knife
- Candle stub or paraffin
- Ruler
- Small roller tool
- Small round paintbrush
- Disposable palette
- Water basin
- Paper towels
- Scissors
- Waxed paper
- Air-tight plastic bag
- Low-temp glue gun and glue sticks
- Thick, white craft glue
Steps:
- Wax serrated knife with candle stub or paraffin. Cut thin slice from bottom of each foam ball to create flat base.
- Cover work area with waxed paper. Roll red clay to 1/4" thickness on waxed paper.
- Use fingers to mold clay around one 5" foam ball, avoiding flat base and 1"-2" area above base near back of ball. Piece clay together as needed to fill in gaps. Use small roller to smooth clay. Place any excess clay into air-tight bag for future use.
- Stamp "merry merry" on front of ball as shown. Let dry overnight.
- In same way as red ball, make 4" natural ball and 5" green ball. Stamp natural ball with "ho ho ho"; stamp green with "jingle jingle." Let dry overnight.
- Place small amount of silver glaze on paper towel and rub over stamped balls. Remove excess glaze with dry paper towel. Let dry.
- Repeat Step 6 using brown antiquing gel.
- Use small paintbrush to paint stamped lettering metallic bronze. Remove excess paint with dry paper towel.
- Repeat Step 6 using very small amount of metallic bronze paint.
- Use small paintbrush to apply antiquing gel highlights to stamped letters. Let dry. Place very small amount of antiquing gel on paper towel and rub over urn. Let dry.
- Glue foam vase insert into urn and twig wreath to urn rim. Use serrated knife to trim insert even with top of wreath.
- Glue red ball to twig wreath and vase insert. Glue small pieces of moss around urn edges and to wreath, covering exposed portions of ball. Fill in gaps in moss as needed. Let dry.
- Glue small pieces of moss to flat base and back of each remaining ball. Let dry.
®™ Trademark of The Dow Chemical Company ("Dow") or an affiliated company of Dow. For more project ideas, please see styrofoamstyle.com.
If you like this project, we also suggest:
Decorative Floral Balls
Faux Leather Spheres
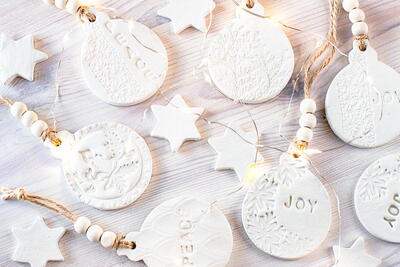
Read NextAir Dry Clay Ornaments