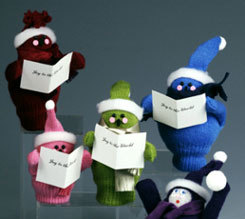
Caroling Gloves
Get creative this holiday season and make some crafts out of your old gloves. These adorable caroling gloves can be made using felt, sewing threads, pom poms and more. In eight easy steps they'll be ready for production.

Materials:
- STYROFOAM* Brand Foam:
- Small caroler (pink)
- Medium caroler (green, red)
- Ball, 1-1/2"
- Large caroler (blue)
- Balls: 1-1/2"; 3"
- Egg, 3-1/16"
- Egg, 1-15/16"
- Ball, 1-1/2"
- White pom-pom, 1/2" (use 1/4" pom-pom for small caroler)
- Black craft foam, 2mm thick, scrap
- Black half-round beads, 5mm, two
- Stretch glove, adult (use infant glove for small caroler)
- Felt: color to complement glove, 1-1/2" x 13"; white plush, 1/2" x 5"; pink scrap
- Sewing thread to match glove
- Fiberfil stuffing
- White cardstock, 1-3/4" x 2-3/4"
- Fine-line black permanent marker
- Pencil
- Ruler
- Scissors
- Sewing needle
- Hole punch
- Low-temp glue gun and glue sticks
- Thick, white craft glue
Pattern
Steps:
- To make body, firmly twist together 1-1/2" foam-ball head and remaining foam shape; glue together with glue gun.
- Turn glove inside out. Refer to diagram to sew first and third fingers shut; trim seams to 1/8". Turn glove right side out.
- Fill thumb and little finger with small amount of fiberfil to create arms.
- Place foam body inside glove. Pull glove down until cuff is below bottom of body, and head is smooth. Note: Middle finger of glove becomes hat.
- Cut small oval mouth from craft foam; punch two holes from pink felt for cheeks. Use white glue to glue bead eyes, mouth, and cheeks to head.
- Glue white felt around head for hat cuff. Glue pom-pom to tip of hat. Note: To make hat shown on red caroler, omit pom-pom. Instead, tightly wrap sewing thread around hat close to head. Cut off tip of finger; make vertical cuts down finger to thread. Fabric will curl around itself to form pom-pom.
- Fringe ends of felt strip for scarf; tie around neck.
- Fold cardstock in half. Use marker to write, or computer to print, desired message on outside. Use glue gun to glue caroling book into hands.
®™* Trademark of The Dow Chemical Company ("Dow") or an affiliated company of Dow
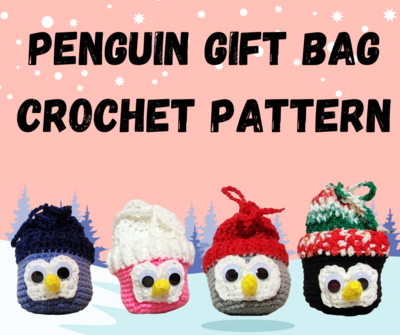
Read NextPenguin Gift Bag

Thanks for your comment. Don't forget to share!
bobbylonardo 50143 99
Oct 01, 2012
Cute idea. Even though the directions are unclear they don't look that hard to make. Great way to use the single gloves I've collected over the past few years, since they never come home in pairs when my daughter wears them.
kittyjo
Nov 22, 2009
These are cute. The directons leave MUCH to be desired, like,step one and where are the diagrams?
Sue B
Nov 22, 2009
I thought this was cute too, until I read about Step 1 and I agree. The directions are not clear.
inspired
Nov 22, 2009
Very cute idea and such a fun and easy project to do with the kids ) Tracey httpwww.bonanzle.cominspired
lwstn
Nov 21, 2009
I think I've figures out some of the confusion in Step 1 The "remaining foam shape" refers to the foam egg shape, which are used for the body part of the caroler. "Twist together" refers to flattening one little side of the ball and doing the same to the narrow end of the egg shape. Guess you could cut off a little but as well off both ends so they match, and glue them together.
Debily
Nov 09, 2009
Please clarify step 1 - what "remaining foam shape"? The way I read the materials list is that the small and medium carolers only call for one 1 12" foam ball.
HRHCraftQueenie
Nov 09, 2009
How do you "twist together" a foam ball to another foam shape? Is this to flatten the ends of both so they will glue together?
Report Inappropriate Comment
Are you sure you would like to report this comment? It will be flagged for our moderators to take action.
Thank you for taking the time to improve the content on our site.