Sewing Basics: How to Sew on a Button
Everyone has lost a button on a coat or garment at one time or another. Before you rush off to a seamstress, learn this simple skill yourself and save yourself time and money. Once you learn how, replacing buttons is a breeze and you can even replace tired old buttons with ones you like better!
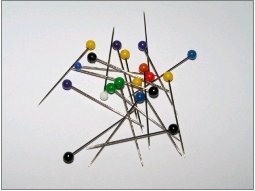
- Select thread that will match your button. Using a striaght cut with sharp scissors, cut off at least 5 inches of thread.
- Lick one end of the thread and insert through the eye of the needle to thread the needle. To reduce the number of times you have to thread the holes in the button, double thread your needle. To double the thread, simply pull the thread through the eye of the needle until you have equal lengths of thread extending from both sides. You can repeat this with another thread for a super-strong quadruple-thread.
- Tie the ends of the thread together for a beginning knot. If you did not double the thread, tie a knot at the end of the thread.
- Align the button on the fabric. Make sure it lines up with the button hole on the other panel. If a button was on the garment previously, use the old button holes as a guide.
- Push the needle through the fabric up from the button through one hole in the button and slowly pull to the knot.
- Before you start stitching across the button, place a needle, pin, or toothpick across the button and hold it there while you make the first stitches. Removing this pin when finished creates the necessary space between the button and the garment so that it can be buttoned.
- To match the other buttons on the garment with 4-hole buttons, check whether the stitches are crossed or parallel. For parallel lines, push the needle down through a hole next to the first hole. For crossed X lines, push the needle down through the hole diagonal. For a 2-hole button, you only have one choice!
- Bring the needle up through a new hole in a 4-hole button, or the first hole in a 2-hole button.
- Repeat the process until the button is secure, making sure the stitches are equally made. Remember, you have to do this less times with a double or quadruple thread.
- On the last stitch, push the needle through the material, but not through a button hole, in the area between the fabric and the button. Pull the thread through.
- Remove the pin or needle and pull up gently on the button to give you some space.
- To reinforce the thread between the button and the fabric, take the needle and wrap it around the thread five or six times.
- Push the needle back down through the fabric.
- To secure the thread, backstitch a couple times. Stick the needle into the fabric near the knot, push the needle over a quarter inch to the left and bring it back up, pulling taut. At the left end of your stitch, repeat this process. Do this a few times. You can also make these stitches at the beginning before sewing on your button.
- Cut off any excess thread and you are done!
For a fun video demonstration, check this out.
Your Recently Viewed Projects
Thanks for your comment. Don't forget to share!
flowergirl
Sep 13, 2017
I think I'm the only person who can sew a button on clothes so everyone asks me too. I had a problem in securing the thread so thanks for that lesson.
Weberme
Oct 11, 2016
I tried to teach all my children how to sew a button on when they were young but they did not want to watch. When me oldest was in the service first thing He asked when he was on leave was "MOM WILL YOU SHOW ME AGAIN HOW TO SEW ON A BUTTON. THEY CHARGE $25 TO SEW ONE ON IN THE SERVICE" and he learned. Everyone should learn this and it does not take long. This is a good tutorial and it leads you to a link for a video. I learned some new things too that do not do like they do but I like much better. Never wrapped the button like that.Anyone else see it done different then you do?
drieds4u 4781764
Feb 12, 2011
Where were you when I was 9 years old? I was home sick in bed and my Dad brought me one of his shirts and everything I would need for the project and asked me to sew a button on. When he came back 15 minutes later I was still trying to make the knot in the thread big enough so it wouldn't go through the hole in the button.
hernandez7171 3046 157
Nov 28, 2010
WOW NEVER IN MY LIFE WHICH I AM 61 DID I KNOW THE REAL WAY TO SEW A BUTTON, THANK YOU SO MUCH.
Report Inappropriate Comment
Are you sure you would like to report this comment? It will be flagged for our moderators to take action.
Thank you for taking the time to improve the content on our site.