Cutting Tutorial for Quilt Projects
This photo tutorial shows you how to cut different pieces for a quilt and the materials needed.
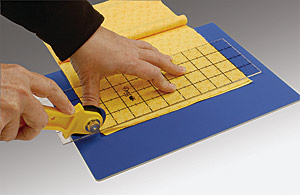
To Straighten Edges:
Fold fabric in half lengthwise on mat. Place horizontal ruler line on fold. Hold ruler steady. Cutting away from yourself, with blade against edge of ruler, trim away uneven edges of fabric.
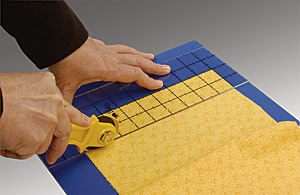
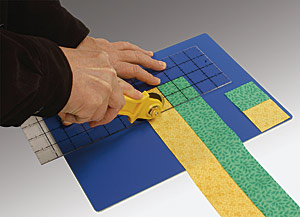
Cutting fabric into strips using a rotary cutter:
To Cut Strips: Rotate mat, with fabric still in place, so trimmed edge is on opposite side. Find the vertical ruler measurement for desired width of strip. Place this line exactly over trimmed edge. Cut strip.
Sub-cutting the strips to the desired size.
To Sub-cut Strips: Place fabric strip on mat. Using same measuring technique as for cutting strips, cut squares of desired size. Always align a vertical and a horizontal ruler line with fabric before cutting.
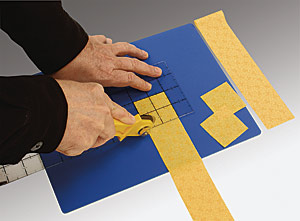
Sub-cutting to form joined squares or rectangles.
To Sub-cut Joined Strips: Sew strips, right sides together, with 1/4" seam allowance. Press seams toward darker fabric. Place on mat. Cut at desired measurements to form already joined squares or rectangles.
Read NextSweet Snowballs Quilt
Your Recently Viewed Projects
Thanks for your comment. Don't forget to share!
plparies43 2262685
Feb 11, 2013
Do you have a pattern for a wool quilt from old sweaters? Thank you
Aunt Nettie
Sep 09, 2010
it would be nice to also give help for us left handed people when cutting, sometimes I have to reverse everthing to get the same cuts.
ksaugustsson
Apr 14, 2010
Some rulers come with a paper film on the back of them. That is used to keep the rulers from becoming scratched in transporting them and some people think they are for grip. Remove that paper and you will have a clear, see thru ruler just like the one in the picture. It's nice to purchase different sizes of rulers for different projects. Also I find I achieve a more accurate cut if I stand and apply pressure to the ruler while cutting.
PHYL PEEK
Feb 24, 2010
i like the ruler that person is using. my rullers are not as clear and easy to read. where do you get them? phylpeek
Report Inappropriate Comment
Are you sure you would like to report this comment? It will be flagged for our moderators to take action.
Thank you for taking the time to improve the content on our site.