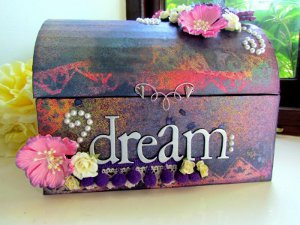
Dream Treasure Chest
Kids and adults alike will love this Dream Treasure Chest from Purple Cows Blog. This storage chest is great for holding your own personal treasures or your biggest wishes, hopes, and dreams. Filled with a diary, writing utensils, and stickers, this makes a great gift!
Materials:
- Purple Cows FreestyleMouse #6040
- Purple Cows Click BladeStraight #2801
- Purple Cows 2-in-1Combo Trimmer #1040
- CraftGeek Punch It:Winter #7201, Spring#7202, Autumn #7200
- CraftGeek Roll It #7300
- CraftGeek Wind It #7100
- CraftGeek Pink Wind Itwire #7101
- Smooch spritz inks variouscolours
- Colorbox archival inks inpurples
- Helmars 450 craft glue
- Brads
- Ribbon
- Flowers
- Pearls
- Alphas
- Embossing powder
- Craft knife
- Crop-a-dile
- Paper peircer
Instructions:
- Decide what size you want your chest to be and cut the pieces from some thick chipboard. As a guide my chip is 1/16th'' thick and my box measures 8 1/4'' x 6'' x3'' You will need 1 front, 1 back, 2 sides, a base, a piece for the lid (mine is 81/4'' x 9 1/4'') and 2 semicircle end pieces for the lid (mine is 6'' x a semi circlemade with a 2 3/4'' radius) I have given my guide measurements as you may want a bigger or smaller chest and your material may be thicker/ thinner than mine. You will need to cut the chip with a craft knife if it is as thick as mine.
- Adhere the semi-circles of lid to the underside ends of the curved strip.
- Using the Punch it's create some masks and punch some 12 x 12 paper with your smooch spritz inks, building up a pattern, add some extra detail and texture with the roll it.
- When you’re happy with your paper design cut the pieces to cover the inside and outside of the chest using the 2 in 1 combo trimmer. If you have used my sizes you will need as follows: front and back outside of chest base 8 1/4'' x 3'' PLUS the thickness of your chip (eg mine is 1/16th'') so it extends over the edge of the base. 2 x sides outside of base of chest 6'' x 3'' PLUS one thickness of your chip. 1 x bottom of chest outside 8 1/4'' x 6''. 1 x piece to cover lid outside 8 1/4'' x 9 1/4'' and 2 end of lid pieces outside that will be 2 semi circles 6'' with a radius height of 2 3/4'' PLUS the thickness of your chip around the curve. Front and back inside base of chest 8 1/4'' MINUS 2 thicknesses of your chip (to accommodate the decrease in measurement from the 2 sides) x 3''. 2 sides inside base of chest 6'' x 3'' 1 inside of lid 8 1/4'' MINUS 2 thicknesses of chip x 9 '' 2 inside semi circles the same size as those you cut out of chip. Inside base of box 8 1/4''MINUS 2 thicknesses of chip x 6'' MINUS 2 thicknesses of chip.
- Cover the outside of all the pieces, leave the inside for now. Sand and ink the edges of the pieces to meld the box together.
- Cut four small rectangles of chip, mine are 1 1/2'' x 1/2'' Punch 2 small holes in each and emboss them with a metallic powder. Take a small strip of ribbon and join 2 of the pieces together to create 2 hinges, remember to leave a gap the thickness of the chip between to two pieces so the hinges will work properly.
- Sit the lid in place and attach the hinges with brads.
- Using the wind it create a decoration for the front of the lid, I like the fact that this looks like a catch. Attach it with some decorative brads.
- Now cover the inside of the box, covering all the legs of the brads.
- Add 2 strips of ribbon to the inside of the lid and the side of the box to stop the lid from falling backwards.
- Finally add your decoration to the outside of your chest.
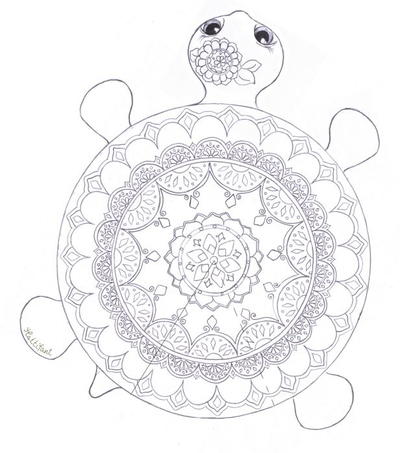
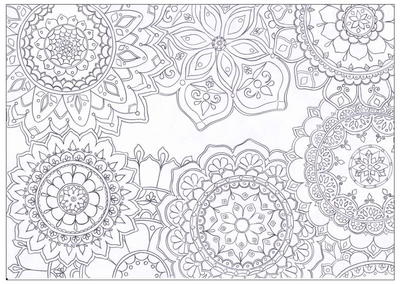
Read NextMandala Flowers Coloring Page
Your Recently Viewed Projects
Thanks for your comment. Don't forget to share!
jkexum 2903321
May 19, 2013
Believe that a printable pattern would be more helpful. Great idea though.
jkexum 2903321
May 19, 2013
Love the idea! Is there a printable pattern for this? I believe that a printable pattern would really help me rather than just the measurements. What about doing a tutorial?
Report Inappropriate Comment
Are you sure you would like to report this comment? It will be flagged for our moderators to take action.
Thank you for taking the time to improve the content on our site.