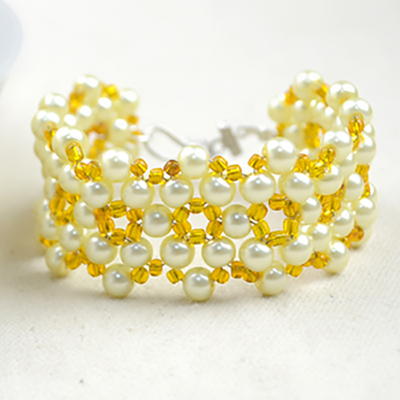
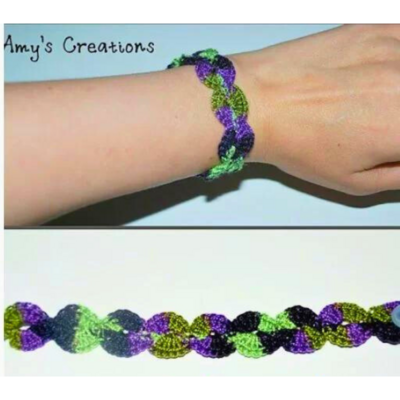
Tri Color Stretchy Cuff Bracelet
Hone your beading skills with this multicolored bracelet or use one color of beads for a quick and easy jewelry project from Katie Hacker.

Materials:
- Elasticity, two 9" lengths of .8mm, clear
- Sixteen size 6/0 beads of each color: turquoise, green, purple
- Eight 12mm faceted cylinders in each color: turquoise, green, purple
- 6mm bicone beads: 12 green, 18 turquoise, 18 purple
- 24 silver eye pins
- Round nose pliers
- Nipper tool
- GS Hypo Cement glue
- Designer Scissors
- Adhesive tape
Steps:
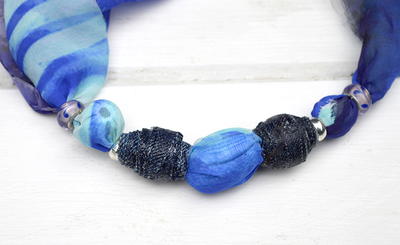
- Create 24 beaded eye pins by stringing a size 6/0 bead, a faceted cylinder and a size 6/0 bead onto an eye pin. Use round nose pliers to make a loop above the top bead, and then cut off any excess wire. To create a bracelet as shown in the photo, use the following color combinations:
(A) turquoise 6/0 with green faceted cylinder
(B) green 6/0 with purple faceted cylinder
(C) purple 6/0 with turquoise faceted cylinder
- Once the pins are all beaded, you can start to assemble the bracelet. Place a piece of adhesive tape over one end of a piece of stretchy cord. String the end of the cord through one end of an "A" beaded pin. String a purple bicone, then string a "B" beaded pin. String a purple bicone, then string a "C" beaded pin. Next, you'll string three turquoise bicone beads between the beaded pins (in the same order), then you'll string three green bicone beads between the beaded pins. Repeat the pattern a total of eight times. Place a piece of adhesive tape over the end to prevent the beads from sliding off.
- String the other piece of Elasticity through the opposite end of the beaded pins. Follow the same beading pattern to string the bicone beads. When you reach the end, tie the ends together in a surgeon's knot (a square knot with an extra wrap). Remove the tape from the other cord and tie those ends together. Place a drop of glue on the knots and carefully cut off any extra cord.
Your Recently Viewed Projects

Thanks for your comment. Don't forget to share!
Report Inappropriate Comment
Are you sure you would like to report this comment? It will be flagged for our moderators to take action.
Thank you for taking the time to improve the content on our site.