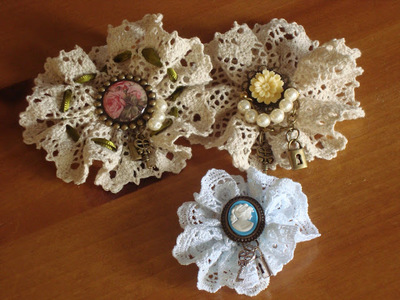
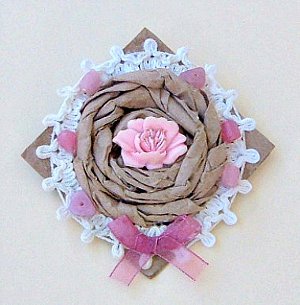
Romantic Paper Bag Brooch
This Romantic Paper Bag Brooch from Maria Chatzi is a beautiful Mother's Day gift or a sweet treat for your Valentine. Made with a paper bag, crafts like this are environmentally friendly and a great way to reuse leftover crafting materials.
Materials:
- 3 strips cut from a paper bag (all should be 2.4 inches wide and 10.2 inches long)
- White cotton lace ribbon with a pointed edge design, 9.4 inches long and 0.3–0.4 inches wide
- A small pink flat flower (any material will do) for the center – mine is synthetic, from a broken hair clip
- 6 small pink glass beads or faux rose agate chips
- Pink organza ribbon, 3 inches long and 0.3 inches wide
- A small rectangular piece of fabric to cover and secure your brooch pin
- Scissors
- Pencil
- Ruler
- Glue
- A brooch pin
Instructions:
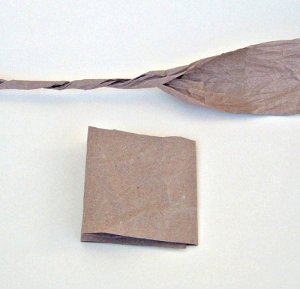
- To start, crumple the paper bag strips with your hands, to give them texture and make them softer to work with. Spread them out one by one. Crumple and spread out once more.
- Fold one of the paper bag strips once in half, and then once more in half again. You should have a square shape (2.4 inches x 2.4 inches).
- Put a little glue on all folds you’ve made (on all sides of the square) to secure that it will stay together and become more sturdy. This will be the base for your Romantic Brooch. Leave it aside for a while, for the glue to dry.
- Now take the other 2 paper bag strips and glue one’s end onto the end of the other strip (the ends should overlap 0.3 inches at this point), so as to create a longer paper bag strip. Wait till the glue is dry and the two ends are secured together.
- Start twisting this long paper bag strip lengthwise. Twist as tightly as possible till you’ve twisted to full length and then let go of the strip. It keeps its twisted shape but it’s not as tight as before.
- Now here comes the harder part of this project: After marking (with your pencil) the center of your square brooch base, start curling your twisted paper strip from its one end. Put some glue on the mark you’ve just made on the paper bag square and hold your curled strip on it for a while till it sticks to the paper base. Make sure the glue has hardened and you’ve secured the beginning of your paper flower design before you proceed – this is VERY IMPORTANT.
- After the glue has dried completely, start rolling your twisted paper around this center you’ve created, so as to form a rosette flower. Remember to put a little glue all around, as you move in circles. When you reach the end, make sure you stick the end under the twisted paper so it doesn’t show. Don’t be afraid to press and shape this twisted rosette flower with your fingers.
- Turn your square shaped Paper Bag Brooch diagonally. Use your fingers to press down the central part of your paper bag rosette and glue your flat pink flower there.
- Take your cotton lace ribbon with the pointed edges and glue it around your rosette.
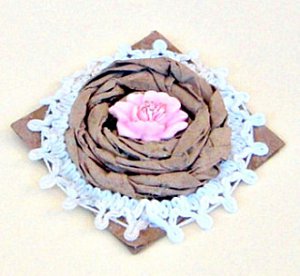
- When the glue has dried completely, make a small bow with your organza ribbon and glue it on the lower part of your Romantic Paper Bag Brooch, below the pink flower. Trim any organza in excess.
- Glue your pink glass beads around the rosette – three to the left and three to the right side. Wait for the glue to dry completely – VERY IMPORTANT at this point.
- Now turn your brooch to the back side and glue the brooch pin. When the glue has hardened, secure the pin even better by gluing the little rectangular piece of fabric on it and onto the brooch base too.
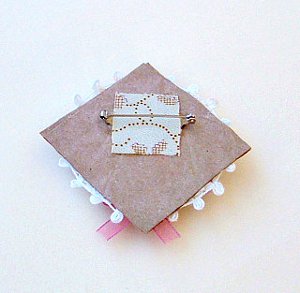
- Your Romantic Paper Bag Brooch is ready. Wear it and see how it becomes a conversation starter.
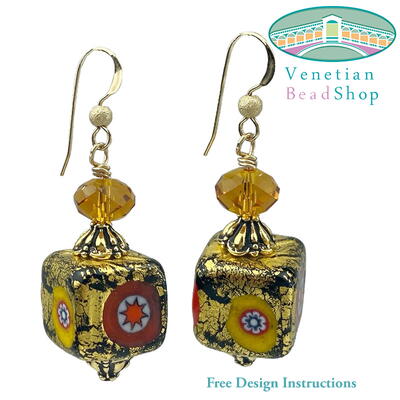
Read NextGold Foil Cube Millefiori Earrings