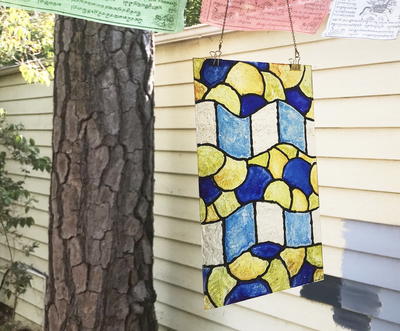
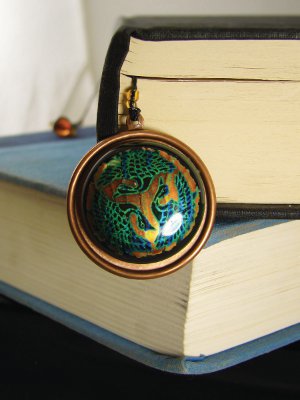
Oriental Swans Bookmark
Glass fusing is easy with helpful instructions! This Oriental Swans Bookmark from Diamond Tech is absolutely beautiful and makes a great gift for those who love to read! If you're looking for glass fusing ideas, look no further! Make this craft today!
Materials:
- Fuseworks™ Microwave Kiln
- Fuseworks™ Hot Mitts
- Fuseworks™ Kiln Paper
- Fuseworks™ Fusible Shapes Green (1) & Dichroic Red (1)
- Fuseworks™ “The Orient” Decal – Swans
- Safety Glasses
- E-6000®
- Super Glue®
- Scissors
- Bowl for water
- Button Thread 30”
- Bees Wax
- Beads – Assorted Coordinating colors and sizes.
- Copper Medallion
Instructions:
- Clean glass using paper towel moistened with water. Completely dry the surface of the glass with a lint free cloth.
- Cut a 2” X 2” piece of kiln paper. Remove the lid from the Fuseworks™ Kiln. Place the kiln paper on the kiln base.
- Position the green fusible shape on the center of the kiln paper.
- Cover with the red dichroic Fusible Shape.
- Carefully set the base with glass inside the microwave and cover with kiln lid. Fuse in a 1200-watt microwave at 50% for 2 minutes; 80% at 1 minute; 30 seconds. If using a microwave with a lower wattage, increase the power percentage but keep time consistent. PLEASE NOTE: All microwave and kiln combinations will have different firing patterns. Be sure to take careful notes and log all fusing times for future use.
- After time has expired, open microwave and, using Hot Mitts, carefully lift the lid enough to inspect the fusing process. The glass is fused when the edges of the glass are nicely rounded. If necessary, continue to microwave at 15 second increments until desired results are achieved.
- Remove kiln from microwave using the Hot Mitts and place on a heat resistant surface. Cool the kiln for at least 30 minutes WITH THE LID ON. CAUTION: Removing the lid or peeking under the lid during the cooling stage may result in your piece cracking. Glass remains hot for a long time handle with great care.
- Use scissors and cut around the swan decal. Place it in a bowl of water (preferably distilled) for approximately 30 seconds. Slide the backing-paper away from the decal so the decal rests against the glass. The decal should slide off backing-paper easily; if not, let it soak longer. Use a paper towel to pat the moisture from the decal and glass. Should air bubbles appear, push them out with your finger.
- Allow to dry completely.
- Remove used kiln paper and discard. Cut another 2” X 2” piece of kiln paper. Place the kiln paper on the kiln base.
- Place the glass with the decal in the center of the kiln paper.
- Carefully set the base with glass inside the microwave. Cover base and glass with kiln lid.
- If using a 1200-watt microwave, fuse at 50% power for 2 minutes. Heat again, at 80% for 1 minute and 30 seconds. If using a microwave with a lower wattage, increase the time to 2 minutes and 30 seconds. PLEASE NOTE: All microwave and kiln combinations will have different firing patterns. Be sure to take careful notes and log all fusing times for future use.
- When time has expired, open microwave and, using Hot Mitts, carefully lift the lid enough to inspect the fusing process. Check your glass, if the decal appears as a white silhouette; continue fusing at 100%, adding an additional 15 seconds to the time until the decal looses the white appearance. When you are able to see the color and definition of the decal, the fusing process is complete. Remove kiln from microwave using the Hot Mitts and place on a heat resistant surface. Cool the kiln on a heat resistant surface for at least 30 to 40 minutes with the lid on. WARNING: Removing the lid or peeking under the lid during the cooling will result in your piece cracking. Glass remains hot for a long time handle with great caution. Cool the glass completely.
- Glue the glass to the center of a Copper Medallion and allow it to dry.
- While medallion is drying, lightly coat the length of thread with bees wax. Pull the thread against the wax to evenly coat.
- String a bead assortment of your choice onto one end of the thread. Fold the thread in half. Slide the beads to the center. Knot to secure them at the end. Grasp the thread with two fingers above the knot. Gently twist and pull the thread through your fingers. Make a knot 2” from the end opposite beads. Twist the two ends together and string two small beads and the medallion onto the thread. Tie several knots and securing the medallion tightly to the beads. Trim the ends of the thread and secure the knot with a drop Super Glue™.
Read NextUpcycled Vase From A Pasta Jar