Mother's Day Truffle Box, Card and Envelope
You can use this beautiful box to hold some chocolate nuggets, truffles, bonbons or even some jewelry to treat your mom to on Mother’s Day! With minimal materials required, you can create a memorable keepsake for your mom or for another special woman this holiday.
Materials:
- The Ultimate Crafter’s Companion
- 12x12 sheet patterned cardstock (double sided if possible)
- 12x12 sheet co-ordinating cardstock
- Co-ordinating ribbon
- A waterproof fine felt-tipped pen
- A hole punch
- Double-sided tape
- Scissors
- A paper trimmer
Instructions:
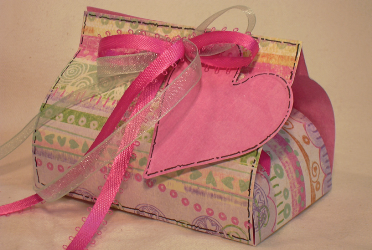
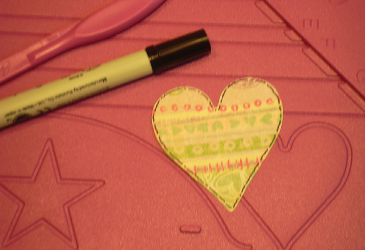
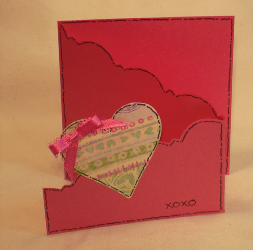
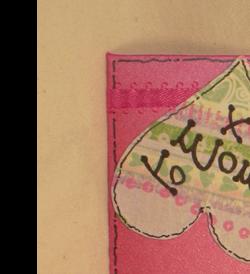
- Make a gift tag from some of the off-cut pieces of card, by embossing the decorative heart shape from the envelope-making side of the Ultimate and cutting it out. Punch a hole in the top of the heart and draw a border around the edge using a fine felt tip pen.
- Trim away the area above the scored line, including the embossed line itself. Crease your scored lines in a concertina fold.
- Emboss another heart to match the gift tag, this time with the patterned side of the card showing. Cut it out and draw on the border as before.
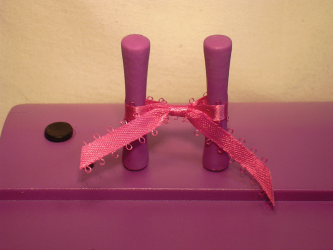
- Make a small bow using the pegs that come with the Ultimate.
- To assemble the card, draw your border around the edges of the three card panels that will face the front. Mount the heart to the front panel of the card and stick the bow onto the top left of it.
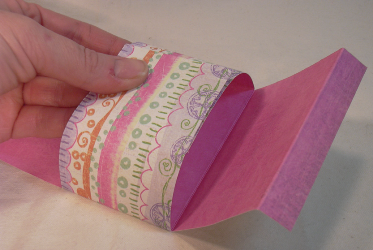
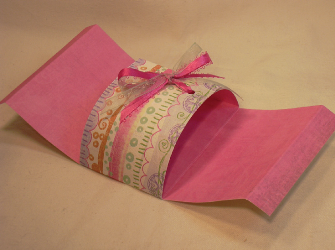
- Cut your patterned cardstock to USL size (8.5x11 inches), making sure you keep the off-cuts. Place the piece onto the box-making side of the Ultimate board and rest one of the long edges of card against the Box Lid edge. Score along the first and sixth lines. Keeping the card facing the same way, rest it against the Box Base edge. Once again, score the first and sixth lines.
- Rotate the card so that one of the short sides is placed against the Box Base edge. Score the seventh line. Keeping the card facing the same way, rest it against the Box Lid edge, and score the seventh line.
- Cut away the four corner squares. Crease all of the scored lines as shown.
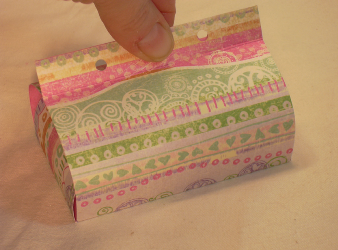
- Take the two sides without the flaps and overlap them by two inches in the middle.
- Hold the two sides together and punch two holes through both pieces.
- Tip: If you have trouble holding the two pieces steady, try using some low tack masking tape to hold the sides in place.
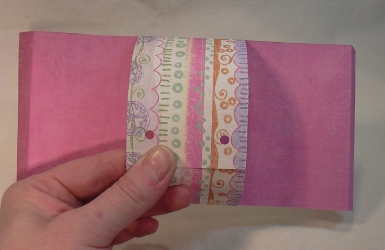
- Feed some ribbon through the holes and tie in a bow to keep the sides in place.
- Now bring up the two sides with the extra flaps to meet over the top of the inner sides. Hold the two flaps together while you punch two holes through both pieces.

- To complete the box, repeat the style of border from the tag around the two outer edges of your box. Feed some ribbon through the punched holes, threading on the gift tag, and tie in a bow.
- Tip: When filling your box, if you use unwrapped candy, you may want to place a square of parchment or food safe tissue in the base first, so that the oil from the candy won’t leak onto the bottom of the box and mark it.
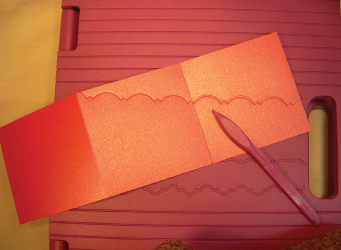
- To make a matching card, trim a piece of the matching plain card to 12x4 inches. Place the short edge against the handle side of the card scoring part of the Ultimate and score along the “Tri-fold 12x12/Half- fold 8x8” line. Rotate the card and score the same line from the opposite edge. The card is now split equally into three parts.
- Choose one of the decorative score lines in the middle of the box-maker element of the Ultimate and, leaving one panel clear, score diagonally across the two remaining panels, starting with the top left corner of the centre panel, and finishing in the bottom half of the outside panel.
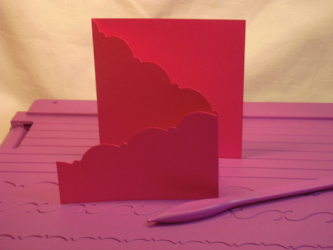
- Finally, write a greeting onto the bottom right of the card using the black felt-tip pen.
- Finally, make a basic envelope using the instructions shown in the Ultimate booklet - using a piece of card that measures 6⅜” x 6 ⅜”, scored on line C on all 4 edges. Assemble the envelope and decorate using a little more of the ribbon you used on the box and another embossed heart. Draw the border around the front of the envelope for a truly co-ordinated set.
Read NextMason Jar DIY Cutting Board