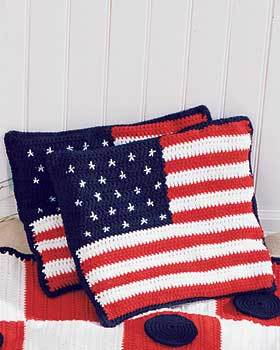
Star Quilt Block
Here's a fun no-sew quilt block you can attach to a quilted background. Use your child's drawing printed onto muslin, or create your own design on a piece of fabric. When you add beads, tape and thread, the result is 3-dimensional fun.
Materials:
- 8" x 10" sheets of Treasure Tape
- Treasure Tape dots
- Diamond Beadlets
- Kreinik #12 Braid 018 Navy, 001 Silver
- Red white and blue 1/4" ribbon
- Red gingham 1/4" ribbon
- Red, white and blue buttons
- White pom-pom trim
- 8" x 10" crème muslin, plus blue fabric cut in shape of a star
Instructions:
-
Remove the white backing from your 8x10 sheet of Treasure Tape. Lay the muslin fabric on the sticky tape, with the front side facing the tape. Smooth out any bubbles.
-
Turn your fabric piece over and remove the red liner exposing the top sticky area.
-
Lay the red gingham ribbon all around the edge of the fabric piece, pressing into the tape to adhere. We folded the ribbon back and forth for a fun border effect.
-
Lay the white pom pom trim next to the red ribbon, pressing into the tape to make sure it adheres.
-
With your other piece of 8" x 10" tape, cut out a star shape the same as your blue star fabric (use copy paper as a template if needed). Remove the white backing and lay the blue fabric on the tape, printed side toward the sticky tape.
-
Lay this blue star in the center of your block, pressing into the taped piece of muslin to make it smooth and free of ripples. Remove the red liner on the star shape.
-
Lay the red, white and blue 1/4" ribbon all around the edge of the blue star.
-
Lay red, white and blue buttons on the blue star.
-
Lay the silver Tapestry braid in swirls or curls or wavy lines all around the buttons in the blue star area. Press the thread into the tape to make sure it adheres.
-
Lay the navy Tapestry Braid in swirls all around the remaining areas of the muslin, as shown in our photograph.
- When thread decorating is complete, lay the design in a shallow pan or tray and cover all remaining areas with Diamond Beadlets.
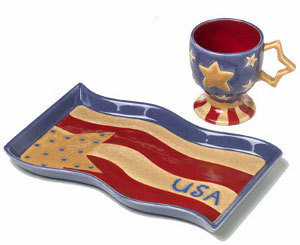
Read NextStar Spangled Coffee Server Set
Your Recently Viewed Projects
Thanks for your comment. Don't forget to share!
crafty suzziq
Feb 12, 2010
Looks like cute project except I have no idea what the first four products are. Never heard of them. Please be more explicit when naming products and possibly where you can get them. Actually, this goes for all the instructions on this site.
Crafter 2233625
Feb 12, 2010
what is this treasure tape sheetsa? Can i get them at joAnns Fabric
Report Inappropriate Comment
Are you sure you would like to report this comment? It will be flagged for our moderators to take action.
Thank you for taking the time to improve the content on our site.