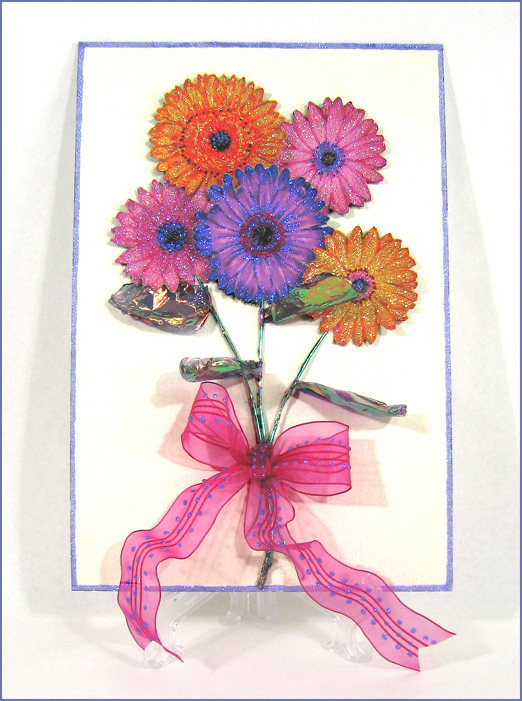
Glittered Bouquet Relief
This sparkly bouquet from Art Glitter makes a great spring decoration with its bright colors and cheery flowers. Or give as a gift to your favorite girl!
Materials:
- Ultrafine Art Glitter colors that match fabric
- Cotton Designer Fabric
- Fabric or Designer Dries Clear Adhesive, (DDC)
- Ultrafine Metal Tip attached to adhesive bottle
- Scrap cardstock, any color
- Matching background fabric or paper
- Spray adhesive or Xyron Machine
- Scissors
- 1/8” Sticky Tape
- 18 Gauge Wire
- Fantasy Film: In the Forest, 20”
- Iron set to Med-High Heat
- Baker’s Parchment Paper
- Pliers
- Heat Tool
- Candle and matches
- Hot Glue Gun
- 2” Wired Ribbon
- Mat Board, approx. 11” x 15”
Art Glitter Ultrafine Glitter shown: Pearlescent, 177 Florida Orange; Neon Transparent, 242 Lava Lamp; Opaque, 173 Ripe Plum; Transparent: 90 Melone’, 92 Bananan, 268 Pink Smoothie, 87 Hot Kiss
Featured Fabric: “Day Z Chain” by Holly Hall
Steps:
- Cut out flowers from fabric, leaving at least 1/2” border around them. Run through Xyron machine or spray back of fabric with spray adhesive. Adhere to scrap cardstock.
- Highlight flowers by filling in center of petal shapes with DDC adhesive and spoon on matching glitter. This technique looks best if you leave some space outlining each petal free of glitter. Glue and glitter flower centers too. Set aside to dry.
- Cut Film into ten 2” strips (2” x 4”). Cut again in half diagonally creating twenty triangles. Cut wire to desired length. Wrap one film piece around top of wire enclosing end. Hold in place with pliers and wave heat tool over it. Wrap another film piece around wire, overlapping previous piece of film approx. 1/2”. Hold other end in place with pliers and wave heat tool over both contact points. Wrap remaining film around stem one at a time and heat in same manner, enclosing bottom end with film as well. Repeat with other stems.
- Place long point of one film piece under stem and fold it around to the front. Hold in place with fingers while placing long point of another film piece on top of first one, fold over the stem and hold in place. Now you have two triangles wrapped around each other and the stem.
- While holding leaves, place parchment paper on top. Hold in place with your other hand and slide fingers out from under parchment paper. Slide iron along triangles for 2 seconds up to the stem and on stem too. Flip over and iron other side of stem.
- Position and iron additional leaves where you want them. Hold leaves over candle flame one at a time very briefly and curl points as desired. While film is still pliable, bend up at base for realistic look.
- Closely cut out glittered flowers around each petal up to the flower center and bend them upwards. Group flowers together closely on mat board so that they overlap each other slightly. Glue centers with DDC adhesive and weight down for 15 minutes or so.
- Position and bend stems as desired. Make ribbon into a bow around stems and glue all into place, with hot glue gun.
- Roll Sticky Tape along one edge of mat board, cut to size and press in place. Remove red protective cover and sprinkle with a dark glitter color. Tape and glitter rest of mat board’s border.
- Stem and Leaf Alternatives: Draw stems and leaves with DDC and sprinkle with glitter. Draw stem with a brush marker and stamp on leaves to be embossed or glittered. Make stems as above and heat impress leaf stamp onto Fantasy Film, cut out image and glue on mat board. (For film stamping directions go to: http://www.artglitter.com/lcdragonfly.htm)
Click here for more information about Art Institute Glitter, Inc.
Read NextDiy Tool Mesh Wreath