How to Crochet a Granny Square
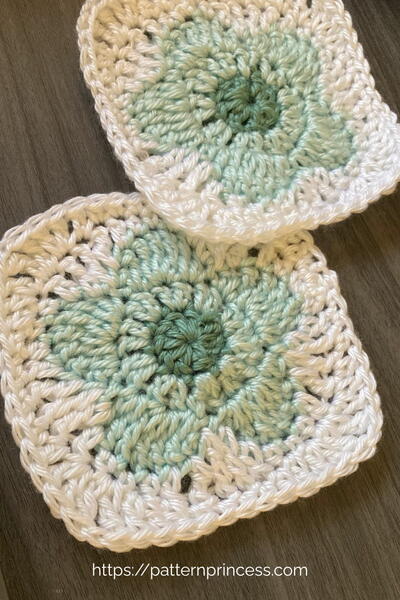
Learn how to crochet a basic granny square in double crochet. Granny squares help you practice crochet in the round as a beginner and can become building blocks for afghans, tote bags and other items. If you are new to crochet, check out our five part Beginner's Guide to Crochet.
- Take your worsted weight yarn and medium size crochet hook.
- Chain six and make a slip stitch though the first chain to form a ring.
- Once you have a ring, chain three. This equals a first stitch in double crochet.
- Double crochet three times into the center of the ring.
- Chain two and make three double crochet into the center of the ring.
- Repeat last step, between two more times for a total of 4 groups of 3 double crochet stitches.
- To finish the round, slip stitch into the third chain of the round.
- You can switch to a new color at this point if you like. Join the second color of yarn in one of the chain-2 spaces.
- Chain three for the first dc (double crochet).
- In the same ch-2 space, a corner, do two double crochet, chain two, and do three more double crochet. A new corner should be forming.
- Chain one and skip to the next corner.
- Again, do 3 dc, chain 2, and 3 more dc.
- Skip to next corner. Repeat until all four corners are done.
- Slip stitch to the first corner to finish the round.
- You can switch colors again if you like for the third round. You can join the yarn in the chain one space before a corner.
- Chain 3 and make 2 dc in the ch-1 space.
- Chain 1 and then make 3 dc, chain 2, and 3 more dc in the ch-2 corner space.
- Chain 1 and make 3 dc in the ch-1 space. Chain 1 and make 3 dc, chain 2, and 3 more dc in ch-2 corner space.
- Repeat last step between all the way around the square.
- Join the third round with a slip stitch.
- You can make the granny square larger if you like, now that you have the basic technique.
Read NextSummer Vacation Gnome
Your Recently Viewed Projects
shannongrimm 22436 86
May 22, 2011
I can't even explain how excited I am right now. I wont even tell you how long it has take me to learn how to do this lol. Novascotiagirl is correct also. For number four you only do two dc's since you already have chained three and that acts as your first dc. :) THANK YOU SO MUCH! Shay
novascotiagirl
Jan 15, 2011
4 Should read, double crochet two times in ring, because you already have a ch three from row 3. Also, if you do not want to change color everytime, at the end of each row you can ch 1, turn, sl st into ch 1 space, ch 3, 2 dc in same space, ch 1 and proceed around as instructed. This means every second row is on the wrong side, you just have to be sure on the last row, it is on the same side as the first row.
kevychevy420
Feb 15, 2010
This Step-by-Step guide was very helpfull to me. I had an idea on how to make a basic granny square, but wasn't completely clear on how to make one for sure. Thanks for this step-by-step now I am very confident that I can make a really good square. Thanks again, Heather )
Report Inappropriate Comment
Are you sure you would like to report this comment? It will be flagged for our moderators to take action.
Thank you for taking the time to improve the content on our site.


