Frog Crochet Cocoon, Hat & Booties
Make this crochet frog cocoon and matching crochet hat and booties to keep baby warm and looking cute. Embroidered frog eyes top off the crochet baby hat so your little one will look absolutely adorable in this sweet outfit. This crocheted baby set makes a wonderful gift for a baby shower and is a fun project for crochet fans of all skill levels to make. Simple and easy, this adorable cocoon, hat, and bootie set makes the perfect crochet project for a rainy spring day.

Materials:
- 1 skein bright lime worsted weight yarn (A)
- 1 skein - lime & white worsted weight boucle (B)
- 1 small amount white worsted weight boucle (for inside of eyes)
- 1 small amount of black worsted weight yarn (for eye slits)
- Crochet hooks size I (10.5mm) and size H (10mm)
- Tapestry needle to weave in ends and attach eyes
- Stitch marker (use to mark each first stitch in each round)
Special Abbreviation:
- (jwslst) join with sl st to first ch 2, (Dc decrease) 2 dc together in next st
Instructions:
6-12 months
Cocoon
12 inches wide x 16 inches long.
- With I hook and (A): Chain 4, join with sl st to form a ring.
- Rnd 1: Ch 2, 12 Dc inside the ring around, (jwslst) (12 dc)
- Rnd 2: Ch 2, 2 Dc in each dc around, (jwslst) (24 dc)
- Rnd 3: Ch 2, 2 Dc in same dc, * 1 Dc in next dc, 2 Dc in next dc, repeat from * around, (jwslst) (36 dc)
- Rnd 4: Ch 2, 2 Dc in same dc, * 1 Dc in next 2 dc, 2 Dc in next dc, repeat from * around, (jwslst) (48 dc)
- Rnd 5: Ch 2, 2 Dc in same dc, * 1 Dc in next 3 dc, 2 Dc in next dc, repeat from * around, (jwslst) (60 dc)
- Rnd 6: Ch 3, * 2 Dc in next 4 dc, 2 Dc in next dc, repeat from * around, (jwslst) (71 dc)
- Rnd 7: Ch 3, *2 Dc in next dc, 1 Dc in next 9 dc, repeat from * around, (jwslst) (80 dc)
- Rnd 8 -10: Ch 3, Dc in each dc around, (jwslst) Fasten off (A) join (B) (80 dc)
- Rnds 11 - 22: With (B) Ch 3, Dc in each dc around, (jwslst) (80 dc)
- Rnd 23: Ch 3, *(Dc decrease) in next 2 dc, Dc in next 18, dc, Repeat from * 3 times, Dc in next 3 dc , (jwslst) (76 dc)
- Rnds 24 - 25: With (B) Ch 3, Dc in each dc around, (jwslst) (76 dc)
- Rnd 26: Ch 3, *(Dc decrease) in next 2 dc, Dc in next 12, dc, Repeat from * 4 times, Dc in next 5 dc, (jwslst) (71 dc)
- Rnd 27 - 28: Ch 3, Dc in each dc around, (jwslst) (71 dc)
- Border Row: Ch 1, sc in same st, *dc in next st, sc in next st, Repeat from * around.
- Fasten off and weave in ends.
Hat
7 ½ inches wide x 6 inches high
- With H hook and (A) Make a magic circle,
- Rnd 1: Sc 6 in circle, join in first sc with a slst and mark
- Rnd 2: 2 sc in each sc around, join in first sc with a slst and mark (12 sc )
- Rnd 3: *2 sc in next sc, 1 sc in next, repeat from (*) around, , join in first sc with a slst and mark, (18 sc)
- Rnd 4: *2 sc in next sc, 1 sc in next 2 sc, repeat* around, join in first sc with a slst and mark (24 sc)
- Rnd 5: *2 sc in next sc, 1 sc in next 3 sc, repeat* around, join in first sc with a slst and mark (30 sc)
- Rnd 6: *2 sc in next sc, 1 sc in next 4 sc, * repeat around, join in first sc with a slst and mark (36 sc)
- Rnd 7: *2 sc in next sc, 1 sc in next 5 sc, * repeat around, join in first sc with a slst and mark (42 sc)
- Rnd 8: *2 sc in next sc, 1 sc in next 6 sc, * repeat around, join in first sc with a slst and mark (48 sc)
- Rnd 9: *2 sc in next sc, 1 sc in next 7 sc, * repeat around, join in first sc with a slst and mark (54 sc)
- Rnd 10-12: Sc in each sc around, join in first sc with a slst and mark, (54 sc) Fasten off (A) and join (B)
- Rnd 13 - 25: With (B) Sc in each sc around, join in first sc with a slst and mark (54 sc) Fasten off (B) and weave in ends.
Eyes (Make 2)
- With (A) Make magic ring,
- Rnd 1: Sc 6 in ring, join in first sc with a slst and mark
- Rnd 2: Ch 1, 2 sc in each sc around, join in first sc with a slst and mark (12 sc)
- Rnd 3: Ch 1, *2 sc in next stitch, 1 sc in next, repeat *around, join in first sc with a slst and mark (18 sc)
- Rnd 4 - 5: Ch 1, Sc in each sc around, join in first sc with a slst and mark, Fasten off at rnd 5 leaving a 10 inch tail
Inner Eye
- Turn lime circle inside-out, working in second row from outer edge, join white boucle in one of that rounds sc with a slst,
- Rnd 1: Sc in same stitch and in each sc around that row, join in first sc with a slst (18 sc)
- Rnd 2: Ch 1, *Sc in first 4 sc, sc2tg (decrease made), repeat * one more time, sc in next 4 sc, join in first sc with a slst
- Rnd 3: Ch 1, *Sc in first 2 sc, sc2tg (decrease made), repeat * three more times, sc2tg in last 2 sc, join in first sc with a slst
- Rnd 4: Ch 1, *Sc2tg in next 2 sc (decrease made), repeat * 4 more times, join in first sc with a slst
- Rnd 5: Ch 1, *Sc2tg until you reach first sc, join in first sc with a slst and fasten off leaving 4 inch tail, weave tail into center circle, sewing to a few of the lime stitches in the center of eye. Turn eye right lime side out, white will be inside.
Finishing Eyes
- Take a 12 inch piece of black and sew an eye slit to inside white area. Thread the 10 inch lime tail into yarn needle, catching each outside row lime sc‘s, sew the tail in and out of the outside sc’s all the way around, pull and tighten to partially close the eye, knot, fasten off and trim.
- Sew eyes to top lime area of hat slightly apart using lime yarn. Fasten off, weave in ends.
Booties
Cuff
Working into back loop only of each st on cuff
- With (A) Ch 16,
- Row 1: 1 sc in 2nd ch from hook, 1 sc in each ch to end of ch, Turn, 15 sts,
- Row 2: Ch 1, Work 1 sc in each st to end of row, Turn,
- Rep last row until work from beg measures 6¼ ins [16 cm] when slightly stretched, Do not fasten off.
Edging
- Row 1: Ch 1, Work 23 sc evenly across long edge of cuff, Fasten off (A) Join (B) Turn,
- Row 2: With (B), Ch 1, Work 1 sc in each sc to end of row, Fasten off,
- Instep: Working other end of cuff
- Row 1: With RS of work facing, miss first 7 sts, Join (B) with sl st to next sc, Ch 1, 1 sc in same sp, 1 sc in each of next 8 sc, Turn, 9 sc,
- Row 2 - 4: Ch 1, 1 sc in each sc to end of row, Turn,
- Row 5: Ch 1, Sc2tog, 1 sc in each of next 5 sc, Sc2tog, Turn,
- Row 6: Ch 1, Sc2tog, 1 sc in each of next 3 sc, Sc2tog, Fasten off,
Around Outside of Foot
- Sew center back seam. With RS of work facing, join (B) with sl st at center back, Ch 1, 1 sc in each of next 7 sc, Work 5 sc down side of instep, 3 sc in corner sc, 3 sc across end of instep, 3 sc in corner sc, Work 5 sc along other side of instep, 1 sc in each of next 7 sc, Join with sl st to first st, 33 sc,
- Rnd 1: Ch 1, 1 sc in each st around, Join with sl st to first st,
- Rnd 2: Ch 1, 1 sc in each st around, Fasten off (B) Join (A) with sl st to first sc,
Sole Area
- Rnd 3: With (B) Ch 1, Working in back loops only, work 1 sc in each st around, Join with sl st to first sc,
- Rnd: Ch 1, Sc2tog, 1 sc in each of next 12 scs, Sc2tog, 1 sc in next sc, Sc2tog, 1 sc in each of next 12 sc, Sc2tog, Join with sl st to first sc,
- Rnd: Ch 1, Sc2tog, 1 sc in each of next 10 scs, Sc2tog, 1 sc in next sc, Sc2tog, 1 sc in each of next 10 sc, Sc2tog, Join with sl st to first st,
- Next rnd: Ch 1, Sc2tog, 1 sc in each of next 8 sc, Sc2tog, 1 sc in next st, Sc2tog, 1 sc in each of next 8 sc, Sc2tog, Join with sl st to first st, Fasten off. Join center foot seam.
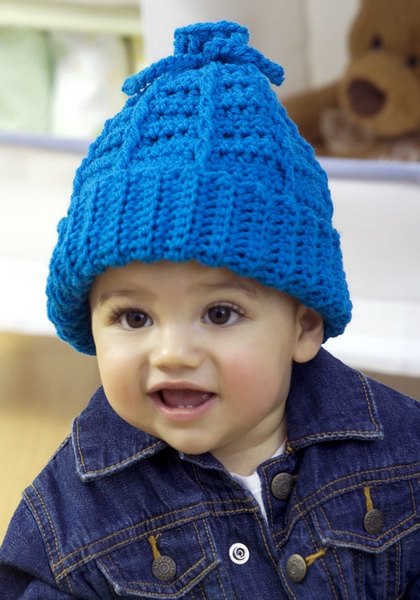
Read NextStretchy Kid's Hat
Your Recently Viewed Projects


Thanks for your comment. Don't forget to share!
cantcount 7838795
Jan 28, 2014
The written pattern needs some work. I googled "jwslst" and STILL don't know what it means. I ignored that and the "ch 2" at beginning of rounds that do not count. If you are experienced it's easy to see where the problems are and how to solve them. For someone just beginning it would be impossible to figure out what is meant. I used the basic premise and did my own thing.
bobbylonardo 50143 99
Sep 09, 2014
I am pretty sure that "jwslst" means "join with slip stitch". Though I have NEVER seen that used as an abbreviation it's the only thing I could come up with that makes sense.
Naine
Sep 09, 2013
Round 6 is 1Dc in next 4 Not2 that came out right for me but round23 is not making any sense HELP Nadine B
emlu33
Feb 03, 2013
Yes round 6 is wrong. I solved it like this: ch3, *2dc in same dc, 1 dc in next 5 dc* Repeat from * (71 dc)
ILUV2CROCHET4U
Nov 18, 2012
Was Anyone Able to complete this Adorable Baby Cocoon? If so pls print "tips" and corrections if applicable. I would love to see the finished work :). Thank you & GB*
sweetdimples83 743 4391
Nov 27, 2010
Mine is not coming out like this, so frustrating. Wish there was a video tutorial for this.
shopinqueenxx 2561 107
Sep 01, 2012
I agree. I was flying along. It was really easy and then I got to Rnd 6. Talk frustrating--I pulled it out four times. Same thing--way to many double crochets. So somebody check this out so I can use this yarn I bought for the frog cocoon and get it done. Thanks
KarenC
Aug 28, 2010
This is too cute. I am attending a friends baby shower in a couple of weeks, and this is definitely going to be one of the gifts! I will post a picture if I can when it is finished!
Report Inappropriate Comment
Are you sure you would like to report this comment? It will be flagged for our moderators to take action.
Thank you for taking the time to improve the content on our site.