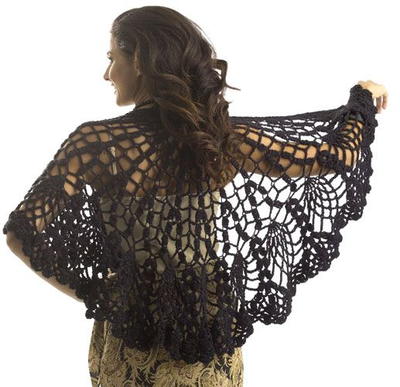
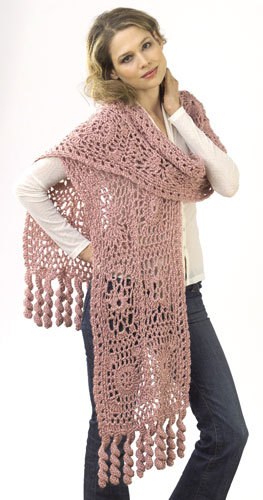
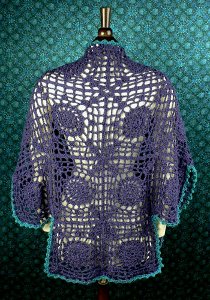
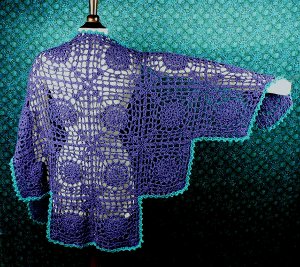
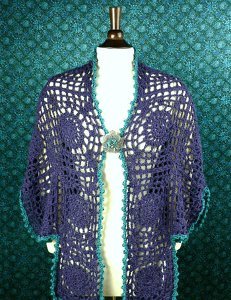
Breezy Shawl
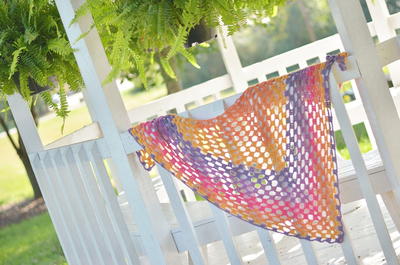
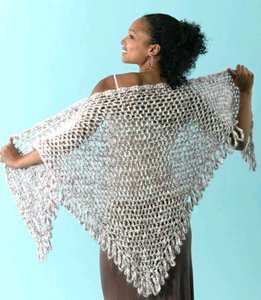
Use this pattern to make a crochet shawl that's breezy and cool in the warmer months. The breezy shawl is a fun way to add interest to an outfit.

Materials:
- One size US I-9 (5.5 mm) crochet hook, or size to obtain gauge.
- Yarn needle
- Naturally Caron.com Country (75% Microdenier Acrylic/25% Merino Wool): 12 oz (A), 2 oz (B), Shown in: #0014 Deep Purple (A); # 0013 Spruce (B).
- Pattern

Instructions:
FINISHED MEASUREMENTS:
Shawl measures approximately 61"/155 cm wide x 31"/78.5 cm long, including edging
GAUGE
Rounds 1–5 of square = 3 1/2 x 3 1/2"/9 x 9 cm; 1 square = 8 x 8"/20.5 x 20.5 cm.
STITCHES USED
Chain (ch), double crochet (dc), single crochet (sc), slip stitch (slip st), treble crochet (tr)
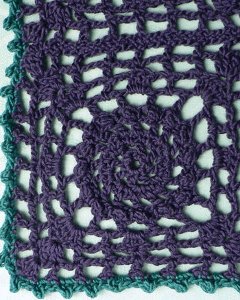
SQUARE (make 20)
- With A, chain 4; join with slip st in first ch to form a ring.
- Round 1 (RS): Ch 1, work 8 sc in ring; join with slip st in first sc, turn—8 sc.
- Round 2: Ch 4 (counts as dc, ch 1), *dc in next sc, ch 1; repeat from * around; join with slip st in 3rd ch of beginning ch, turn—8 dc and 8 ch-1 sps.
- Round 3: Ch 1, sc in same st as join, ch 1, sc in next ch-1 sp, ch 1, *sc in next dc, ch 1, sc in next ch-1 sp, ch 1; rep from * around; join with slip st in first sc, turn—16 sc and 16 ch-1 sps.
- Round 4: Slip st into first ch-1 sp, ch 5 (counts as dc, ch 2), *dc in next ch-1 sp, ch 2; repeat from * around; join with slip st in 3rd ch of beginning ch, turn—16 dc and 16 ch-2 sps.
- Round 5: Ch 4 (counts as tr), slip st in same st as join, ch 1, *(tr, slip st) in next dc, ch 1; repeat from * around; join with slip st in top of beginning ch, turn—16 tr, 16 slip sts, and 16 ch-1 sps.
- Round 6: Ch 6 (counts as dc, ch 3), *dc in next tr, ch 3; repeat from * around; join with slip st in 3rd ch of beginning ch, turn—16 dc, and 16 ch-3 sps.
- Round 7: Ch 3 (counts as dc), (dc, tr, 2 dc) in first ch-3 sp (corner made), ch 3, dc in next ch-3 sp, ch 2, 3 dc in next ch-3 sp, ch 2, dc in next ch-3 sp, ch 3, *(2 dc, tr, 2 dc) in next ch-3 sp (corner made), ch 3, dc in next ch-3 sp, ch 2, 3 dc in next ch-3 sp, ch 2, dc in next ch-3 sp, ch 3; repeat from * around; join with slip st in top of beginning ch, turn.
- Round 8: Ch 6 (counts as dc, ch 3), dc in next dc, ch 3, sk next dc, sc in next dc (center dc of 3-dc group), [ch 3, dc in next dc] twice, ch 2, sk next dc, (2 dc, tr, 2 dc) in next tr (corner made), ch 2, *sk next dc, dc in next dc, ch 3, dc in next dc, ch 3, sk next dc, sc in next dc, [ch 3, dc in next dc] twice, ch 2, sk next dc, (2 dc, tr, 2 dc) in next tr (corner made), ch 2; repeat from * around; join with slip st in 4th ch of beginning ch, turn.
- Round 9: Ch 6 (counts as dc, ch 3), dc in next dc, ch 2, sk next dc, (dc, tr, dc) in next tr (corner made), ch 2, sk next dc, [dc in next dc, ch 3] 3 times, dc in next sc, ch 3, *[dc in next dc, ch 3] twice, dc in next dc, ch 2, sk next dc, (dc, tr, dc) in next tr (corner made), ch 2, sk next dc, [dc in next dc, ch 3] 3 times, dc in next sc, ch 3; repeat from * around, dc in next dc, ch 3; join with slip st in 4th ch of beginning ch. Fasten off.
FINISHING
Arrange squares according to assembly diagram. Hold neighboring squares with RS together, and corner treble crochet stitches and side double crochet stitches aligned. Sew neighboring sides of squares together, beginning and ending at a corner treble stitch, and stitching through one loop of each stitch only. Note: The numbers on the assembly diagram provide a recommended order of assembly.
Edging
- With RS facing, join B with slip st in any dc before a ch-sp along edge of shawl.
- Round 1: Ch 1, sc in same st as join; work 2 sc in each ch-2 sp, 2 sc in each ch-3 sp, sc in each dc, 2 sc in each outer corner tr; at inner corners, sc in dc after ch-2 sp, sc in the corner, sc in next dc; join with slip st in first st, turn. Note: Ensure that you have a multiple of 3 sts worked in this round, work one or two more sc if needed.
- Round 2: Slip st in first 2 sc, (tr, slip st) in next sc, *slip st in next 2 sc, (tr, slip st) in next sc; rep from * around; join with slip st in first slip st.
- Using yarn needle, weave in all ends.
Read NextJustine Crochet Prayer Shawl Pattern
Your Recently Viewed Projects

Thanks for your comment. Don't forget to share!
Delphine Bryant
Oct 03, 2018
Shawls are a staple in any woman's wardrobe. It is always a good idea to add pieces like this to expand a wardrobe. Because this one is a really different design that makes it that much more special.
Morehouse17
Sep 29, 2018
OMG! What a creative shawl. These easy motifs work up 8 x 8 inches then joined in a simple arrangement to make this breeze shawl. This blue color is very attractive for the summer and spring months but would also be appropriate for the cooler months of fall and winter. Because of the unique design it would not be a bad idea to make two.
princess6860504
Sep 10, 2018
I know it says this is a perfect summer weather shawl, but I can totally see this being worn over a solid tunic and a pair of leather boots with leggings. Make it in a warm mocha and black trim (or vice-versa) or a deep red with black trim . Great for travel as you are only making individual squares of 9 rounds each.
Zeemer
Jun 20, 2018
This Breezy Shawl is the kind of shawl I like because you don't have to hold it with your hand all the time. However, this has a limited use because of the style. I don't find it appropriate for formal occasions. Some people might want to use it for casual wear.
smarrazo
May 27, 2016
I made this using Unforgetable in seaside (?) and assembled using Caron simply soft in cream. Came out glorious, just rather a pain in my chosen yarn, because it does not frog easily if you make a mistake.
CreativityGoddess
Apr 28, 2011
@kcbail 9249624 - There is a link that says "Pattern" listed under the Materials section. I believe this is what you are looking for. -The Editors of FaveCrafts.com
Report Inappropriate Comment
Are you sure you would like to report this comment? It will be flagged for our moderators to take action.
Thank you for taking the time to improve the content on our site.