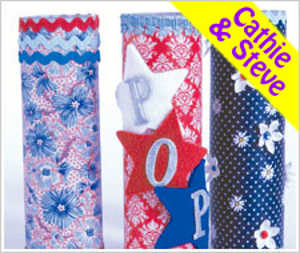
Velvet Luxurious Ornament
Using fabric, wire and tassels you can create this luxurious velvet ornament. It decorates your tree and it can be used as a wall decoration as well.

Materials:
- STYROFOAM* Brand Foam:
- Cone, 4" x 2-1/2"
- Disc, 4" x 1
- Bold foam stamp of choice, 2"- 4" diameter (Note: Detailed images do not work well.)
- Fabrics, 45" wide: rayon-acetate velvet, 1/6 yd.; silk or satin to match velvet, 1/3 yd.
- Metallic gold wire-edged ribbon, 1-1/2" x 2 yds.
- Metallic gold wired cord, 1/8" x 1/2 yd.
- Two metallic gold rayon tassels, 4" long
- 8" length cloth-covered floral wire,
- White paper, 8-1/2" x 11", one sheet
- Fine-line black permanent marker
- Ruler
- Scissors
- Straight pins
- Wire cutters
- Iron and hard ironing surface, such as countertop
- Awl or metal skewer
- Spray bottle filled with water
- Thick, white craft glue
Steps:
- For foam disc, cut two 6" squares from velvet.
- For foam cone, make pattern by placing cone on its side, with tip near center of paper. Use marker to draw line along 4" outside edge of cone. Keeping tip stationary, roll cone clockwise in a semi-circle, from approximately 10 o'clock to 2 o'clock, tracing path of large end of cone with marker. Draw line along opposite 4" edge of cone to finish pattern. Cut out pattern and pin to velvet. Cut out velvet, adding 1/4" allowance at tip and 1/2" allowance at each edge.
- To emboss velvet, place stamp design side up on ironing surface; place velvet right side down over stamp. Lightly mist wrong side of velvet with water. Without moving fabric, press with hot iron for 20-30 seconds, avoiding steam vents. If fabric sticks, adjust heat setting. Repeat embossing as desired.
- Trace disc onto wrong side of each velvet square. Cut out velvet, adding 1/2" allowance. Center and pin one velvet circle to disc. Clip allowance at 1/2" intervals; glue tabs to disc edge. Remove pins. Repeat for other side of disc. Let dry.
- Cut one 2-3/4" x 13" strip from silk fabric; fold in thirds lengthwise. Adjust folds as needed to ensure strip covers disc edge. Glue strip around disc, allowing 1/2" overlap; trim excess.
- Wrap velvet around cone to check fit. When properly positioned, glue one edge to side of cone. Let dry. Rewrap velvet around cone; glue overlap to cone. Clip and glue top and bottom allowances in same way as disc, trimming as needed. Trace cone base once onto wrong side of velvet; cut out on traced line and glue to base.
- Cut 1-3/4" x 8-1/2" strip from silk fabric, cutting on bias (diagonal grain). Make bias tape by folding long edges of strip to center; press edges, then fold strip in half lengthwise and press again. Glue bias tape around edge of cone base. Position cone so base is at top.
- Use awl to poke two holes in center edge of disc, one where fabric overlaps and second on opposite side. For cone, poke one hole in tip and one in center of base.
- Cut wired cord in half. For each hanger, fold one 9" cord length in half and knot ends together, 3/4" from end. Glue tails and knot into hole at top of ornament.
- Fold each tassel hanging loop in half and twist; spot glue to secure. Let dry. Glue hanging loop into hole at bottom of ornament.
- Use awl to poke second hole in top of each ornament, near hanger. Cut ribbon length in half. For each bow, fold one 36" length into two-loop bow with center knot and two 10" tails. Cut floral wire in half. Secure center of each bow with 4" wire length; trim ends to 3/4" long. Glue wire ends into hole near hanger.
®™ Trademark of The Dow Chemical Company ("Dow") or an affiliated company of Dow. For more project ideas, please see styrofoamstyle.com.