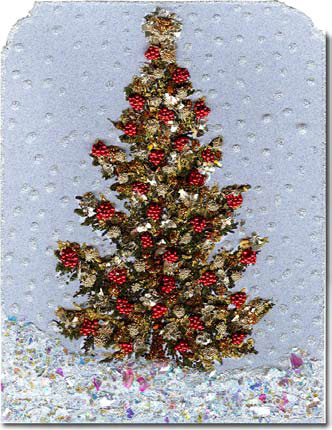
Lavish Christmas Tree Card or Decoration
This Christmas tree card or decoration from Art Glitter is both elegant and festive with beautiful gold and red accents. Make this for your own holiday decor or give it as a holiday gift for a lucky friend!
Materials:
- Art Glitter Elements Earth Textures: #17 Walnuts, #14 Spinach
- Art Glitter Elements Earth Textures Adhesive w/ Metal Tip attached
- Art Glitter Large Red Glass Beads: #800 Vermilion
- Art Glitter Small Silver Glass Beads: #808 Sterling
- Art Glitter Shards Vintage Glass Glitter: #900 Silvery Moon
- Art Glitter Ultrafine Opaque Glitter: #291 Fire Engine, #84 Shiney Si
- #65 Old Gold
- Art Glitter Ultrafine Pearlescent Glitter: #189 Pearl
- Faux Snow
- Folded 8 1/2" x 5 1/2” Periwinkle Cardstock or pearly blue Mat Board
- Christmas Tree Stamp (by Barbara Trombley)
- Ink Pad: Black
- Decorative Corner Punch
Steps:
- Ink tree stamp and stamp image to center front of card. Hold in place with light pressure for about a minute to create a darker, even image. Using decorative corner punch or scissors, cut top edges of card off.
- With adhesive draw a sketchy tree trunk that is not a solid line, cover with “Walnuts”. Also add some branches in same manner.
- Use “Spinach” to fill in the tree image. Let parts of tree trunk show and cross over other parts with sweeping branches. Dry five minutes.
- The tree is going to look full of elaborate decoration. Put beads or glitter on glue while adhesive is wet, white and shiny.
- Working with one embellishment at a time, add some glue dots for “Vermilion” red beads. Make dots of adhesive that are a little larger than an 1/8”. Immediately dust red bead dots with “Fire Engine” glitter to richen the color. Continue adding red beads to rest of the tree.
- Put a 1/4” circle of adhesive for the tree topper, fill it in and cover with “Silvery Moon” Glass Shards, immediately dust with “Shiney Si” glitter. Let this dry while completing the rest of the card.
- Now, add silver beads to the tree in the same manner as the red beads but with smaller dots. Dusting with ultrafine glitter is unnecessary with the micro beads. Next, apply the Glass Shards dots and immediately dust with “Shiney Si” glitter. Let this dry while completing the rest of the card. Finally, put “Old Gold” dots on the tree in between everything else for gaudy grandeur. Add one “Old Gold” dot in the middle of the tree topper.
- At the bottom of the tree, draw a rolling snow line from the left of the card to the right. Fill in area below snow line with adhesive.
- Sprinkle on “Faux Snow”, tap off excess and dust with “Pearl” glitter. You may want to add more glue and “Pearl” glitter on top of the “Faux Snow” to deepen the snow.
Click here for more information about Art Institute Glitter, Inc.
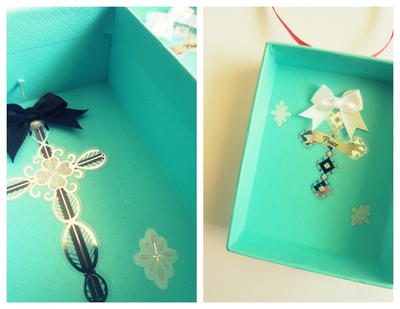
Read NextChristmas Cross Box Ornaments