How to Make a Paper Doily Angel
Add a vintage touch to the holidays with angels made from paper doilies.

Angel crafts are a sure sign that Christmas is around the corner. Learn how to make a paper doily angel from Heidi Borchers that you can display anywhere! Simple angel crafts are a fun and easy way to decorate your table or desk during the holidays. You can even stick one on a gift before you put it under the tree!
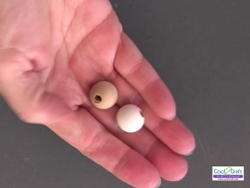
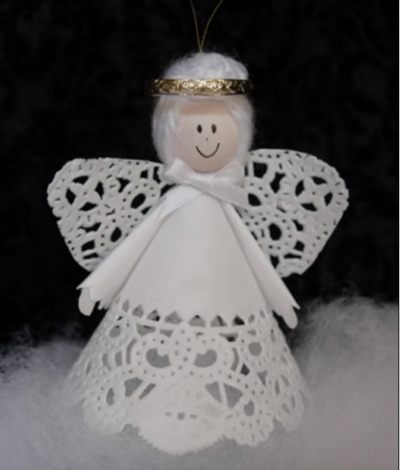
Head to your favorite craft store and pick up some cheap paper doilies. All you need is one for this project, but you'll want to have a few extras on hand so you can make a bunch more angels! For the head all you'll need is one wooden bead and dome scrap yarn. Does it get much easier than that?
Estimated CostUnder $10
Time to CompleteUnder an hour

Paper Doily Angel Craft Video Tutorial
Instructions:
-
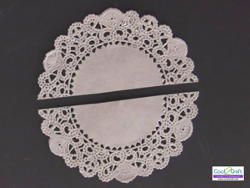
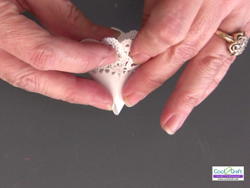
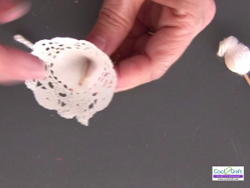
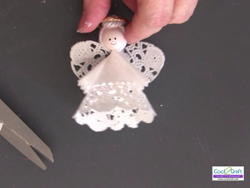
Cut one doily in half.
-
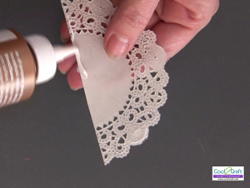
Apply glue along edge of one half of doily (wrong side).
-
Overlap to create angel’s dress. Press along glue line for a few moments until glue sticks.
-
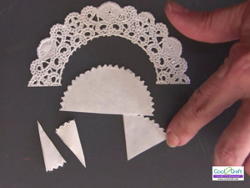
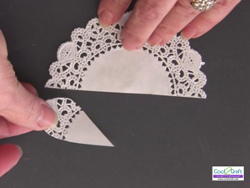
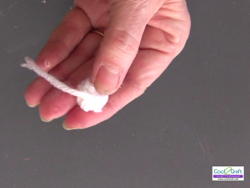
To create arms, cut edge from other half of doily. Cut center in half. Apply glue along one edge and fold to create arms.
-
To create wings, cut another doily in half. Cut two wings using doily pattern as guide for cutting line.
-
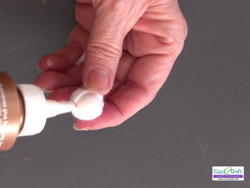
Apply paint to wooden bead. Let dry.
-
Thread yarn onto needle. Pass needle through bead center leaving approximately 5″ tail. Loop needle around and around through bead center until approximately 1/2 of bead is covered with yarn. Cut off end of yarn (keeping original 5″ tail intact.)
-
Apply glue on top of head around 5″ yarn tail.
-
Twist yarn around top and into glue to create hair bun. Trim off excess yarn and glue end in place under hair bun.
-
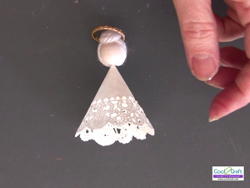
Dip end of toothpick into glue and insert into neck end of bead. Insert toothpick into top of dress. Apply glue inside dress to hold toothpick in place.
-
To attach halo, slightly split ring and insert one side of ring into one loop of yarn on back of head. Close ring and apply glue at split then slide ring around and tuck the split under the yarn. Adjust ring on front of head.
-
Draw facial features with pen.

Read NextHow to Make a Paper Doily Angel
Your Recently Viewed Projects


Thanks for your comment. Don't forget to share!
flowergirl
Aug 23, 2017
I know it isnt halloween yet but I'm in aa christmas mood already. I enjoy a great tutorial that's well put together with picture aids or videos and this craft is one of them.
Report Inappropriate Comment
Are you sure you would like to report this comment? It will be flagged for our moderators to take action.
Thank you for taking the time to improve the content on our site.