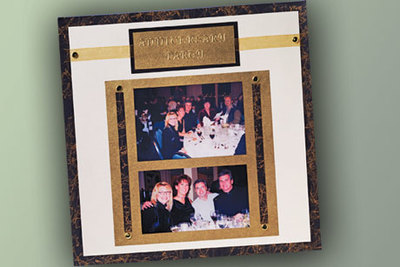
Celebration Embossing Card
This celebration embossing board card is ideal for what else but a celebration! It features one of your own photos on the cover, which makes it great for weddings and anniversary celebrations. Create this elaborate card in just five steps!
Materials:
- Celebration Embossing Board
- Metallic Card
- Top Score Scoreboard (& Scorer)
- 6mm Embossing Tool
- 1 Sheet Of Letter Size Card (Main Body Of Card)
- Cameo Shaped Picture
- Several Pieces Of Scrap Card & Design Paper
- Drier Cloth Or Candle
- Low Tack Tape
- Adhesive
- Foam Pads
- Scissors
Step 1
Score and fold the main cardstock in half using the Top-score board and put to one side for later. Take a smaller piece of gold pearlescent cardstock lay this face-down over the oval frame design as shown, and hold it in place with some low tack
tape. Rub the drier sheet or candle on the reverse side. Begin with the tool at the top of the design in the centre and follow the
leading channel into the design.
Step 2
Slowly pull the tool towards you until you feel some resistance. This usually occurs when either the design changes direction
or the pattern changes. Firmly push the tool into the channel and follow the design until you have completed the outer and the inner frame of the oval. Then emboss the centre part of the design in between the 2 ovals and when you have completed the design, peel the tape away and cut around the finished embossed design.
Step 3
Take another piece of metallic gold cardstock and again place this face down over the same design. This time emboss
just the centre pattern. Cut out around the outside of the embossing. This will form a layer of decoupage onto the base layer. you can continue in this way adding as many layers as you like to create a different effect. Here we have just chosen to use
the 2 layers for a simple and elegant feel.
Step 4
Take a photograph and lay this down over the centre of the board and emboss around the inner oval. Lift this up and
cut it out just outside the embossed line. This will then form the centrepiece of your layered embossed cameo. If you have any pretty lace or borders stickers they would look pretty around the edge of the finished frame, or use glitter glue to add more
dimension and sparkle.
Step 5
Take a piece of the designer paper and lay onto the main cardstock at an angle so that from the top left corner of the card down to the bottom right corner of the card then stick into place. Place the Oval frame onto the centre of the card and stick into place using foam pads again then add a ribbon border and bow down the side of the card and a sentiment to finish.
Your Recently Viewed Projects
Thanks for your comment. Don't forget to share!
angelskandi
Jun 02, 2011
I would love to see a picture of this project. I am a very visual person .
Report Inappropriate Comment
Are you sure you would like to report this comment? It will be flagged for our moderators to take action.
Thank you for taking the time to improve the content on our site.