Floral Brooches with Craft Porcelain Clay
Use porcelain clay to create delicate floral brooches with an antique look.
By Linda Peterson for AMACO

Materials:
- AMACO® Craft Porcelain Clay
- Paintbrush
- Water Color Pencils in Colors of Choice (Rose, Light and Dark Green, Purple, Blue, Yellow)
- Pin Back
- Jewelry Glue
- AMACO® Clay Shaper
- AMACO® Needle Tool
- AMACO® PolyBlade
- AMACO® PolyRoller
Helpful hints when working with Craft Porcelain clay:
Keep a moist towel nearby and wrap the extra clay inside to keep it from drying out.
Dip your fingers in a glass of water to moisten the clay if it dries to the touch. Slightly moisten the areas to be joined. This allows a better bond. Do not bake, this tends to bring air bubbles to the surface and gives an undesirable effect.
Steps:
- ROSE BROOCH: Roll the clay to the size of a 1" ball. Flatten to 1/8" and cut out pattern for brooch base.
- Rose: Rose bud: Roll ball the size of a pea. Flatten between fingers and stretch into a rectangle. Pinch one edge until thin and ruffled. Roll the clay from left to right forming a rose bud.
- Petals: Flatten three pea size balls between fingers and pinch edges to ruffle. Wrap these petals around the rosebud in a clockwise fashion. Repeat until the rose is as big as desired, about four petals. Repeat these steps using balls of various sizes to create various size roses. Moisten the base slightly with water from fingertips. Roll a log about 3" long. Curl at both ends and apply to the upper left of brooch. Apply roses in pattern as desired. Allow to dry approximately 2 hours. Shape leaves from flatten balls shaped into teardrops. Draw in veins from needle tool. Apply to brooch.
- Color Wash. Dip brush in water and blot slightly. Rub brush over desired rose color to pick up color on brush. Paint on color to roses. Repeat this process if a deeper richer color is desired. Paint the leaves in the same fashion using green. Add colors of purple, blue and yellow to create a background.
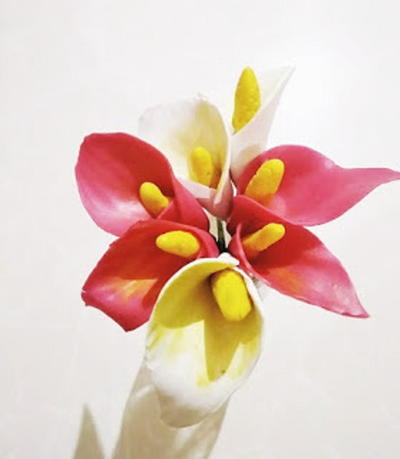
- DOGWOOD BROOCH: Flatten four pea size balls and shape into teardrops. Pinch edges of teardrop to give shape. Press in center of rounded end. Place all four petals points together. Add tiny balls to center to fill. Shape leaves from teardrop shaped balls. Apply to brooch base. Add logs for embellishment as desired. Allow to dry for 2 hours, then apply color wash as above.
- HIBISCUS BROOCH: Cut out brooch base in desired shape. Follow the directions for the dogwood except using five petals. Arrange as shown. Add a small log sticking out of center. Add leaves as desired. Apply flower to brooch and add embellishments as desired. Allow to dry 2 hours. Apply color wash if desired. Allow all projects to dry thoroughly before applying pin back.
- Stringing. Place a crimp bead onto beading wire. Thread beading ewire through hole on toggle and back through crimp bead. Pull tight and crimp.
Strand #1: 3 chocolate, 2 tube, repeat. Finish with crimp bead stringing through opposite toggle.
Strand #2: Attach beading wire as above using the same toggle. Beading order: 2 chocolate, 1 tube, 1 caramel bulls-eye, 1 sahara bullseye, 1 caramel bulls-eyes, 1 tube, repeat.
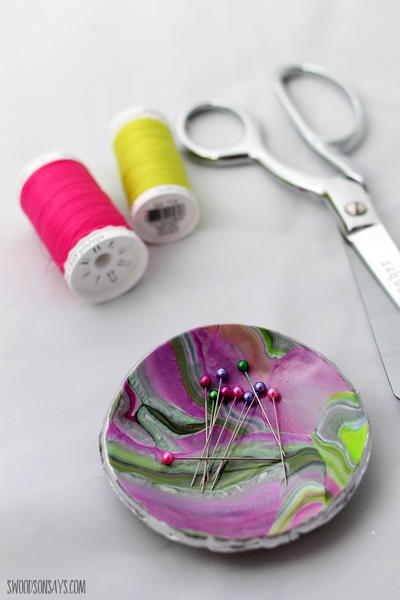
Read Next6 Polymer Clay Jewelry Tutorials
Your Recently Viewed Projects

Thanks for your comment. Don't forget to share!
mulberrygalprinces s
Dec 15, 2016
What gorgeous pieces. I have only worked with polymer clay that you bake so this is new, challenging and exiting. I can't want to get started. The flowers remind me of the ones that were on tiny vases that my mom collected in the 40's. They were made in occupied Japan. Very old and very delicate.
dixie dweller
Apr 24, 2011
Lovely project! Can't wait to try it! Seems very adaptable to different items, such as hair accessories, rings, bracelets, necklaces, etc. And you could use your newly-learned flower-making skills to create flowers to apply with adhesive to just about anything--like frames, lamps, even furniture!
Brierwood
Apr 06, 2010
I did not understand the 7 instructions? I thought this was for brooches not necklaces.
Report Inappropriate Comment
Are you sure you would like to report this comment? It will be flagged for our moderators to take action.
Thank you for taking the time to improve the content on our site.