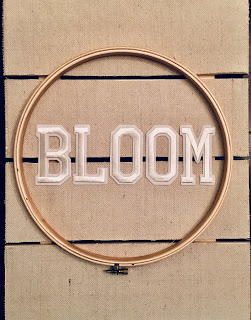
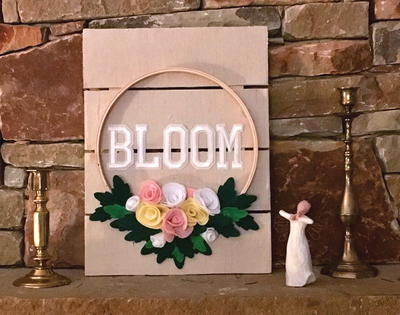
Bloom Embroidery Hoop Art

Use one of the world's favorite craft mediums to create beautiful blooms to decorate your wall! This embroidery hoop art is just too darling to pass up. Use die cut felt shapes to create sweet flowers to decorate your plaque. It's so easy to position the flowers in an arrangement you find pleasing to the eye. And felt is such a wonderfully easy material to work with, all you need to do is glue the flowers in place! Choose a sentiment you love to fill the center of the embroidery hoop. This is a wonderful project for spring, and you can display it year round as a cheery reminder to grow!
Notes: As this project is customizable, choose a plaque to suit your particular needs and an embroidery hoop large enough to fit on top as shown. Embroidered letters are also available in different sizes.
Estimated Cost$11-$20
Time to CompleteIn an evening
Main MaterialFelt

SeasonSpring
Project TypeMake a Project
Materials List
- Kunin® Classic Felt, 9” x 12” – Baby Pink, Lemon Frost, White and Apple Green
- Kunin® Premium Felt, 9” x 12” – Kelly Green
- Cricut® Maker™ with Rotary blade
- Joy® Iron-on Embroidered letters – O x 2, B L M
- Mod Podge® Ultra Spray - Matte
- Zots® clear adhesive dots - singles
- 12” x 16” Wood plaque*
- 10” Embroidery Hoop*
- Tacky glue & lo-temp glue gun
- Canvas cloth (drop cloth)
- Leaf pattern
Instructions for Bloom Embroidery Hoop Art:
-
Cut 4 pieces of canvas cloth to cover each section of the wood plaque. Then, following manufacturer’s directions, spray the wood liberally with Mod Podge Ultra. Press the cloth on top then set aside to dry. Rinse the spray nozzle when finished to avoid clogging.
-
Glue the hoop in place on top of the covered plaque with lo-temp glue. Peel the backing from the embroidered letters to reveal the adhesive, then press firmly in place as shown. TIP: Always start by placing the middle letter first, then adding letters to the left and right for even spacing.
-
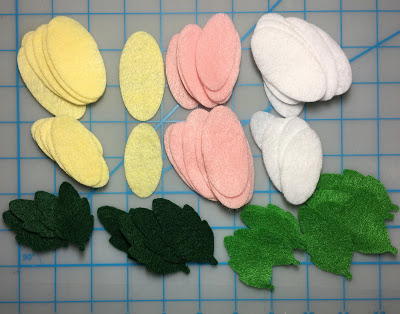
Using the “felt acrylic” setting and rotary blade on your Cricut® Maker, cut 7, 2” x 1” oval felt shapes for each medium rose and 7, 2 ½” x 1 ¼” ovals for a larger rose. Cut 16, or more 2” and 2 ½” leaves from 2 shades of green using the pattern below.
-
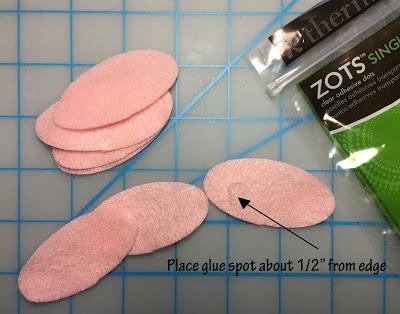
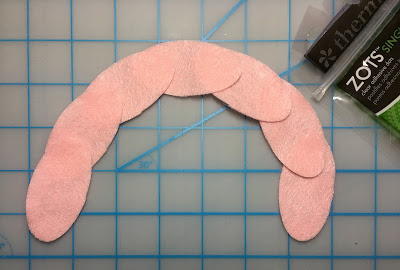
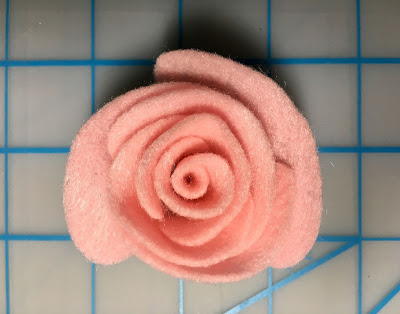
Using adhesive dots, attach 7 ovals together in a slight curve. Press the felt firmly onto the adhesive dots.
-
Starting at one end, tightly roll the linked shapes together to form the rose. To prevent unrolling, squeeze shapes together at the base then secure by spreading lo-temp glue across the bottom. Create rose buds by tightly rolling 3-4 shapes together.
-
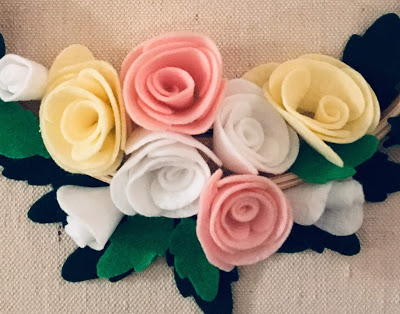
Position roses, rose buds, and leaves on the plaque at the base of the hoop, then glue in place.