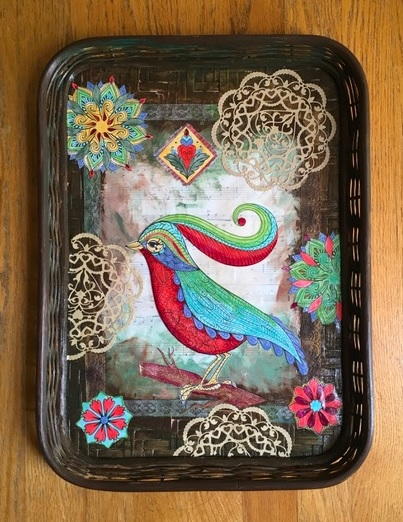
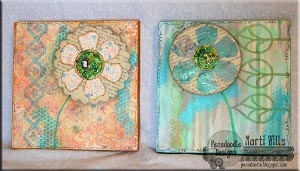
Mixed Media Flower Collage
Collage craft ideas can help you train a plain canvas into a work of art. Incorporate spring images into your Mixed Media Flower Collage and turn your home into a garden. This isn't your average floral craft, but the colors and design make it entirely unique. Use PLUS America products to create this pretty project.
Materials:
- PLUS America Decoration Roller and Deco Roller Mini
- Wood base
- Patterned scrapbook paper
- Sand paper
- Acrylic paint - two pale colors and white or cream
- Natural Sponges
- Luminarte Silks acrylic glaze
- Old book page
- Sequin Waste
- Sponge dabber
- Gel Medium
- Luminarte Primary Elements Artist Pigment Powder
- Plastic craft knife
- Small button and seed beads
- Metal dies or hand drawn patterns for flower layers
- Additional stamps (optional)
- Mod Podge
- Black marker pen
Instructions:
-
Begin by applying a thin layer of Mod Podge over the wood base and flatten your patterned paper over it making sure it’s smooth - let it dry completely. Sand the edges to remove the excess paper around the edges of the base.
-
Begin applying acrylic paint across the surface using the natural sponge - moistened but not dripping. You can also apply the paint randomly using your fingers. Go for as much or as little coverage as you want. Use the white or cream to soften it or lighten it up. Continue layering paint until you are pleased with the look.
-
Cut out your flower layers - two layers for the flower and a round center large enough to accommodate your button and beads. Use this to help you determine where you will place your next layers but do not glue it down yet.
-
Lay your sequin waste on your piece and sponge on Luminarte Silks using the sponge dabber - be random and don’t completely cover the piece. Smooth more Luminarte onto the sides of your wood - I use my finger!
-
Use a PLUS America Decoration Roller or Deco Roller Mini to stamp a border across one side of your project. To use the larger style simply press the large button on top. This will cause the cover to slide back and the stamp roller will pop out. The smaller roller just has a cover you pop off by hand.
Read NextHow to Reverse Collage