Stamp Carving Tutorial
Round up your stamp making materials for this fantastic craft. By following this Stamp Carving Tutorial from Melissa Langer, you'll expand your crafting horizons and become inspired.
Materials:
- Tracing paper
- Pencil
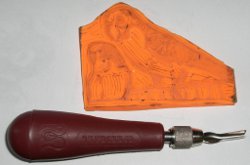
- Wood/lino cutter tool
- #2 and #3 V shaped cutter blades and an ink pad
Instructions:
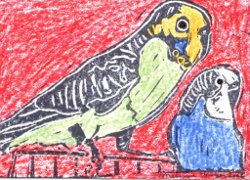
- Draw your design on your tracing paper with a pencil.
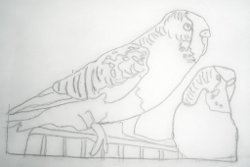
- Flip the tracing paper wrong side up onto the PZ CUT and trace your design lines over again with your pencil to transfer your design. Your drawing will look backwards on the PZ CUT. Don't worry, this is correct. Your stamp will produce your image the way you drew it when we are done.
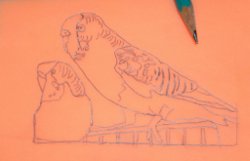
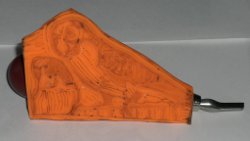
- Now you are ready to carve. You do not have to carve deep to make a line. It takes very little pressure to carve in PZ CUT. Carve out all of the areas that you want to be white (or not print). Leave alone all the lines and areas that you want to be black (or the color of the ink in the ink pad you choose).
- Press your stamp onto your ink pad and stamp on your favorite paper. Voila! You have created your own hand carved stamp that you can hand color with paint, colored pencils or even crayons.
Your Recently Viewed Projects
Thanks for your comment. Don't forget to share!
flowergirl
Jul 14, 2018
I've never thought of making my own stamps. I guess I a way this would save me alot of money buying stamps. Its very easy to follow this tutorial and make your own custom stamps for your projects. People love a custom touch to the things they buy and this is one way you'll achieve that.
Report Inappropriate Comment
Are you sure you would like to report this comment? It will be flagged for our moderators to take action.
Thank you for taking the time to improve the content on our site.