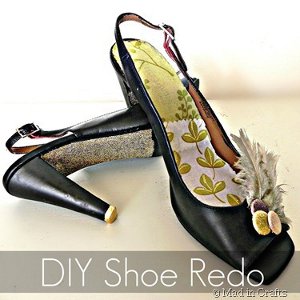
Walking on Glitter Shoes
Give an old pair of shoes a new life with this Walking on Glitter Shoes makeover from Jessica Hill. You can use up items you already have to help add some pizazz to your thrift store finds! DIY makeovers like this are fun to do with your best friends! Gather up all your supplies and swap with your girlfriends so you all can create awesome and stylish shoes!
Materials:
- Old pair of shoes
- Glittery brad embellishments
- Ferrero Rocher chocolates
- Loose glitter
- Assorted fabric swatches
- Assorted color craft feathers
- Chalkboard paint
- Mod Podge
Instructions:
- A few weeks back I was chosen through Blueprint Social to participate in a crafting mystery box challenge sponsored by Scribble Shop.
- The rules were simple. Scribble Shop would send me a box containing 8-10 random products that are sold on ScribbleShop.com. I was to create one project using as many of the materials in the box as possible. Stash materials were allowed as well.
- I received my mystery package in the mail and was so excited to see just what would be inside.
- The items that came in my Scribble Shop mystery box were: Glittery brad embellishments, Ferrero Rocher chocolates, Loose glitter, Assorted fabric swatches, Assorted color craft feathers, and Chalkboard paint.
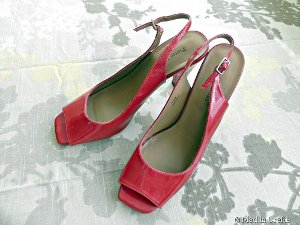
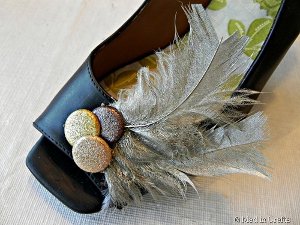
- I bought these red, patent leather, open-toed slingbacks at Goodwill for $1.50. They were in my size and in relatively good shape, so I thought they would be a good starting place for this challenge.
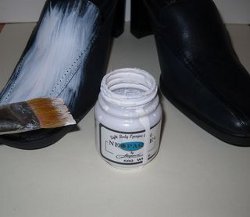
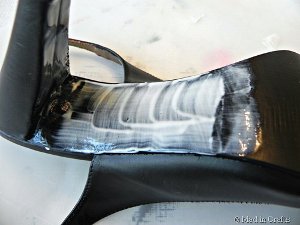
- I followed the directions on the bottle of paint, and set out to turn the red shoes black.
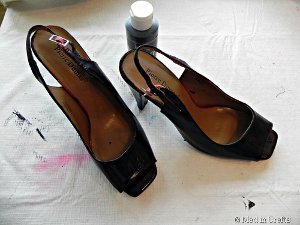
- This is what the shoes looked like after one coat of paint.

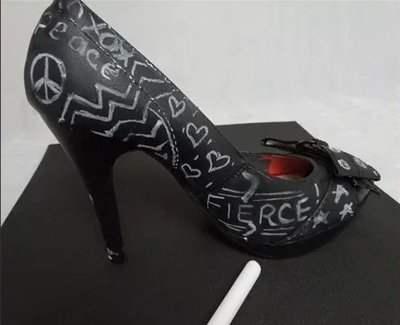
- You can see that after the second coat of paint, the shoes looked great. They have a matte black look to them and took the paint surprisingly well. I even bent the shoes around a bit, and the paint didn’t crack at all.
- Next, I attacked the bottoms of the shoes. I painted decoupage medium onto the soles and heels of the shoes wherever it would be visible when standing.
- I shook the loose glitter onto the decoupage and let it dry. Then I covered it in a coat of clear sealant.
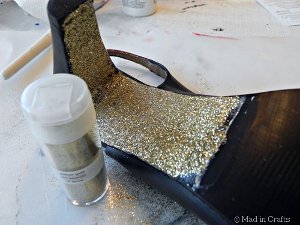
- After adding the sealant, I was able to run my fingers over the glitter without any of it coming off. And the sparkle is amazing!
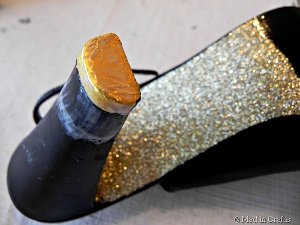
- I wasn’t sure whether the chocolates were meant just as a special treat or if I was actually supposed to use them in the project. To be on the safe side, I incorporated them into the shoe redo by decoupaging a bit of the gold foil wrapper onto the tip of the heels. It ended up looking really cool!
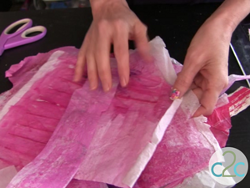
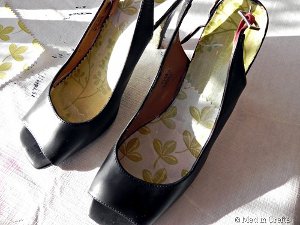
- I used the fabric swatches to reline the inside of the shoes. I just cut the material to size and glued it on with decoupage.
- To further “fancify” the shoes, I decided to add embellishments to the toe of each shoe. First I bent the prongs of the glitter brads back so they were flat.
- I spray painted four of the white feathers gold, cut them down to a manageable size, and hot glued them to the back of some of the glitter brads.
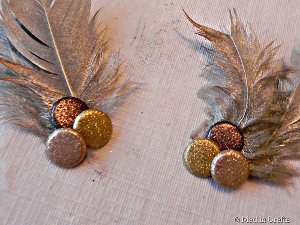
- Then I glued the embellishments to the toe of each shoe.
Read NextDenim and Lace Flip Flops